3D Printer Control For The Raspi

Instead of dedicating his laptop to control his RepRap all night, [Walter] is using a Raspberry Pi as an Internet-enabled front end for his 3D printer.

Before [Walter] got his hands on a Raspberry Pi, he set up his laptop next to his RepRap and let the machine do its work for hours on end. Obviously, this tied up his laptop for a while so when his Raspi was delivered he was eager to offload the responsibilities of controlling a printer to his new Linux board.

Right now, [Walter] has his Raspberry Pi set up as a web interface able to control his printer similar to Pronterface. We have to note that the Raspberry Pi isn’t driving servos or feeding filament onto the bed; those responsibilities are still handled by the RepRap electronics, but the ability to use a 3D printer over the web is still pretty cool.

[Walter] is putting the finishing touches on his 3D printer web interface, after which he’ll upload everything onto the git. Planned features for future updates include uploading gcode from the web and an option to connect a webcam for visual feedback when controlling a remote printer.

Video demo after the break.

Continue reading “3D Printer Control For The Raspi”

Eventorbot 3D Printer

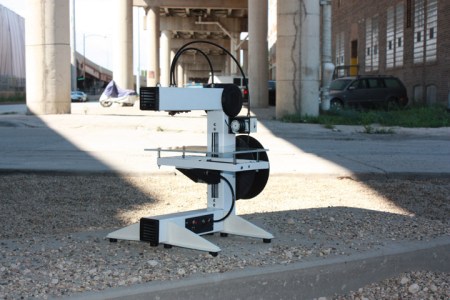
Tired of 3D printers that use t-slot construction? The Eventorbot is yet another open source 3D printer,  but it’s built out of steel and 3D printable parts. The design also aims to minimize the effect of vibrations by using a single solid frame. All of the wiring runs through the steel frame, which gives the printer a professional look.

The Eventorbot page on the RepRap wiki provides details on how to build your own, along with STL files for all the printable parts. If you want to see renders of the parts, they’re all available on Thingiverse. The material cost is $300-$500, and the assembled cost is quoted at $799.

Like many of the open source printers we’ve seen, this one uses the RepRap Mega Pololu Shield (RAMPS) to control the actuators. This is attached to a Sanguinololu motherboard, which runs the RepRap firmware.

The Eventorbot Youtube channel has a collection of videos detailing the assembly of the robot. Check out a video of a test print after the break.

Via Make

Continue reading “Eventorbot 3D Printer”

Learning The Ins And Outs Of USB With A Simple Dev Board

We can’t count the number of projects we’ve seen on Hackaday with a USB port.  Unfortunately, most of these builds – from RepRap controllers to wireless data loggers – don’t use the full capabilities offered to them with USB. [Ben] came up with a very cool USB breakout board that allows you to explore the USB protocol with just a single inexpensive ATtiny.

Instead of relying on an FTDI chip or otherwise sending serial data down a USB pipe, [Ben]’s project is meant to be the hardware compliment to his book on programming USB devices. His hardware board is exceedingly simple, just an ATtiny 2313, a USB port, and a handful of other components, but allows [Ben] to receive data on eight pins on a breadboard and send them over USB to a computer.

[Ben] had sent in his USB figure eight controller, a board that displays the numbers 0 through 9 according to what data is received via USB, a while ago. It’s a truly useless build aside from learning how USB works, but an excellent tool if you’d like to program your own USB device.

3D Printed Guns, Laws And Regulations, And Philosophical Discussions On The Nature Of Printed Objects

For as long as they’ve been banded about, 3D printers were regarded as the path to a new economy, a method of distributed manufacturing, and a revolution for the current consumer culture. With every revolution, a few people need to get angry and the guys at Defense Distributed are doing their part to make that happen. They’re designing a handgun able to be printed on a hobbyist-level 3D printer

This isn’t the first time we’ve seen a 3D printable weapon; this 3D printed AR-15 lower receiver is the only part of an AR-15 that contains the ID markings and serial number. Legally, the AR lower is the gun, and requires a background check to purchase (with the footnote that this varies from state to state and country to country – long story short, the BATFE probably isn’t happy about a 3D printed AR lower). The one drawback of a 3D printed AR-15 lower is that every other part of the gun must be purchased elsewhere. This is where Defense Distributed comes in: they propose designing a gun that is 100% printable on a hobbist-level 3D printer such as a RepRap or Makerbot.

Right now, Defense Distributed is looking for funding to produce two gun designs. The first design, WikiWep A will serve as a research build, allowing Defense Distributed to answer a few questions on what can be built with a RepRap. WikiWep B will have moving parts for the firing action and very nearly all the parts will be printable on a RepRap or Makerbot.

In the video Defense Distributed put up for their now cancelled IndieGoGo campaign (available after the break), the guys talk about the distribution of a CAD file of completely 3D printable weapon being a threshold of a new economy where laws and regulations cease to apply. We’re not sure we agree with that statement; after all, anyone with some metal forming tools can build an excellent weapon to acquire another weapon, but we’re interested in seeing what governments and regulators will make of Defense Distributed’s project.

Continue reading “3D Printed Guns, Laws And Regulations, And Philosophical Discussions On The Nature Of Printed Objects”

Rendering OpenSCAD In The Browser

If you haven’t heard of it, OpenSCAD is a really wonderful tool for 3D modeling.  While it doesn’t have the traditional graphical interface of AutoCAD – it’s basically a programming language for 3D models – OpenSCAD is able to create very complex parts with only a few lines of code.

That’s all well and good, but what if you wanted to edit OpenSCAD parts in your browser? Enter OpenJsCAD, an OpenSCAD interpreter written entirely in Javascript and able to be embedded in a web page.

OpenSCAD allows for two types of modeling – constructive solid geometry, or taking 3D primitives and stretching, scaling, and intersecting them to create a 3D shape, or extrusion from a 2D outline. Quite a few RepRap parts were designed in OpenSCAD, and the lightweight interface and open source nature means it’s perfect for designing stuff to print on your Makerbot.

Tip ‘o the hat to [Gordon] for sending this one in, and we really have to commend him for writing his own online scriptable CAD exporter before finding out about OpenJsCAD. He may be a little late to the online OpenSCAD party, but we have to agree with him that an online 3D solid editor would be an awesome feature for Thingiverse to roll out.

Toorcamp: Type A Machines

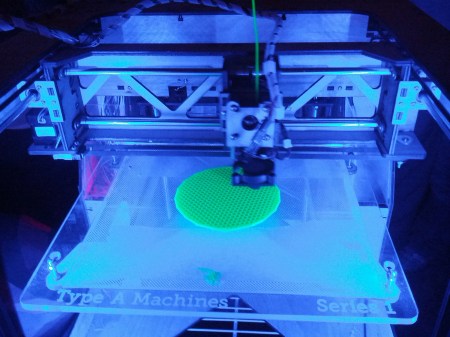
Type A Machines designs and builds 3D printers in San Francisco. [Miloh], one of the founders, brought two of their flagship Series 1 printers to Toorcamp. He printed out a variety of models including water tight cups and quadcopter arms.

The RepRap Arduino MEGA Pololu Shield (RAMPS) is used to drive the stepper motors for each axis, as well as the extruder. This is attached to an Arduino MEGA running the Marlin RepRap firmware. Type A Machines ships the printer with Polylactic Acid (PLA) filament, which is biodegradable.

On software side, you start with a 3D model in STL format. This can be exported from 3D software such as Google SketchUp or Autodesk 123D. You then need a slicer to generate G-code and machine control software to command the printer. [Miloh] used Slic3r and Repetier for his workflow, but he also pointed out a good summary of 3D printer workflows.

The Series 1 was launched at the Bay Area Maker Faire this past May. It has a print volume of 1200 mL, which is the largest print volume of any desktop printer around. The Series 1 brings another option into the low-cost 3D printer market.

TangiBot And The Perils Of Open Source Hardware

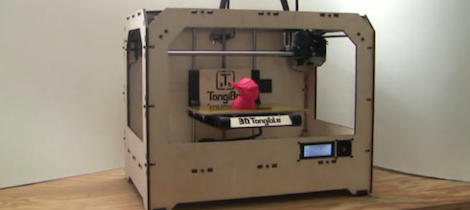
I’ve commented before on the terrible inefficiency and artificially high expense of the current crop of 3D printers. It simply doesn’t make sense to produce the plastic parts of 3D printer kits on a printer farm when there are literally thousands of Chinese injection molding companies that will make those parts cheaper. It looks like [Matt Strong] heeded my call and now has a Makerbot Replicator clone up on Kickstarter that costs $700 less than the official version. We assume the Makerbot lawyers are having a busy morning.

From the info on the Kickstarter page, [Matt] is used parts from his Makerbot Replicator to design a one-to-one copy. Every part and component on [Matt]’s TangiBot is 100% compatible – and seemingly 100% identical – with the Makerbot Replicator. Like the Replicator, [Matt] is offering a dual extruder version that allows you to print in two colors.

At the bottom of the Kickstarter page, under a section titled, “How is 3DTangible able to make a Replicator Clone?,” you’ll see [Matt]’s reasoning for cloning the MakerBot replicator. He says everything is open source, and, “MakerBot used other open source designs when designing and producing their 3D Printers.” We’ll agree that MakerBot used existing extruder designs (and improved upon them), but MakerBot was not this blatant in borrowing from the RepRap project.

For want of editorializing, I’ve complained about the stupid inefficiency of manufacturing 3D printers with 3D printers before. It was only a matter of time before someone realized current manufacturing techniques can be used to make 3D printers cheaper. [Matt] – dude – you were supposed to clone a RepRap. Makerbot has done some really incredible things for the community such as building Thingiverse and generally being an awesome cheerleader for the 3D printing community. Taking the flagship Makerbot printer and making it cheaper will not make [Matt] any friends on the Internet, but at least the laws of economics are coming to the world of 3D printers.

Thanks [Brad] for sending this in.