Ikea Provides A Great UV Exposure Box

Making your own boards at home is among the heights of achievement for home tinkerers, and one fraught with frustration. The toner transfer process requires carefully peeling away layers of photo paper, and milling your own circuit boards is an exercise in complexity. One of the best options is using photosensitive copper boards, but this requires exposing the masked-off copper to fairly intense UV light. A UV exposure box is a wonderful project, then, and something [Carlo] just about has wrapped up.

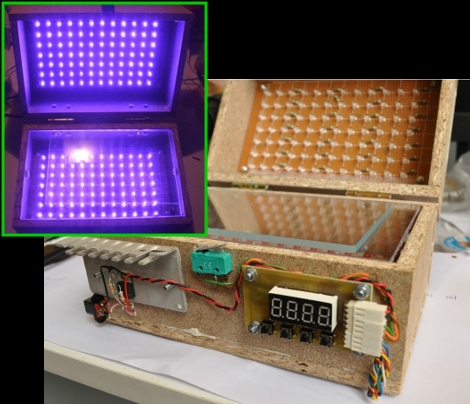
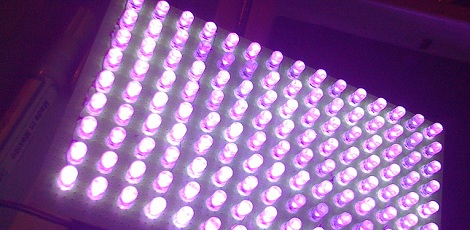
The first portion of [Carlo]’s build involved placing 135 UV LEDs on a piece of protoboard. This UV source eats up a surprising amount of power; [Carlo] is using 12V for the supply, so an old industrial power supply is more than capable of dishing out the 1.5 Amps required for the build.

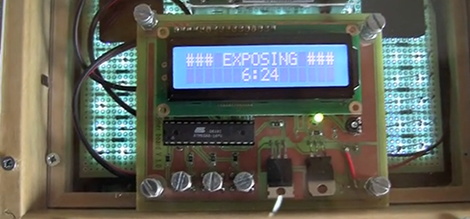
Next, [Carlo] needed a timer for his exposure box. He settled on a design based on an ATMega8 turning a high voltage transistor on and off with a character LCD for the user interface. A few buttons allow [Carlo] to set the countdown timer, after which the LEDs turn on for a set period of time.

All this was packaged into a small box [Carlo] picked up from Ikea. It’s a very useful build, and judging from the video after the break, extremely easy to use.

Continue reading “Ikea Provides A Great UV Exposure Box”

UV LEDs Expose PCBs, Gives You A Tan

Among the projects that define electronic design, a UV exposure box is right up at the top of the list. These boxes shine UV light on a work piece and are used for everything from exposing photosensitive PCBs to erasing EPROMs. [carlolog] decided to build his own and ended up with a fairly impressive array of ultraviolet LEDs perfect for making PCBs or tanning the back of your hand.

One important thing to remember when making large arrays of LEDs is current consumption and power needed to light the device up. [carlolog] naive assessment of how much power would be required used a 12 volt supply with 135 LEDs and 135 resistors, wasting a lot of energy and producing 24 Watts of heat.

Of course this power consumption can be reduced by putting a few LEDs in series, so [carlolog] wired 3 LEDs together with a 150Ω resistor. This array requires just over 11 Watts and consumes less than 1 Amp; perfect for a desktop UV box.

The enclosure for the box was crafted out of three Ikea photo frames, and a small timer circuit powered by an ATmega8 was added. Now whenever [carlolog] needs to wipe an EPROM, he can put the chip in the box, set the timer, and walk away.

A very nice build, but when dealing with a lot of UV we must remind our readers: do not look into the UV array with your remaining eye.

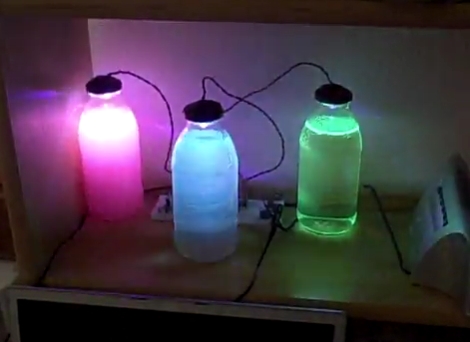
Slick Music Synchronized Light Show Uses UV LEDs And Water

music_synchronized_light_show

[mike6789k] wanted to spice up his dorm room, so he built a cool music synchronized light show that struck us as being very well thought out. We have seen similar music-based visualizations before, but they tend to be pretty basic, relying on volume more than actual audio frequencies to trigger the lighting.

[mike6789k] didn’t want to build “just another” synchronized light show, and his all-analog approach gives a true representation of the music being played instead of just flashing lights along with the beat. Using a trio of simple filters, he broke the audio signals down into three distinct frequency bands before being driven through a high gain transistor to power a set of LEDs.

We were pretty impressed at how bright the display was given that he is using UV LEDs, but the 1W diodes seem to have no problem lighting up the place when aimed through the UV-reactive water, as you can see in the video below.

If you’re looking to make something similar for your next party, the folks over at Buildlounge were able to wrangle a schematic out of [mike6789k], which you can find here.

Continue reading “Slick Music Synchronized Light Show Uses UV LEDs And Water”

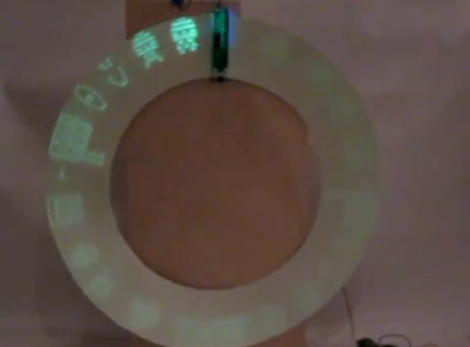
Spinning UV Light Writer

uv_light_writer_ring

[David] has always wanted use UV LEDs to write on a phosphorescent surface ever since saw an article about it on Make. He accidentally purchased UV LEDs when he meant to buy purple ones, so he figured that his mistake was all the reason he needed to give UV light writing a try.

He built a PIC16F628 UV POV board using the LEDs, and while manually swiping the writer across various glow in the dark surfaces was cool, he wanted to keep the POV board stationary, moving the writing medium instead. He bought some phosphorescent vinyl, but found that it wasn’t too flexible, meaning he could not use a conveyor belt approach for his display. One day it dawned on him that a vinyl ring might work pretty well, and using a motor from an old cassette player, he constructed the UV writer you see above.

It seems to work pretty well despite a small flaw in the UV ring, and while [David] is happy with the results, he already has plenty of ideas in mind for the second revision.

Check out the video of his UV light ring in action after the jump.

[Thanks, Riley]

Continue reading “Spinning UV Light Writer”

Art Installation Lets You Be Your Own Souvenir

3d_souvenir_printer

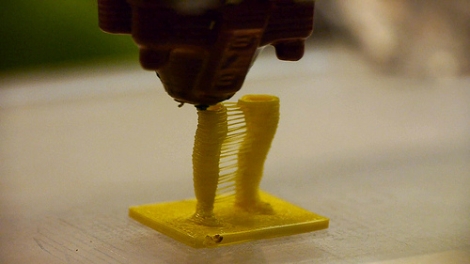
The team at [blablabLAB] have been hard at work on their latest project, which they unleashed on the streets of Barcelona in the La Rambla pedestrian mall. Their art installation allows you to pose in the middle of the mall and receive a plastic statue of yourself as a souvenir.

Not unlike the “Fabricate Yourself” installation we saw a short time ago, this project also uses the Kinect to create a 3D representation of the subject, though it uses three separate sensors rather than just one. Each sensor is positioned around a centralized platform, creating a complete 3D model, which is then sent to a RapMan 3D printer stationed nearby.

Each user is then gifted a plastic representation of themselves to take home – it’s almost like an interactive human Mold-A-Rama. While the figures are neat, it would be great to see what sorts of plastic statues could be made using a higher resolution 3D printer like the one we featured a week ago.

Check out the video below to see the souvenir printer in action.

Continue reading “Art Installation Lets You Be Your Own Souvenir”

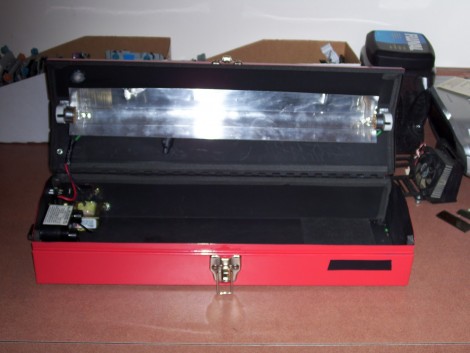
UV EPROM Eraser In A Toolbox

[Devon Croy] belongs to a hackerspace that works hard to keep hardware from going to the landfill. He found they were in possession of over a hundred Erasable Programmable Read Only Memory chips (EPROM). Not to be confused with EEPROM, which are electronically erasable, these EPROM chips require a strong source of UV light to blank the old data before they can be written again.

Instead of buying a tool to erase two or three chips at a time he built his own bulk EPROM eraser from an old metal toolbox. He used parts from a fluorescent black light and acquired a new bulb that generates light in the UVC spectrum, the band which works as an eraser for the chips. After bolting the parts into the case he added a spring-loaded timer knob and a safety switch that kills the power when the case is opened, similar to the UV exposure box we looked at yesterday.

Of course, if you don’t need a bulk eraser you could shop some garage sales for a UV pacifier cleaner which can also erase EPROM chips.

Building A UV Exposure Box

There are two methods of using etchant resist when making circuit boards. We use the toner transfer method that requires ironing on laser toner to the copper, but you can also use chemical resist that reacts to ultraviolet light. [Bogdan] decided to start doing more of the latter so he built a UV exposure box to make the process easier.

It is possible to use flourescent light bulbs for this, but he decided to use UV LEDs, a method we’ve also seen before. But there’s always room to innovate, and [Bogdan] built-in a couple of nice features that are new to us. Because the UV light can be bad for your eyes, he included a set of red visible-light LEDs on the bottom half of the box that are used to align two layers of exposure mask when making double-sided boards. There’s also a switch that automatically shuts off the UV light when the box is opened. And as the coup-de-grace, he added a programmable timer to regulate the exposure, using his newly created box when etching the PCB for it.