Many of the Fail Of The Week stories we feature here are pretty minor in the grand scheme of things. At worse, gears are ground, bits are broken, or the Magic Blue Smoke is released. This attempt to smooth a 3D print released far more than a puff of blue smoke, and was nearly a disaster of insurance adjuster or medical examiner proportions.
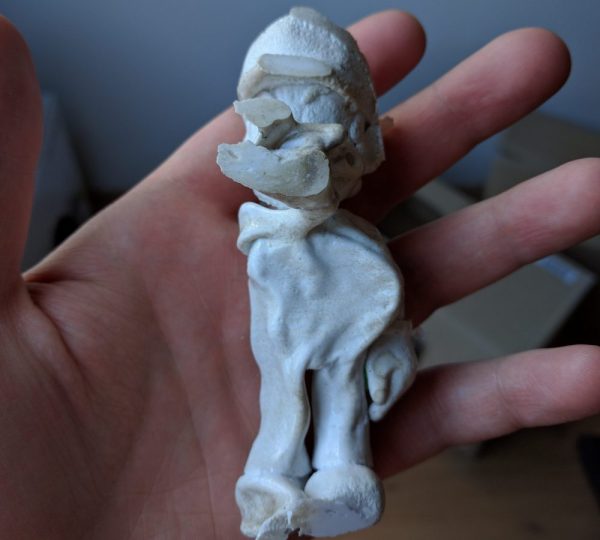
Luckily, [Maxloader] and his wife escaped serious injury, and their house came out mostly unscathed. The misadventure started with a 3D printed Mario statue. [Maxloader] had read acetone vapor can smooth a 3D print, and that warming the acetone speeds the process. Fortunately, his wife saw the looming danger and wisely suggested keeping a fire blanket handy, because [Max] decided to speed the process even more by putting a lid on the pot. It’s not clear exactly what happened in the pot – did the trapped acetone vapors burp the lid off and find a path to the cooktop burner? Whatever it was, the results were pretty spectacular and were captured on a security camera. The action starts at 1:13 in the video below. The fire blanket came in handy, buying [Max] a few seconds to open the window and send the whole flaming mess outside. Crisis averted, except for nearly setting the yard on fire.
What are we to learn from [Maxloader]’s nearly epic fail? First, acetone and open flame do not mix. If you want to heat acetone, do it outside and use an electric heat source. Second, a fire extinguisher is standard household equipment. Every house needs at least one, and doubly so when there’s a 3D printer present. And third, it’s best to know your filaments – the dearly departed Mario print was in PLA, which is best smoothed with tetrahydrofuran, not acetone.
Anything else? Feel free to flame away in the comments.
Continue reading “Fail Of The Week: How NOT To Smooth A 3D Print” →