Customizing STLs For Off-Brand Devices

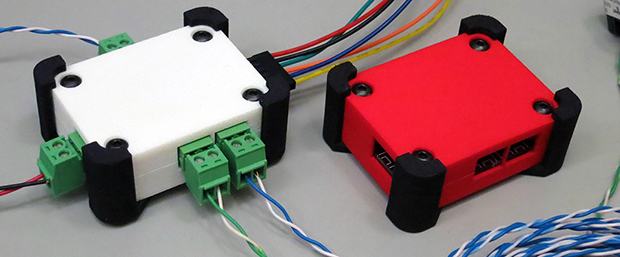
[Rob Clarke] needed a mount for his off-brand action camera, but it’s not exactly the kind of thing with a bustling accessory market. To make matters worse, it turns out the camera is so low-key that he couldn’t find a 3D printable mount for it either. Luckily, a check with his calipers confirmed his camera is just about the same size as an old GoPro Hero 3, so all he had to do was modify an existing design to fit his needs.

As anyone who’s worked with STL files will tell you, they are a pain to modify. An STL is essentially a completed solid model, and not really meant to be fiddled around with. It’s a bit like trying to take an edited image and get back to the layers that were used to create it in Photoshop or GIMP. The final output has been “flattened”, so that granular control is lost.

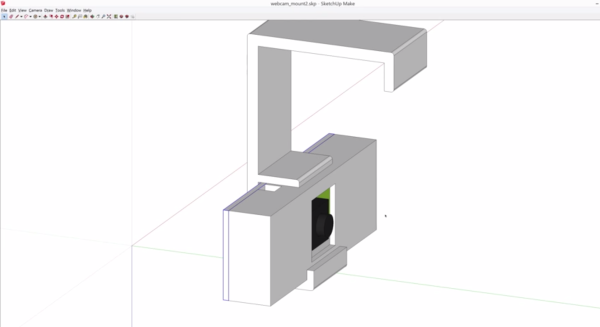
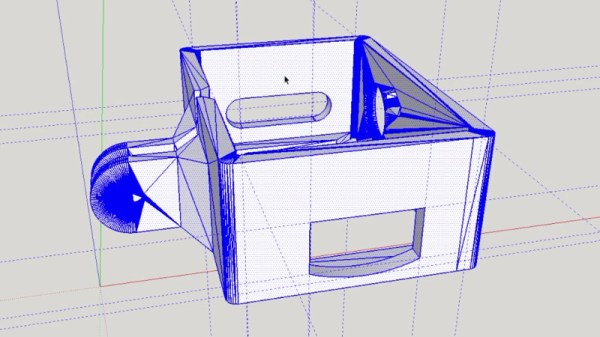
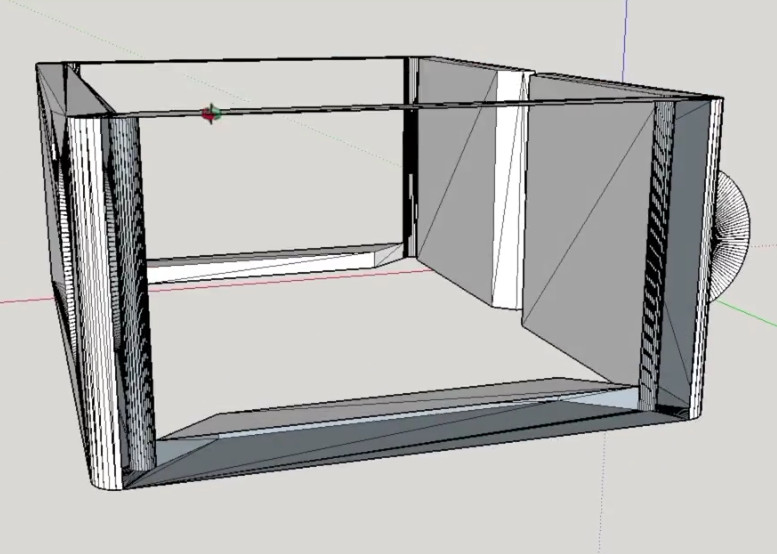
That being said, [Rob] got rather lucky in this case. He found a GoPro mount that was about 90% there, he just needed to adjust the depth and change the positioning of the holes on the side. He loaded the STL into SketchUp, deleted the two sides, and replaced them with new surfaces. This gave him a clean slate to add the appropriate openings for his camera’s USB port and microSD card. To adjust the depth of the mount, he simply stretched the model out on the Z axis.

[Rob] event went ahead and released his modified STLs as a remix of the original case he found on Thingiverse for anyone else that has the same camera. That’s what we love to see.

If you’re interested in learning more about using SketchUp for designing 3D printed parts, check out this excellent guide by our very own [Brian Benchoff].

Continue reading “Customizing STLs For Off-Brand Devices”

Animatronic Cosplay Wings

In recent years, Cosplay as a hobby has seen improvement in the props department by leaps and bounds. Thanks in part due to the rise of the Maker culture and the easy availability of design and manufacturing tools and processes. Case in point is this awesome set of Animatronic Wings that programmer [Nelson Stoldt] built for his daughter who wanted to be Nightmare Moon.

[Nelson] had no idea what he’d gotten himself in to when he answered “Sure, I can do that”. Making motorized cosplay wings that open up to 8 feet wide and close again at the flick of a switch without weighing a ton is not a trivial project. The final rig did end up tipping the scales at just over 9 kgs, but we guess that’s a load that Cosplayers are used to hauling around.

Using a nifty program called Linkage, he played around with a few different design approaches until he found a mechanism that worked well. If you ever want to build one of [Theo Jansen]’s Strandbeest, give this program a spin. Armed with this information, and a spreadsheet to help determine the exact length of each linkage element, he modelled the project in Sketchup. The wings are operated by a scissor mechanism that is driven by a motorized screw operated sliding carriage. Wing position is measured by a potentiometer coupled to one of the wing elements. Basically, he just built a huge, powerful servo.

Continue reading “Animatronic Cosplay Wings”

BTTF Alarm Clock

Back To The Future Alarm Clock Is As Real As It Gets

While real time-travel is obviously not happening anytime soon, with this Back to the Future themed alarm clock, you can go to the future in seven hour eight hour increments by going to sleep. Great Scott!

[CrossleyAcoustics] spent the past few months designing and building this movie-prop worthy alarm clock, and it certainly shows. After designing everything on breadboards, he had custom PCBs made, he modeled the whole thing in Sketchup (first time he’s used it!) and even tried his hand at the sheet metal fabrication after shops quoted him thousands for what he wanted.

The coolest part of the build is that [CrossleyAcoustics] had some detailed drawings that he had made himself… when he was 8 years old. Talk about a plan coming together!

Continue reading “Back To The Future Alarm Clock Is As Real As It Gets”

3d printed webcam mount

Repackaging A Webcam In A 3D Printed Enclosure

One of the beauties of having a 3D printer is the ability to print accessories for it to make it better. [Sky] had been using a Logitech C920 webcam to record some of his prints, but it wasn’t really designed to mount off a 3D printers frame. So he designed his own enclosure for it.

He started by taking the webcam apart, getting down to the bare PCB  level and taking some measurements. It turned out to be pretty compact! He modeled a rough outline of it in SketchUp, and then started designing his new enclosure around it. After a few failed prints — thanks to the 3D printer company that shall not be named — he put it altogether and did some test fits. It worked!

The new enclosure is designed to mount off the frame of his 3D printer, allowing for a wide angle view of the print bed. If you print something that makes use of the entire z-axis, you might run into some visibility issues, but [Sky] isn’t too worried about this.

For the full explanation and design, he gives a great walk through on all the details in the video below.

Continue reading “Repackaging A Webcam In A 3D Printed Enclosure”

First CNC Project Results In Coffee Table Of Catan

[Christian Finklea] was inspired by a glow in the dark table, and decided to try his hand at making his own… and it’s absolutely fantastic.

He designed the table using SketchUp Make, and overlaid the continents of our planet on a grid of hexagons — Though it looks like he left Antarctica out of the mix — poor Antarctica! Why hexagons you might ask? Well, his CNC machine isn’t that big, so he had to choose a smaller work piece size in order to make the table. Kind of gives off a Settlers of Catan vibe too…

Once he had all the intricate hexagons milled out, he began assembling the table. Lots of wood glue later the table started looking like a table. Now here’s the fun part — making it glow.

Using what looks like a kind of glow-in-the-dark epoxy, [Christian] filled in all of the country cutouts and waited for it to cure. Bit of sanding later, some more lacquer, and boom — he has an awesome coffee table.

Now if only he had stuck some LEDs in there too like one of these RGB coffee tables we’ve seen — Then you could also play Risk anytime!

Your Halloween Costume May Be Cool, But It’s Not Laser-Cut Cardboard Vintage Airplane Cool

While others are absorbed in baseball playoffs, [Aidan] has spent his recent Octobers planning incredible Halloween costumes for his son. We don’t know what he did last year, but there’s no way it’s better than this laser-cut cardboard airplane costume.

He had a few specs in mind and started with a model of a Grumman F4F-4 Wildcat from 3D Warehouse. Using SketchUp, he simplified the model and removed the landing gear and the propeller. [Aidan] created a simpler model on top of that, and set to work changing the proportions to make it adorable and toddler-sized.

To build around his son’s proportions, he inserted a 10-inch diameter scaled tube vertically into the model and squished down the fuselage in SketchUp. The plan was to have it laser-cut by Ponoko, which meant turning the design into flat pieces for them to cut. He ended up with 58 parts, many of them mirror images due to the symmetry of his design.

When the box from Ponoko arrived, [Aidan] was giddy. He was astonished at the quality of the pieces and found the plane very satisfying to build. But, he didn’t stop there. Using LayOut, he created a custom instrument cluster with reflections and shadows. The plane also has a Wii steering wheel, a motorized propeller, and of course, decals.

Designing And Printing A Custom Enclosure

enclosure

So you know how to design a circuit board, assemble the parts, and have a functional device at the end of a soldering session. Great, but if you want to use that device in the real world, you’re probably going to want an enclosure, and Tupperware hacked with an Exacto knife just won’t cut it. It’s actually not that hard to design a custom enclosure for you board, as [Glen] demonstrates with a custom 3D printed project box.

[Glen]’s board, a quad RS-422 transmitter with a PMOD connector, was designed in Eagle. There are a vast array of scripts and plugins for this kind of mechanical design work, including the EagleUP plugins that turn an Eagle PCB into a 3D object that can be imported into SketchUp.

Taking measurements from Eagle, [Glen] designed a small project box that fits the PCB. A few standoffs were added, and the board itself was imported into SketchUp. From there, all he needed to do was to subtract the outline of the connectors from the walls of then enclosure for a custom-fit case. Much better than Tupperware, and much easier than designing a laser cut enclosure.

Once the enclosure was complete, [Glen] exported the design as an STL, ready for 3D printing or in his case, sending off to Shapeways. Either way, the result is a custom enclosure with a perfect fit.