Bluetooth Communications For Android Devices Via Processing

[Oscar] shows us how to use a Processing sketch for Android to communicate with Bluetooth devices (translated). It turns out this is easier than you might think. Processing and Android are both closely related to Java, and you can just import the Android libraries that deal with Bluetooth within the Processing sketch. That makes it easy to enable the Bluetooth modem when the sketch is launched, and manages connecting with devices as well as sending and receiving data.

For this example [Oscar] is using an Arduino with a Bluetooth module as a test device. His sketch first shows what devices are available, then connects to the one you select from the list. The 11 lines of Arduino code transmit a value via the serial port, and listens back for a command to toggle the LED on pin 13. [Oscar] takes time in his tutorial to show us how each step of the Processing sketch is assembled, instead of only posting the finished code.

[Thanks Sara]

Voxel Shield Makes Driving LED Cubes Easy

voxel_shield_led_cube

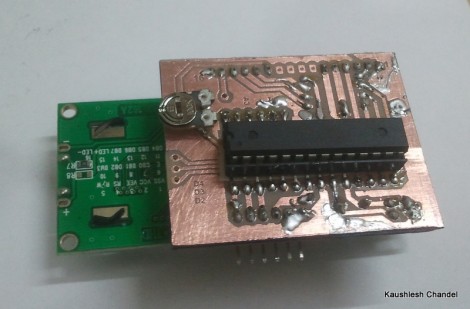
An Arduino can handle running a small LED cube on its own, but if you’re planning on building something big, eventually you are going to run out of pins. For something like an 8x8x8 cube, odds are you will have to turn to shift registers to get the job done. While you could design a breakout board full of shift registers on your own, [Connor] has done the work for you and produced an easy to use Arduino LED cube shield.

He calls his creation the Voxel Shield, and it incorporates 9 SN74LS595N shift registers and an external power plug for all of your LED cube needs. The shield can handle addressing up to 512 LEDs, making it an easy way to drive an 8x8x8 cube or even a 64×8 LED matrix.

It’s a nice clean and compact way to drive a large number of LEDs, so if you have the need, be sure to swing by his site – he has made his schematics and board layout files available to all comers.

[Thanks, Thomas]

Arduino Heart Rate Monitor

[Wolf] had a Polar brand exercise watch that wirelessly monitored a chest strap that sends it heart rate data. It sounds like there’s some way to transfer data from the watch to a computer, but it’s only meant for use with Polar’s website. He wanted to do a little more with the equipment so he ditched the watch and built an Arduino-based heart rate monitor.

He’s still using the chest strap and was happy to find that SparkFun sells an OEM receiver for it. Just add a 32.768 kHz clock crystal and an optional antenna wire and you’re up and running. Once the receiver finds a transmitting chest strap, it will pulse an output pin with each beat of the heart. [Wolf] used the D2 pin of an Arduino Uno to connect to the receiver because this pin corresponds to one of the ATmega’s external interrupts. A rolling average of five inputs are used to help smooth the display data, which is shown on the 2.8″ LCD screen seen above.

Automated Humane Pest Control

rat_trap_2000

[Tobie] seems to have a bit of a rat problem.

While most people would be inclined to simply buy the oversized Victor spring-loaded rat traps and call it a day, [Tobie] is a bit more humane. To help remedy his problem while also ensuring that no rats are harmed in the process, he built the Rat Trap 2000.

Self-described as completely over the top, the Rat Trap 2000 lures the rodents into its containment area with apples and corn, securing them inside using a servo-actuated trap door. The door is triggered by an Arduino that monitors the holding pen for movement using an IR sensor. All of the action is captured on video using the web cam on his Eee-PC, as you can see in the very short video below.

This certainly isn’t the most cost-efficient way to control your vermin problems, but if you’ve got some spare parts laying around, why not? It’s far more humane than some of the other rodent control solutions we have seen, and it sure beats living with rats!

Continue reading “Automated Humane Pest Control”

Retro-gaming Wall Art; It’s Playable!

Here’s a wall hanging for the reception area that let’s your customers play retro games while they wait. To give you some sense of scale, the buttons to the right (labeled Start/Jump but we would call them A and B) are arcade buttons larger than traditional arcade buttons. The screen itself is a Samsung widescreen computer monitor — we’d wager that it’s a 16″ model but we’re just guessing. It’s held in the wooden frame by a piece of angle bracket.

This is the product of a hack we looked at in June where an Arduino was used to control digitized retro LCD games. The same hardware is used, monitoring the buttons with the Arduino and using a Python script to translate them to keypresses on a computer. That means this isn’t a standalone, but needs a computer to run the game and feed the LCD monitor. Still, we love the look of it and hold out hope that this will someday migrate to FPGA control (they have not problem driving LCD screens) with selectable games.

Lxardoscope Is A Linux+Arduino Oscilloscope

[Privatier] wrote in to let us know about lxardoscope, his project that lets you use an Arduino as hardware input for a Linux-based oscilloscope display. This implementation offers two channels with about 3000 samples per second from each. He touts some of the GUI options like vertical resolution between 2mV and 10V per division. That part kind of stumps us because we don’t see how a measurement of 10V (or more) can be taken using the schematic included. But you’re comprehension may surpass ours so do take a look yourself.

He is using an Arduino Uno for his testing. But to get around some issues he’s experienced with other USB-based solutions he implemented a serial port connection instead. You’ll need to remove the ATmega chip from the Arduino board after flashing the code to it, and then build a circuit around it which includes a power source where -2.5V is ground and 2.5V is VCC. All in all, you’ll need a 16 Mhz crystal, HEF4069 hex inverter, ATmega8-family microcontroller, and a few passive components to build this on a breadboard.

Arduino Releases New Products; Help Them Develop ARM-based Arduino

The Arduino folks took advantage of Maker Faire New York to announce their new line of products. There’s several interesting new additions to their product line.

They’ve got a WiFi shield in the works that utilizes a module from H&D Wireless in conjunction with an AVR32 processor to take the workload off of the ATmega chip on the Arduino board. It even has room for you to run your own code on the shield’s processor.

Notable (but of less interest to us) is the 1.0 release of the IDE and the development of a new low-cost board. That hardware is intended to make USB device development easier for those already familiar with the Arduino platform.

But the big news that caught our eye is the announcement of an ARM Cortex-M3 Arduino called the Due (we already wish that had been named something different just for search term contrast to the Duemilanova). The hardware hasn’t been finalized yet, although you can see a prototype in the picture above. They want community input on the final touches, so get in there and give them a hand!

[Thanks Insapio and Tom]