Improvised Metal Lathe

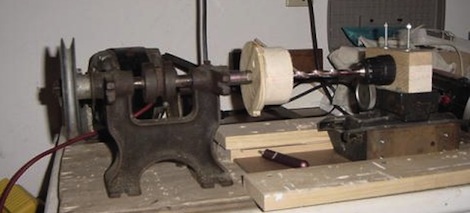
[McKGyver] needed a few parts manufactured. Instead of going the normal route – finding friends with machine tools or paying a machine shop, he improvised a rudimentary metal lathe.

As much as we love 3D printers, they’re not the be-all, end-all solution for everything. Sometimes, you need to get a little dirty and do it the old-fashioned way. [McKGyver] needed a way to produce aluminum shaft couplers to join stepper motors to lead screws. A 1940s grinding wheel was used for the headstock. Since [McKGyver] only needed couplers of one size, he made a jig out of wood to attach the aluminum blanks to the spindle. A drill and a focuser from a photographic enlarger makes up the tailstock of the improvised lathe. The use of a camera focuser is pretty clever. Unless the equipment has been damaged, it’s guaranteed to move in a straight line. A small laser was used to align the drill.

The finished couplers were concentric to 0.005″. A ‘passable precision’ for his application, and a clever build that doesn’t involve moving a thousand pound South Bend lathe.

SNES Gamepad Coversion To USB

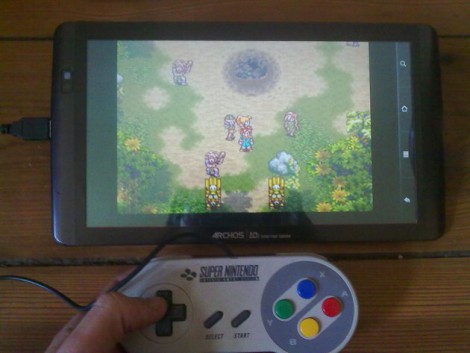
[Kekszumquadrat] wanted to use a classic controller to play emulator games on his Android tablet so he set out to convert an SNES gamepad to connect via USB. He found an old USB keyboard at a yard sale for about 3 Euros. He knew that the emulator he prefers has the option of remapping all the inputs to keyboard keys which means a USB keyboard has all of the electronics he would need to pull this off.

Once he had separated the keyboard circuitry from the case [Kekszumquadrat] plugged it into his Linux box and used Xev to establish how the keyboard matrix is set up. Xev is a common package that opens up an active window on the X desktop. When run from command line, any events that happen to the window will be echoed along with verbose data about that event. When it comes to keypresses, you’ll get the keycode you need. He simply shorted columns and rows until he found the desired mapping, then it was on to soldering.

The SNES controllers are very simple devices. As we’ve seen with previous projects, they use a serial-to-parallel shift register to gather button data and send it to the console. [Kekszumquadrat] simply soldered between button traces and keyboard matrix contacts. Once he finished, the keyboard parts were tucked inside of the controller case and he’s left with a USB controller that appears to be unaltered.

Arduino Heart Rate Monitor

[Wolf] had a Polar brand exercise watch that wirelessly monitored a chest strap that sends it heart rate data. It sounds like there’s some way to transfer data from the watch to a computer, but it’s only meant for use with Polar’s website. He wanted to do a little more with the equipment so he ditched the watch and built an Arduino-based heart rate monitor.

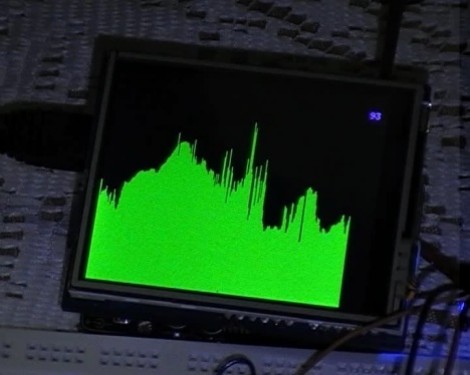
He’s still using the chest strap and was happy to find that SparkFun sells an OEM receiver for it. Just add a 32.768 kHz clock crystal and an optional antenna wire and you’re up and running. Once the receiver finds a transmitting chest strap, it will pulse an output pin with each beat of the heart. [Wolf] used the D2 pin of an Arduino Uno to connect to the receiver because this pin corresponds to one of the ATmega’s external interrupts. A rolling average of five inputs are used to help smooth the display data, which is shown on the 2.8″ LCD screen seen above.

Working With The µOLED-128-G1 Display

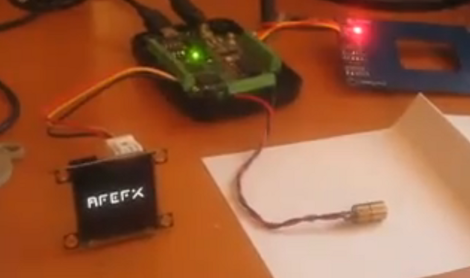
If you’re not already familiar with the 4D Systems µOLED-128-G1 display, [Gary] put together a project that shows some of the features it offers. This is a smart display, having its own onboard microcontroller and a microSD slot. The SD card stores image and video data, while the microcontroller takes care of displaying them based on simple serial commands it receives. This means you can hook it up to a computer or microcontroller and show still or animated sequences with minimal programming effort. We’ve embedded a video after the break, or you can look in on this slot machine project from last year that used the same module.

[Gary] is using a PIC microcontroller programmed with PIC Basic Pro. But most of the work is done with a 4D Systems program called Graphics Composer. You build out the images and animations you want to see on the screen, which are then formatted for the display and written to the SD card. [Gary] mentions that the card is not written using a traditional filesystem, so if you know of another way to write data to and from this card we’d love to hear about it in the comments. The image editing software will also spit out the serial commands necessary to pull your freshly minted graphics up on the display.

Continue reading “Working With The µOLED-128-G1 Display”

Discrete Logic Driving Game Development

[Caleb] is hard at work on a driving game based on 7400 series logic chips. This will be his entry in the Open 7400 Logic Competition, and it really outlines why this contest is especially tricky.

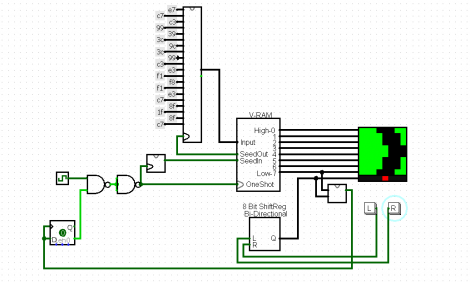
The concept behind the game is quite simple. You’re the driver of a car (the red dot at the bottom of the display square seen above) and need to navigate the curves in the road as you drive along. It’s the same game as we saw played on receipt paper back in June. [Caleb’s] using and LED matrix as the display, and we’re confident that if we grabbed our favorite microcontroller we could have this up and running on an 8×8 bi-color display in an afternoon. But doing it without the crutch of a programmable chip really brings out the clever engineer inside of you.

The circuit seen above is a Logisim proof-of-concept that [Caleb] went on to test on the breadboard. He thought he had everything figured out until he realized that his Data Flip-Flops were very occasionally not powering up in the same state as he predicted. Don’t worry, he found a solution to the problem. But we can’t wait to see what other hurdles he encounters as he pushes on toward completing the project.

ATtiny Hacks: Stopwatch Turned Race Clock

ATtiny Hacks Theme Banner

The folks over at blondihacks are gearing up for an event called “The 24 Hours Of LeMons” which is a form of low-budget endurance racing involving cheap cars, heroic repairs, wacky themes, and a lot of serious driving. The format of the race is pretty simple, the cars race around the track continuously for a set amount of time (usually 12 or 24 hours), and the goal is to complete as many laps as possible in that time.

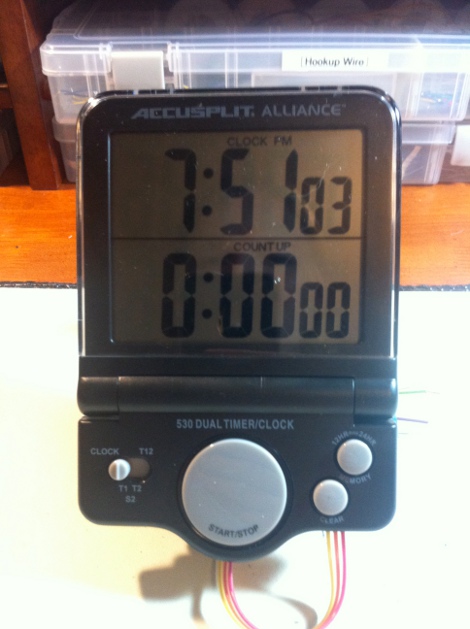
In order to be racing that long each team has multiple drivers, and a in car timer would be especially helpful. While commercial models cost a pile of money, the team was able to source a dual clock / stopwatch with a nice big display, and hack it up with an Attiny13. The stopwatch is deactivated when the engine is off, and reactivated when the engine gets turned back on.

Now when one driver’s turn is up they come in for a pit stop where the engine is shut down for saftey reasons. When the new driver is ready to leave, the clock automaticly resets for them and they can get on with the race.

ATtiny Hacks: ATtiny45/85 Servo Library

ATtiny Hacks Theme Banner

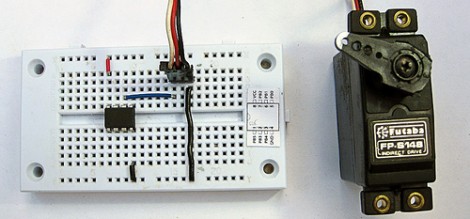
Servo8bit is a library for AVR microcontrollers that allows you to drive servo motors without the need for a 16-bit timer. Obviously, this is quite useful for smaller chips that only have 8-bit timers and it is specifically targeted at the ATtiny45 and ATtiny85 microcontrollers. The library offers 256 steps of resolution, and can drive up to five servos at one time. Servo control pulses can be generated between 512 and 2560 microseconds and if you don’t mind increasing the time between these pulses [Liya] says it would be possible to increase the 5-servo limit.

The library is quite easy to use, but in its current state it would take just a bit of work to port to another device. It’s been written for an 8 Mhz clock signal with PortB used to drive the motors. Using find-and-replace to change the PORTB keywords to use a DEFINE variable should be easy enough, but we don’t know how hard it would be to change the clock frequency.

We wonder if it’s possible to make this a slave device, perhaps implementing a 1-wire protocol?