Motion Sensing Minecraft Creeper Will Scare The Pickaxe Offa’ya

[Chris] Writes in to tell us about his motion sensing, Arduino powered Creeper.  As if these buggers were not frightening enough in game, [Chris] had to go and make the closest (legal) real world facsimile.  The Creeper utilizes an Arduino Uno with a wave shield to playback creeper noises, PIR sensor to detect victims, and an RC car as a motorized cart. The creeper sits and waits for a signal from the PIR detector, when it sees motion the RC remote is triggered, Creeper noises played and (we assume) panic ensues.

We might have forgone the entire RC part of the toy car and found the H-bridge motor controller, but using the RC remote has potential. The whole triggering mechanism can be placed remotely allowing the Creeper to jump out from some kind of cover.

Not enough Minecraft? Check out some our other Minecraft projects if you are interested in more tree-punching goodness.

A video of the creeper in action is available after the jump!

Continue reading “Motion Sensing Minecraft Creeper Will Scare The Pickaxe Offa’ya”

LED Floor Lamp Really Ties The Room Together

led_floor_lamp

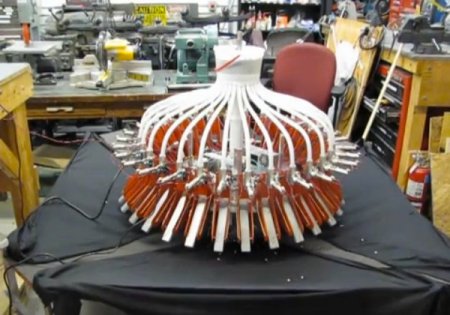
Instructables user [lincomatic] was doing some home decorating and was trying to find something that would really tie the room together. He decided against adding a nice rug, a light fixture is what he was after. Rather than settle on a simple lamp for the corner of the room, he constructed an 8×8 RGB LED fixture he calls the Lampduino.

He constructed the 8×8 grid using some leftover cardboard packaging, then got to work wiring up the LED strands. In a rather unorthodox move, he decided to wire wrap the LED leads instead of soldering them. Once the LEDs were in place, he wired everything up to his Colorduino, an Arduino derivative specially made for driving large quantities of LEDs. A thin sheet of drafting film was placed on both sides of the board, then it was mounted on a stand for display.

His Daft Punk-esque lamp can be programmed to display just about anything from color patterns to video game sprites, and it can also be timed to music if desired. We think it looks great, and could make for a nice wall hanging if he ever got sick of the stand. While the wire wrap technique sounds like it sped up the development of this project significantly, we would be interested in hearing how it holds up after a few months of use.

Check out the trio of videos embedded below to see the Lampduino in action.

Continue reading “LED Floor Lamp Really Ties The Room Together”

HIDUINO: Your Arduino Is Now A MIDI Interface

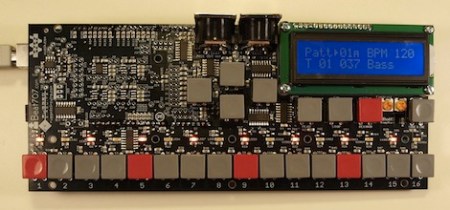
[Dimitri Diakopoulos] dropped into our tip line to let us know his HIDUINO project. The HIDUINO is a set of firmware for the ATmega8u2 used in the new revisions of the Arduino  (Uno, and Mega2560 for example).  Once the HIDUINO is loaded your Arduino can show up as any HID compliant device you wish, no extra drivers necessary. This means that using this firmware, music software such as Max, Ableton, Reaktor etc can read and write MIDI directly to/from the Arduino. Currently the project is for direct USB-MIDI communication but could be altered to act as a variety of HID devices.

Flashing the ATmega8u2 with your own device type or name requires a bit of work on the developers part like owning an ISP programmer, soldering header pins to the board, and re-flashing the ATmega8u2 every time you want to load new code into the Arduino. Users without an ISP can still flash HIDUINO using Atmel’s FLIP software (Windows) or the DFU programmer (Mac OS X and Linux) and a precompiled HIDUINO firmware. They still have to solder a jumper on the underside of the board to use the DFU bootloader.

This firmware could certainly benefit anyone building an Arduinome , Joystick, or any variety of devices that users simply want to interface to a PC without additional software.

A guide for ISP flashing can be found at [Dimitri]’s site.

Wireless Animatronic Hand Control

animatronic_hand

[Easton] was looking to enter his local science fair and needed a project that would wow the judges. After considering it for a bit, he decided that an animatronic hand would be a sure winner. Many animatronic projects we have seen are connected to a computer for control purposes, but his is a bit different.

[Easton] wanted to be able to control the hand in real time with his own movements, so he sewed some flex sensors onto a glove and wired them up to a custom Arduino shield he built. The Arduino is also connected to an XBee radio, allowing it to interface with his animatronic hand wirelessly.

He built the hand after studying anatomical drawings to better understand where finger joints were located and how they moved. He cut up pieces of flexible wire tubing to build the fingers, reinforcing them with Lego bricks. He ran fishing wire from the finger tips to five independent servos to provide the hand’s motion. Another Arduino with an XBee shield was used to control the hand and receive wireless signals from the glove.

Check out the video below to see why this project won [Easton] first place in the science fair.

Continue reading “Wireless Animatronic Hand Control”

Arduino And Open Sound Control Without An Ethernet Shield

Open Sound Control (OSC) is a communications protocol that can be seen as a modern alternative to MIDI. It’s specifically designed to play nicely with network communication systems. The problem with using it along with Arduino-based gadgets is that you then need to use something like an Ethernet shield to provide the network connection. [Liam Lacey] decided to use Processing as a go-between for OSC and the Arduino in lieu of the Ethernet Shield. One of the major benefits of this method is that it gives you some flexibility when it comes to how the Arduino communicates. Since a USB connected Arduino can be addressed by the Processing sketch in the same way as an AVR chip connected via an RS232 serial port, [Liam’s] method will allow you to prototype on an Arduino board, but transition to your own non-USB hardware for the finished project. The one big drawback to this method is the need to have a computer connected to your controller, but we’d bet you’d need one to run MAXmsp anyway.

Interactive Dice Game Pits Man Against Machine

dice_game

While most dice games are based on luck and chance more than anything else, [Mike] decided he wanted to create a dice game that took a little more skill to play. He built a replica of a game found in Ian Stewart’s “The Cow Maze”, a book of mathematical stories and puzzles.

The theory behind the game is as follows:

A number is randomly drawn and is considered the “heap”. Players take turns reducing the heap, using the die to represent the number they would like to remove. The only restrictions placed on moves are that you cannot re-use the same number chosen by your opponent in the preceding move, nor can you use the number on the die face opposite that number. The winner of the game is the individual reducing the heap to exactly zero, though you can also lose the game automatically if you reduce the heap to a negative number.

The game operates using a magnet-loaded wooden die and hall sensors built into the playing surface. The sensors relay the value of the die’s face to the ATmega chip he used to run the game. His code provides the logic for your computer opponent as well as for keeping score.

The whole project is wrapped up in a nice-looking wooden box that gives it a bit of old time-y charm, micro controller and LCD aside.

Be sure to check out the video below to see a few rounds of the game being played, and swing by his site for more details.

[via SparkFun]

Continue reading “Interactive Dice Game Pits Man Against Machine”

Lower Cost Arduino Cell Shield

People love putting their Arduinos in interesting and remote places. while it may be possible, it may not be practical to run out and collect data from the devices. That is where this GSM / GPRS shield comes in handy.

Based around the SIMCom SIM900 that puts this device on the lower end of the price scale, (49 Euro for the module, ~60 Euro for the module mounted on a breakout board, or around 85 greenbacks) makes this module an interesting target for anyone wanting to add cell phone connectivity to a project.

To take this a step further [Boris] whipped up a nice shield PCB for the Arduino and Arduino like footprint users to make connections between the 900’s breakout board and the Arduino layout a snap. Electrically its just wires, and a LM317.