PID Sous-Vide Slow Cooker – Bon Appétit!

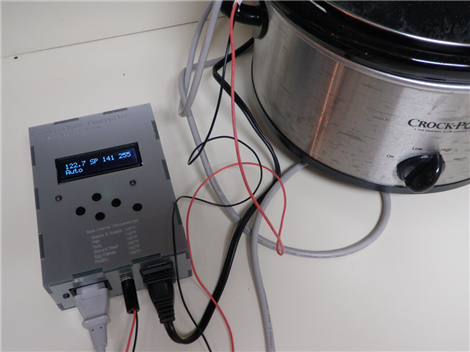
In search of a perfectly-cooked brisket, [Aaron] recently completed this DIY  PID-controlled sous-vide slow cooker. Sous-vide (French for “under vacuum”) is a cooking technique in which foods are typically vacuum-sealed and then cooked in a relatively low temperature water bath for an extended period of time. This is done to minimize temperature gradients throughout the food to ensure even cooking. Precise regulation of the water temperature is the key to ensuring that the results are exactly as desired – when cooking for many hours or days, even a few degrees discrepancy can greatly influence the final product.

A few months ago we featured a similar hack that utilized a simple switching temperature controller spliced into an extension cord.  Although probably sufficient for most aspiring “hacker-chefs”, the temperature was not as stable as it could be. The problem is that it takes time for the heat generated in the slow cooker’s heating element to reach the temperature probe (and food) suspended in the water bath.  By the time the probe reads the elevated temperature, the element is already too hot and the temperature overshoots the target. One way to mitigate this effect is to circulate the water to minimize temperature gradients, as is done in many of the expensive commercial units. In order to achieve similar results, [Aaron] instead created a PID controller that uses temperature feedback over time to precisely maintain the desired temperature and reduce any deviations resulting from outside disturbances.

The build is covered in detail and looks great in a custom acrylic enclosure. All of the board schematics, enclosure layout files, and source code are available under Creative Commons licensing at the bottom of his blog page. A good deal of time is also spent addressing the actual PID programming and tuning – something that could be useful for many different hacks requiring precise feedback control.

The end result is a professional looking control box and a slow cooker that is able to maintain temperature within 1°F even while using a DS1820 temperature sensor that is only rated as accurate to 0.5°C (0.9°F). From the pictures it looks like [Aaron] has finally achieved brisket bliss! Now the only question remaining is: what is the best setting for reheating left-over pizza?

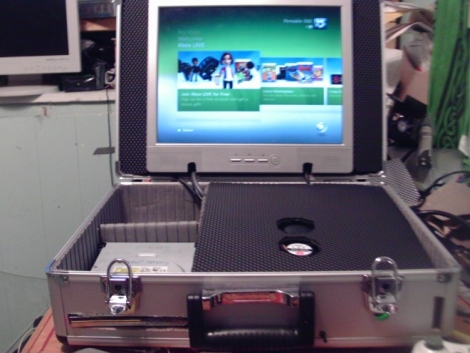
Xbox 360 Briefcase Is Ready To Go Wherever You Do

portable_xbox

Hackaday forum member [azazelcrey] recently wrote in to share his portable Xbox 360 build. This is not his first attempt at constructing one of these, as he completed his first portable console a few years back. This time, he has taken what he learned from the first go round, making his newest creation a bit cleaner and more compact.

He sourced an LCD monitor with built-in speakers to use as the display, mounting it into a $20 metal-sided suitcase from Home Depot. He disassembled his Xbox and added it to the case, installing a couple extra fans to keep things cool. Some standard Xbox functions were externalized, allowing him to power on the console, load games, and synchronize controllers, all while keeping the briefcase shut.

This obviously isn’t something that you would carry on a train or bus for on-the-go gaming, but it’s a great way to travel with your Xbox as well as a handful of gear.  We imagine this rugged, fully-contained gaming center is quite useful for one-off Xbox LAN parties, and it seems like it would be a good way to get your game on if stuck overnight in a hotel.

Check out his web site if you are interested in seeing his first build or more pictures of this one.

Hacking Automated Hand Sanitizers With Ben Heck

benheck_sanitizer

If you have visited a hospital any time recently, you probably noticed quite a few automated hand sanitizer dispensers scattered throughout the hallways and in each patient’s room. Since hospital-acquired infections are a growing problem, there has been a push for all personnel to use these hand sanitizers regularly to lessen the likelihood of spreading disease.

In the most recent episode of his web show, [Ben Heck] took on the challenge of hacking one of these dispensers to use motion sensors in order to sense when hospital personnel are near, as well as to remind them that they should sanitize their hands on the way out.

He disassembled the dispenser to see how it operated, then worked on replacing the IR sensor pair with a set of motion detectors. He hooked the motion sensors to a Propeller board, which uses a separate add-on board for keeping time. Once the motion sensors are triggered, the passer-by is given a window of time before the machine notifies them to kindly sanitize their hands. All movements and sanitizer dispensing events are logged to an SD card connected to the controller, which can be reviewed to ensure policy compliance.

If you have about 20 minutes to spare it’s worth checking out, and if you are interested in more hand washing tech, check out this DIY hand dryer we featured a while back.

Chill Your Phone For Longer Battery Life?

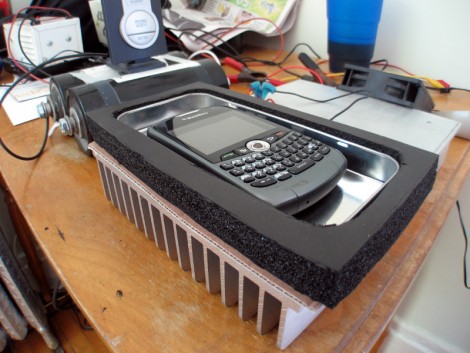
The first specs we look at when choosing a cellphone are the battery life numbers. We know that eventually we’re going to see performance loss, and [Dr. West] wanted to see if there’s a way to delay the inevitable. What he found is that ambient temperature affects the battery throughout its life. He set out to build a phone chiller to slow the degradation of the battery.

The research that he points to shows that at room temperature, a Lithium battery will lose 20% of its capacity each year. This seems like a dubious number so do share links to studies that state otherwise in the comments. Whether that 20% is right or not, the point is that cooling the battery will preserve it. With that in mind, [Dr. West] put together a pod that uses a peltier cooler and a heat sink to host his Blackberry while he sleeps. He figures he can reduce the capacity lost per year from 20% down to 14%. This of course comes at the expense of running that cooler every night (in addition to charging the phone when it needs it). But perhaps this solution will spark an idea that leads to a better one.

TI Adds Some Linux Support For Evalbot – We’ve Got Hardware Coupon Codes For You!

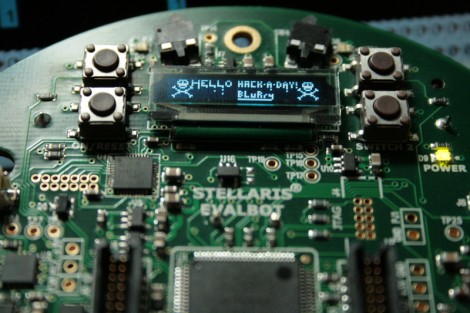
In case you missed it, Texas Instruments sells a little robot called the Evalbot as a development platform for ARM Cortex-M3 microcontrollers. Since its release we’ve seen a few hacks on the hardware; the image above is a proof of concept for developing for the device under Linux. We have criticized TI in the past for not natively supporting Linux with their IDEs. We’re not sure how it will play out, but they have added new software package options to go along with the hardware. You’ll notice on their PR page that there is now an option to use CodeSourcery. It is a trial of the full version, but at least it is a step in the GNU direction from their previous offering.

The Hackaday team has been talking off and on with TI about the hardware. We’re happy to say that they’ve been listening to the Internet community about their likes and dislikes; following various online groups that have sprouted up to talk about Evalbot projects. It sounds like they’re thinking about hosting a contest using the hardware. So maybe you want to get your hands on one so that you can familiarize yourself and hit the ground running if/when that contest starts. You’re in luck, we can help save you a few bucks.

The first time that Texas Instruments tried out a $125-off coupon code the deal got away from them. It had been meant for attendees of the ESC Boston conference. They honored the deals that went through before the proverbial run-on-the-bank got shut down. This time around they’re using serialized deal codes to limit the number of give-aways. We’ve got 200 of them just waiting for our loyal readers to use. One code will let you purchase one Evalbot for just $25 (instead of $150).

Please take a moment to decide if you actually want (and will use) one of these robots, and decide if you are willing to shell out the $25 to order it. You see, we don’t want this deal going to waste. If you decide this is for you, send an email requesting a code to:We’re all out! We’ll dish out the deal on a first-emailed-first-served basis. We will update this post when all 200 have been claimed.

We will not tolerate anyone gaming the system and so we reserve the right to disqualify any email submission for any reason in an attempt to maintain some semblance of fairness. Also… if you’re planning to pick this up just to resell it for cash you’re a loser.

[update: Those who emailed us requesting a code should begin receiving replies this evening or tomorrow.]

[Update 2: here is the specific bot you should be trying to buy. ]

Retake On A Wii Remote Controlled Balancing Robot

[Tijmen Verhulsdonck] built his own version of a Wii remote-controlled balancing robot. He drew his inspiration from the SegWii, which was built by [Ara Kourchians].

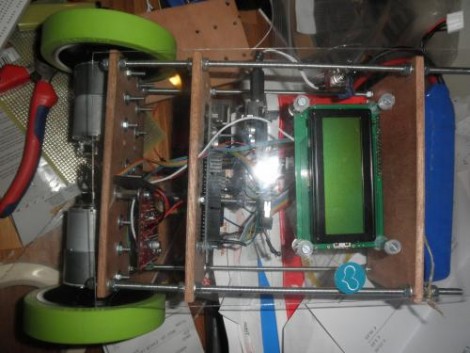
The body is built using one of our preferred fabrication methods; threaded rod makes up a rail system, with three sheets of hard board serving as a mounting structure for the motors, electronics, and battery. This does away with the 9V batteries used on the original SegWii, opting for a very powerful lithium battery perched on the highest part of the assembly. It uses an Arduino as the main microcontroller. That detects roll, pitch, and tilt of the body by reading data from a Sparkfun IMU 5 board (we’re pretty sure it’s this one). Check out the videos after the break. The first demonstrates the robot balancing on its own, then a Wii remote is connected via Bluetooth and [Tijmen] drives it around the room by tilting the controller. The second video covers the components that went into the build.

This is impressive work for a 17-year-old. [Tijmen] lists his material cost at $800 but since he’s Dutch this might not be a USD currency.

Continue reading “Retake On A Wii Remote Controlled Balancing Robot”

Cocktail Cabinet To Be Proud Of

At a glance you might think it’s the real thing, but if you look closer you’ll see that The Distraction Contraption is an extremely well-executed cocktail cabinet recreation that hosts a MAME setup. [Sam Freeman] took pictures of the entire build process and has posted them, along with captions, as a Flickr collection.

The project started after some inspiration from this diminutive cocktail cabinet. He wanted his own version that was closer in scale to the coin-op versions that would have been found in bars a few decades ago. He designed the case to fit a 17″ LCD screen using Google Sketchup. From there, he cut out the parts and routed the edges. The controls feature buttons and joysticks, as you’d expect, but that red cap on the end works as a spinner. He tried out a few different ideas for this auxiliary control. He found that using LEGO gears to map the spinner’s motion to the axle of a mouse worked best. To give the plastic knob a better feel he loaded it with pennies to increase the mass, bringing momentum into play. The final look was achieved using wood-grain contact paper, and custom printed skins.