Milling Ice Molds For Craft Cocktails

Want some fancy ice for your next cocktail party? You can try to find spherical ice-cube trays but you won’t get the kind of results seen here. It turns out the trick to this isn’t how you freeze the water, it’s how you melt the ice.

[Brendan O’Connor] started this project after seeing an ice mold that could make beautiful shapes rather than just cubes. But the price tag was $1400. If he could make his own at a hackerspace we’d bet that would pay his membership for an entire year!

The concept is pretty simple. The video after the break shows the mold he was trying to recreate. It’s two hunks of metal with a shape milled into them. The mold is pre-heated, then an oversized hunk of ice is placed between the blocks. The heat melts away the parts you don’t want, and leaves a perfectly shaped ice orb in between. Gravity is responsible for pulling the mold halves together as they slide along some machined rods.

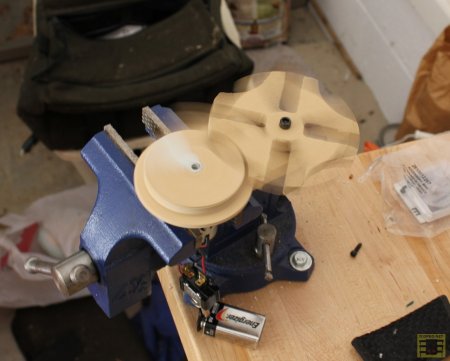
With a big hunk of scrap aluminum he milled two halves of a sphere. They can be sufficiently heated if held under running water, and a some leftover printer rails keep the two parts aligned as the ice orb is formed. Now [Brendan] just needs to work on his method of creating a crystal-clear ice block as a starter and he’ll have achieved total win.

Continue reading “Milling Ice Molds For Craft Cocktails”

Solar-powered CNC Woodburning

[Johnie] built himself a CNC woodburner powered by the sun. Like the solar 3D printer we saw last summer, [Johnie]’s build uses a giant Fresnel lens to focus sunlight onto a piece of wood. To get some control out of his build, a 2-axis bed was made from scrounged and junked parts.

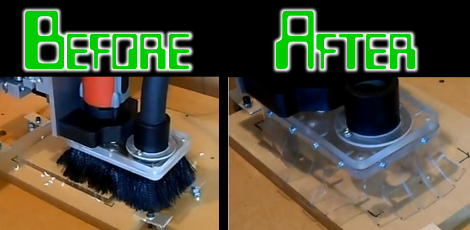
The lens in [Johnie]’s build looks to be about a foot square – more than hot enough to burn a few holes in things from our experience. The bed (hopefully) gets around this problem by being built entirely out of clear acrylic. The idea behind the acrylic bed is that the focused light will pass through harmlessly, and not melt the entire thing.

Now that we think about it, we couldn’t come up with a better project to enter in the Buildlounge laser cutter contest. For everybody else working on their laser cutter projects, the deadline is January 1st. Better get those wrenches out and irons hot, because we’ve seen a few awesome projects for the Buildlounge build off already.

MAMEing A CNC Router

[Ed] is pretty old school. He loves the functionality of old industrial shop tools that have their own dedicated systems. With huge candy-like buttons, who wouldn’t? [Ed] decided to replicate this aesthetic by building a MAME controller for his Mach3 controlled router.

[Ed] had a bunch of MAME buttons and joysticks sitting around from a forgotten project. With his vinyl plotter, it was relatively easy to make a very nice looking control panel. To connect the buttons to the Mach3 computer, a disused I-Pac was brought into the mix. The I-Pac reads the state of the buttons and sends keyboard codes over USB to the computer.

Because the very popular Mach3 CNC software responds to hotkeys, it was very simple to make the buttons do as they say. [Ed] has full control over the X, Y, and Z axes as well as the spindle speed. It seems like this would be interesting to do some ‘free form’ CNC work on [Ed]’s router.

Continue reading “MAMEing A CNC Router”

Playing With Routers, Vinyl And Music Concrete

When Danish musicians Vinyl Terror and Horror visited [Daniel] and his CNC router at EMS in Sweden, things were sure to get interesting. The band uses heavily modified record players and modified vinyl records to produce strange soundscapes. During their time at EMS, Vinyl Terror and Horror were able to produce some strange vinyl that shouldn’t play on a record, but do.

Most of VTaH and [Daniel]’s work is centered on a CNC router. This soundscape took two records to produce. The spare rectangles were cut from a second record and designed to be press-fit into the host. When the newly assembled record is played, truly bizarre ‘skipping-but-still-playing’ sounds are made. The same process was used on the puzzle piece record the guys made.

The experiments continued by cutting a circle out of a record and gluing it back into place with a different orientation. This idea was taken to its logical conclusion that serves as the exemplar of music concrete.

[Daniel] and Vinyl Terror and Horror came up with a pretty neat spin (HA!) on century-old way of making electronic music, so we’ll give all of them some props. Check out all the videos from VTaH’s time at EMS after the break.

Continue reading “Playing With Routers, Vinyl And Music Concrete”

Lighted Acrylic Christmas Ornaments

If you’ve gone to the trouble of building your own CNC mill we know you’re always on the lookout for things to use it for. [Boris Landoni] wrote in with just the thing for the holiday season; a set of lighted acrylic Christmas ornaments.

One of the interesting properties of acrylic is how it reacts when edge-lit. The material pipes the light, until it bounces off of a disturbance in the surface. The first step is to design the outline of the ornament as all cut edges will glow. Next, [Boris] uses artCAM to design the internal parts to be cut. This application translates the relief cuts necessary to really make your design shine (sorry, we couldn’t resist). The best examples of this are the angel and candle seen above.

Each of these acrylic pieces has a slot cut on the bottom to hug an LED. [Boris] used small project boxes with a PCB for that diode, as well as a button battery for power.

Laser Cutting Technique Makes Plywood Bendable

Here’s a laser cutting technique that makes thin plywood bendable. By cutting away elongated diamond shapes from the material, a lattice of strips connected minimally by alternating tabs is left over. The wood is then bendable, and it must be somewhat durable since the idea came from a product that uses the technique as a hinged notebook enclosure.

We don’t have much interest in it as an often used pivot point as surely it must be a problem with long-term use. But we love the look of it as a rounded corner on an enclosure like the Arduino project box seen above. The side walls are one continuous piece, with identical top and bottom sections which receive the alignment tabs. The whole thing is held together with just four bolt/washer/nut combinations.

But if you don’t have access to a laser cutter, we guess you’ll have to stick to altering pre-made enclosures for now.

Milling Interlocking Wooden Rings

[Johan von Konow] wanted to make something special as a wedding gift to his wife. He decided a pair of interlocking miniature rings would be the perfect keepsake. He started his search for a way to mill the wooden rings from a solid piece of wood, and documented his journey for our enjoyment.

This project poses an interesting challenge. Most CNC mills offer three axes of freedom, but he only had a 2D mill meant for routing PCBs. This means the cuts can only be made from the top down at one depth. In order to fabricate the rings he needed to cut from more than one side. With more study, [Johan] discovered that it would be necessary to cut the wood stock from eight different angles before the rings would be complete.

The solution to the problem was to first mill a jig to hold the wood stock. It has positions to hold the stock at each different angle. The final step before starting the cut was to mill the stock itself to perfectly fit his custom jig. We think it turned out great, thanks in part to hand filing, sanding, and polishing to smooth the marks left from milling.