Picture showing the way the cut-down piece of chip is soldered onto the mainboard - looking, indeed, like a QFN package.

Making A Handheld NES By Turning DIP Chips Into…QFN?

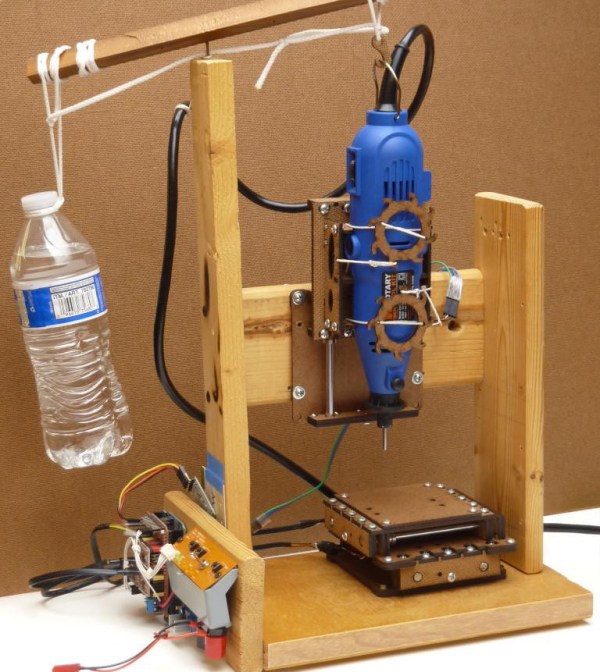
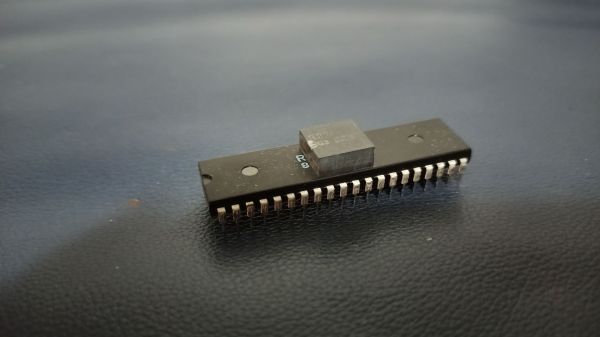
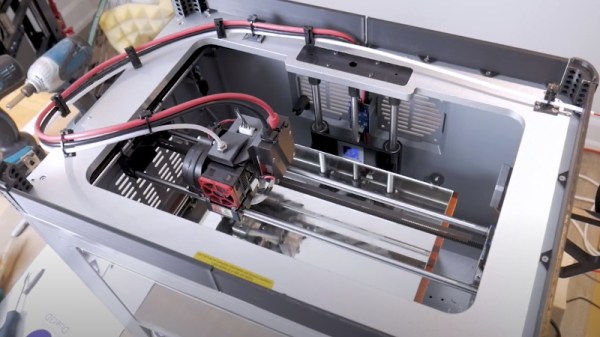
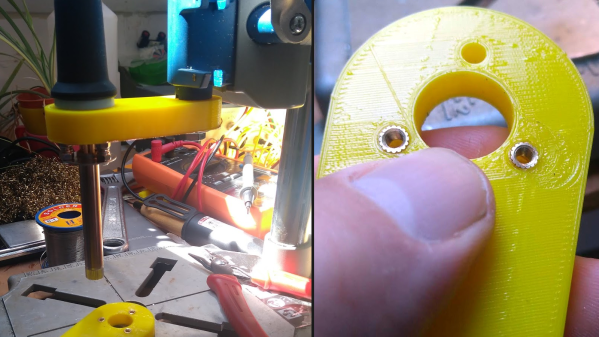
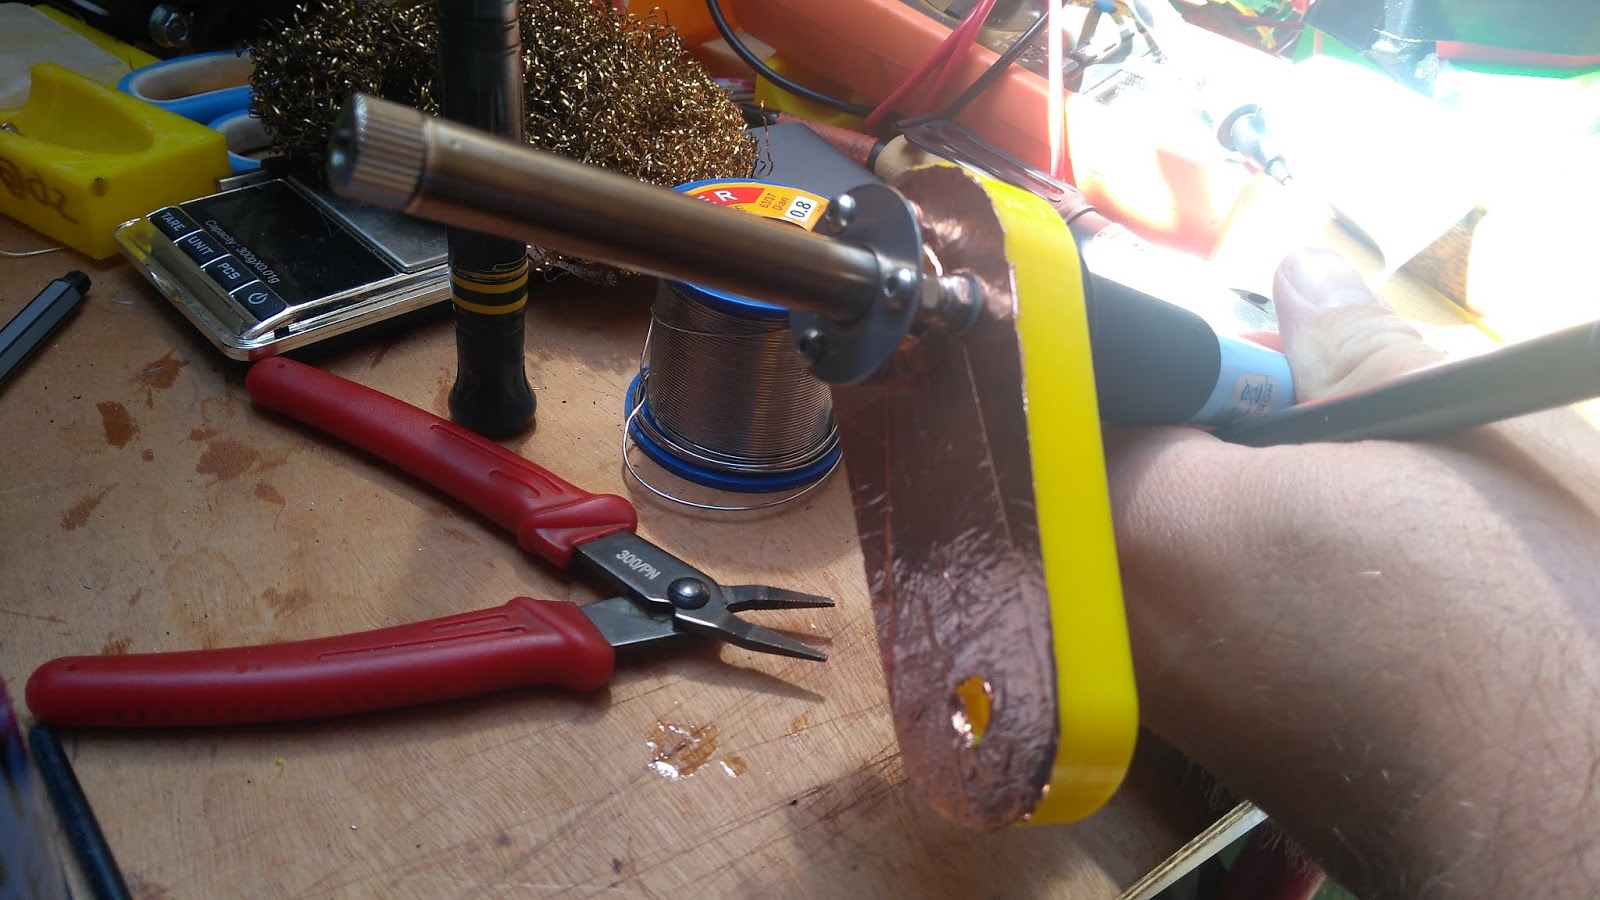
You can achieve a lot with a Dremel. For instance, apparently you can slim the original NES down into the hand-held form-factor. Both the CPU and the PPU (Picture Processing Unit) are 40-pin DIP chips, which makes NES minification a bit tricky. [Redherring32] wasn’t one to be stopped by this, however, and turned these DIP chips into QFN-style-mounted dies (Nitter) using little more than a Dremel cutting wheel. Why? To bring his TinyTendo handheld game console project to fruition, of course.

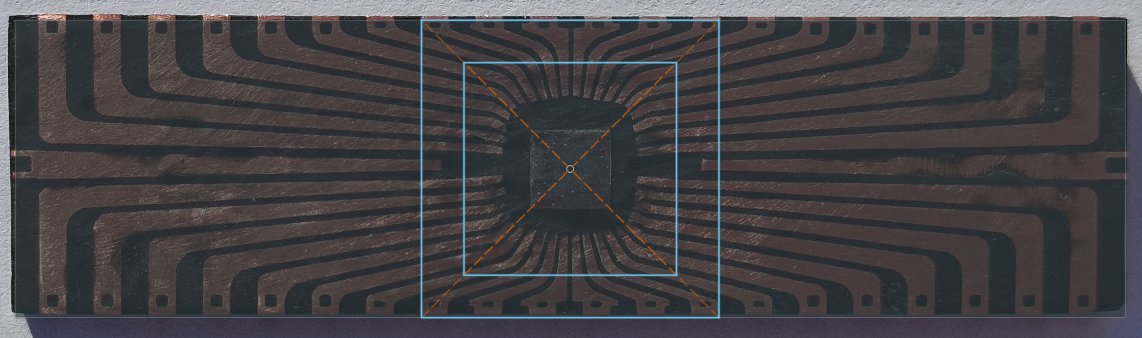
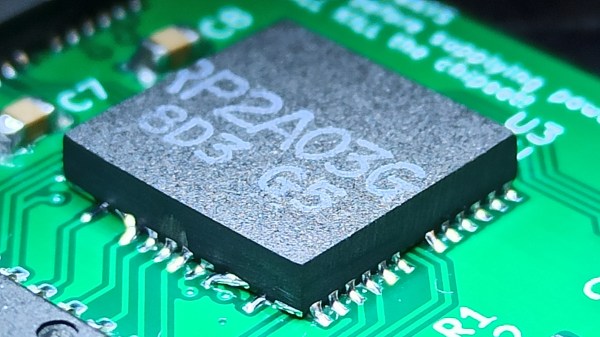
DIP chip contacts go out from the die using a web of metal pins called the leadframe. [Redherring32] cuts into that leadframe and leaves only the useful part of the chip on, with the leadframe pieces remaining as QFN-like contact pads. Then, the chip is mounted onto a tailored footprint on the TinyTendo PCB, connected to all the other components that are, thankfully, possible to acquire in SMD form nowadays.

This trick works consistently, and we’re no doubt going to see the TinyTendo being released as a standalone project soon. Just a year ago, we saw [Redherring32] cut into these chips, and wondered what the purpose could’ve been. Now, we know: it’s a logical continuation of his OpenTendo project, a mainboard reverse-engineering and redesign of the original NES, an effort no doubt appreciated by many a NES enthusiast out there. Usually, people don’t cut the actual chips down to a small size – instead, they cut into the mainboards in a practice called ‘trimming’, and this practice has brought us many miniature original-hardware-based game console builds over these years.

Continue reading “Making A Handheld NES By Turning DIP Chips Into…QFN?”

Blender? No, Grinder

[Leandro Felipe] is no stranger to the dirty hack, and this video of his conversion of a blender into a handheld rotary grinding tool is no exception. (Embedded below.) But the end result is something pretty useful — a lighter and more maneuverable rotary grinder that’s got a lot more grunt to boot.

(The video is in Portuguese, but the captions work pretty well, once you get over the fact that the robots translate “grinding tool” as “rectifier” a lot of the time. And anyway, you’re here for the hacks.)

The highlights are a handmade coupling that mates the blender motor with the flexible shaft and chuck, purchased separately. And the flattened-out PVC pipe used as a mounting bracket. And him using the motor itself against a file to “lathe” down the drive shaft. And…

The tip of the day comes when he holds the blender motor in a metal vise to test it out. Metal and spinning magnets — what’s the worst that could happen?  Sparks, smoke, and a trip to the thrift store for another used blender.

If you just want to see the finished piece, you can jump ahead to the end. But it’s basically, get yourself a speed-adjustable blender, couple it to the shaft of an off-the shelf grinder, and you’re set.

It’s an idea so conceptually easy, you might wonder if Hackaday has ever showcased a blender dr3mel before. We have. What else can you power with a blender motor?

Thanks [Danjovic] for the tip!

Continue reading “Blender? No, Grinder”

Small low-cost CNC mill with rotary tool

Minimal Mill: The Minamil

Having a few machine tools at one’s disposal is a luxury that not many of us are afforded, and often an expensive one at that. It is something that a large percentage of us may dream about, though, and with some commonly available tools and inexpensive electronics a few people have put together some very inexpensive CNC machines. The latest is the Minamil, which uses a rotary tool and straps it to an economical frame in order to get a functional CNC mill setup working.

This project boasts impressively low costs at around $15 per axis. Each axis uses readily available parts such as bearings and threaded rods that are readily installed in the mill, and for a cutting head the build is based on a Dremel-like rotary tool that has a similarly low price tag. Let’s not ignore the essentially free counterweight that is used.

For control, an Arduino with a CNC shield powers the three-axis device which is likely the bulk of the cost of this project. [Paul McClay] also points out that a lot of the material he needed for this build can be salvaged from things like old printers, so the $45 price tag is a ceiling, not a floor.

The Minamil has been demonstrated milling a wide variety of materials with excellent precision. Both acrylic and aluminum are able to be worked with this machine, but [Paul] also demonstrates it in its capacity to mill PCBs. It does have some limitations but for the price it seems that this mill can’t be beat, even compared to his previous CNC build which repurposed old CD drives.

Open-DIP Surgery Cuts Retro Chips Down To Size

At least by today’s standards, some of the early chips were really, really big. They may have been revolutionary and they certainly did shrink the size of electronic devices, but integrating a 40-pin DIP into a modern design can be problematic. The solution: cut off all the extra plastic and just work with the die within.

Continue reading “Open-DIP Surgery Cuts Retro Chips Down To Size”

Dremel 3D20 Printer Gets Modern Overhaul

Dremel’s attempt at breaking into the 3D printer market back in 2014 was respectable, if not particularly exciting. Rather than design their own printer, their 3D20 “Idea Builder” was a lightly customized Flashforge Dreamer (itself a Makerbot Replicator clone) with a new warranty and support contract tacked on. It wasn’t necessarily the 3D printer of choice for the hacker and maker crowd, but it was a fairly solid option for folks who wanted a turn-key experience.

[Chris Chimienti] says he got about 1,000 hours of printing out of his 3D20 before it gave up the ghost. Given the age of the machine and its inherent limitations, he decided to use the Dremel’s carcass as the base for a very impressive custom 3D printer with all the modern bells and whistles. He kept the enclosure, rods, bearings, and the stepper motors, but pretty much everything else was tossed out. Some of the replacements are off-the-shelf parts, but it’s the custom designed elements on this build that really help set it apart.

A print bed strong enough to park your car on.

Under the machine, [Chris] has installed a new power supply and a Duet 2 WiFi controller which itself is connected to the new LCD control panel on the front. There’s an external case fan to keep the electronics cool, but otherwise things look a lot neater under the hood than they did originally.

Moving upwards, he’s designed a gorgeous adjustable print bed and a new extruder assembly that cleverly uses RJ45 jacks and Ethernet cables to connect back to the control board. All told, the custom components have taken this once relatively mid-range 3D printer and turned it into something that looks like it wouldn’t be out of place on the International Space Station.

While custom 3D printer builds like this still trickle in from time to time, we’re seeing far fewer now than we did back when machines like the 3D20 hit the market. Most people are more than satisfied with commercial entry-level desktop printers, and aren’t looking for yet another project to tinker with. There’s nothing wrong with that, though we certainly wouldn’t complain if the recent interest into more advanced high-temperature filaments triggered something of a bespoke 3D printer renaissance.

Continue reading “Dremel 3D20 Printer Gets Modern Overhaul”

Dremel Workstation’s New Job: Applying Threaded Inserts With Cheap Soldering Iron

Dremel has been helping people fit square pegs into round holes for years, and [concretedog] saw that the Dremel 220 Workstation — a piece of hardware similar to a drill press — could be convinced to hold a cheap soldering iron just as easily as it holds a rotary tool. A soldering iron makes an effective thermal insert tool, and the job of heating and pressing the threaded metal rings into plastic is made much easier when it can be done similar to operating a drill press. With a few modifications and a 3D-printed adapter, the thermal insert rig was born.

Whenever one is working around a design that already exists, it pays to be flexible and adjust to the unexpected. The Dremel 220 has a holder intended to clamp a rotary tool, and the original plan was to simply design and print an adapter so a soldering iron could sit in place of the rotary tool. That plan changed upon realizing that the entire rotary tool holder disconnected from the tool’s frame with a single bolt. It made much more sense to make the soldering iron replace the rotary tool holder, instead.

The resulting modified soldering iron is mounted via standoffs to a 3D-printed adapter with a copper foil heat shield. [concretedog] admits it’s not ideal from a heat management perspective, but it makes a fine prototype that seems to work well for light duty. The next step would be a metal version.

If you’re intrigued by threaded heat-set inserts, you can learn all about how to use them from Joshua Vasquez’s guide to the handy things. And should you prefer to make your own DIY press from 3D printed parts and off-the-shelf hardware, we have that covered as well.

Solving Buyer’s Remorse With A Rotary Tool And Soldering Iron

At this point, it’s pretty clear that USB-C has become the new standard connector for an increasing amount of applications, but predominantly charging. Even Apple is on board this time, and thanks to backwards compatibility, you don’t have to abandon devices using the older standards you may prefer for their simplicity or superior lint-resilience either. For [Mat] on the other hand, it’s USB-C all the way nowadays. Yet back in the day when he bought his laptop, he had the price tag convince him otherwise, and has come to regret it, as all the convenience of a slim design is cancelled out by dragging a bulky charger for the laptop’s proprietary charging port along.

Well, as the saying goes for situations like this: love it, leave it, or get out the tools and rework that sucker. Lucky enough, the original charger provides 20 V, which matches nicely the USB power delivery (PD) specification, and after opening up the laptop, [Mat] was happy to see that the interior provided enough room to fit the USB-C module he was planning to use. Even better, the charging port itself was a standalone component attached to a cable, so no modifications to the mainboard were necessary. Once the USB-C module was soldered to that same cable, the only thing left to do was carving a bigger hole on the laptop case, and saying good bye to the obsoleted charger.

The downside is of course the lack of actual USB functionality with that shiny new charging port, but that was never the goal here anyway. With more and more USB-C devices popping up, it’s also no surprise that we’ve seen modifications like this before, and not only with laptops. In case you’re thinking of upgrading one of your own devices to USB-C, and do wish for actual USB functionality, don’t worry, we got you covered as well.

Continue reading “Solving Buyer’s Remorse With A Rotary Tool And Soldering Iron”