Tablet Cover From Old Hardcover Books

Here’s a way to look hip and destroy books at the same time. This table cover is made from an old hardcover book. It’s not difficult to do, an afternoon is all it takes, and if you follow all of the instructions we’d bet this will hold up for a long time.

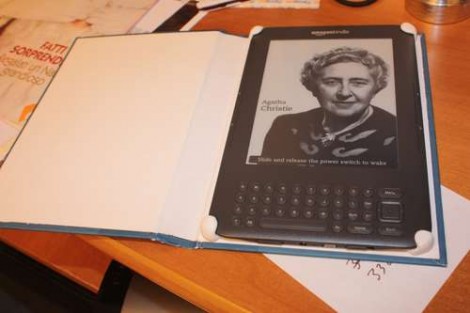
It’s basically another version of the Moleskine cover for the Kindle Fire. You find a donor book (second-hand shops are packed with ’em) with a hardcover which you really enjoy. Kids books would be the most fun because of the artwork – if you can find one thick enough. With book in hand remove all of the pages. This will leave the binding a little flimsy, and since this is a project by the company which make Sugru, you can see why they used the moldable adhesive for that purpose. But check out the brackets in the picture above. They covered the Kindle in cling wrap, then molded Sugru around the corners. Once set, it can be peeled away from the plastic wrap, but will retain its shape. Nice.

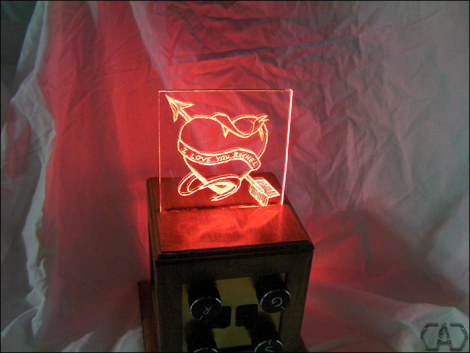
A Lot Of Love Went Into This Glowing Valentine

[Will] didn’t pick up a card, rose, and bottle of wine for Valentine’s Day like most guys. Nope, he planned way ahead and built this color-selectable glowing Valentine. When we first saw it, we figured he threw some LEDs together with a microcontroller and edge-lit a piece of acrylic. While that is technically what happened, there was a lot more design and craftsmanship at play here than you might think.

First off, the controller board is a beautifully designed two-sided PCB which he etched rather than throwing a mess of wires and hot glue into an enclosure. Speaking of enclosures, he grabbed a wooden picture box from the big box store and used a piece of brass plate stock to serve as the control panel. The enclosure was finished with tinted polyurethane after having a slit added to the top for the acrylic. The message itself was milled using an engraving bit and a Dremel tool. This was done by hand and we think achieves a finished look that is comparable to the CNC milled ornaments we’ve seen in the past.

Get a good look at the device and a demonstration of its features in the clip after the jump.

Continue reading “A Lot Of Love Went Into This Glowing Valentine”

Space; It’s A Junkyard Until The Swiss Get Their Way

The Swiss plan to clean up the near-space environment. They just announced a debris removal device which they plan to launch in three to five years. The first goal of the program is to scoop up two satellites. Both of them are Swiss owned, but there’s something very James Bond like that pops into our heads when we hear that.

We’re sure you already know there’s a space junk issue in orbit. But did you know that NASA tracks a half-million pieces of orbital debris? Cleaning that up does sound like a good thing. The plan is to detect the offending item, match its trajectory, grab it somehow (which includes halting any spinning that it’s doing), then encapsulating everything for an eventual re-entry. Looks like they plan on the whole robot burning up along with the junk during that final stage.

We keep hearing about ways robots will clean up the messes we make. Hopefully we’ll see these in action at some point.

[via Reddit]

Hexbug Code Rewrite Makes It A Walking Line-follower

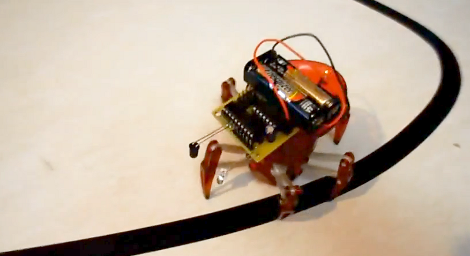
You know you’ve got a good hardware platform if you can easily repurpose it with a code rewrite. And that’s what [Eric] continues to do with these little Hexbugs. This time around he’s bent the IR emitter and receiver downward to use as a reflectance sensor. This gives it the ability to follow a dark line on a light surface.

He originally patched an MSP430 into the $25 RC toy. The IR pair was intended for obstacle avoidance, which we saw in a recent links post. This hack does a great job of repurposing the avoidance system. Since the add-on hardware is mounted on a motorized turret, the single sensor pair can sweep back and forth to find the line it will follow. In one way this is better than most line followers which use multiple sensors mounted to the body. But the drawback is that this results in slower travel and won’t be winning any contests. Don’t miss the demo clip after the break.

Continue reading “Hexbug Code Rewrite Makes It A Walking Line-follower”

Intro To Phase-Locked Loops

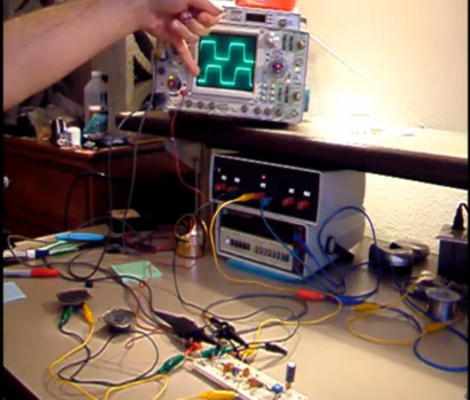
[Kenneth Finnegan] put up a lengthy primer on PLLs (Phase-Locked Loops). We really enjoyed his presentation (even the part where he panders to Rigol for a free scope… sign us up for one of those too). The concepts behind a PLL are not hard to understand, and [Kenneth] managed to come up with a handful of different demonstrations that really help to drive each point home.

A PLL is made up of three parts: a phase detector, a low pass filter, and a voltage controlled oscillator. It can do really neat things, like multiply clock speed (you see them in beefier chips like the ARM architecture all the time). The experiments seen in the video use a CD4046 chip which has two different types of phase detectors. The two signals displayed on the oscilloscope above compare the incoming clock signal with the output from the VCO. Depending on the type of phase detector used, and the quality of the low-pass filter, these might be tightly synchronized or wildly unstable. Find out why by watching the video embedded after the break.

Continue reading “Intro To Phase-Locked Loops”

3d Printer Software Tutorials

It’s no secret that the 3D printer community is extremely fragmented. With three models of RepRaps, three printer kits from Makerbot, and hundreds of ‘printers of the week,’ it’s extremely frustrating for beginners to wrap their heads around the pros and cons of each machine. The software for these printers is segmented nearly as much as the hardware itself, but thankfully [Mike] has put up a series of videos so beginners can wrap their head around all the software packages.

[Mike] used Alibre 3D CAD software to generate the .stl files for all his printable objects. These .stl files were converted into printer-readable GCode by the very popular Skeinforge. The GCode is sent over to [Mike]’s SUMPOD with ReplicatorG, an awesome program that serves as the front end to a printer.

Although we’d like to see a tutorial for Sfact, the new hotness in .stl to GCode conversion, [Mike] does a very good job at breaking down the complexity of Skeinforge into manageable bites.

Etching PCBs With Vinegar

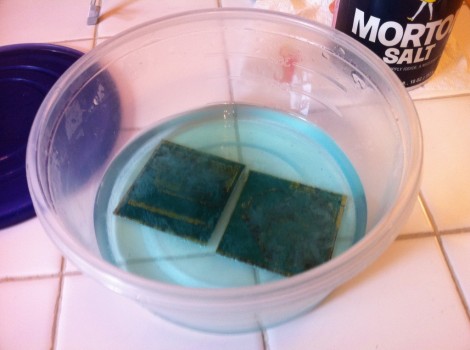
When we hear about etching PCBs at home we assume that either Ferric Chloride or Cupric Chloride were used to eat away unmasked copper from the boards. But [Quinn Dunki] just wrote up her PCB etching guide and she doesn’t use either of those. Instead, she combines vinegar, hydrogen peroxide, and salt. It’s easier to find vinegar than muriatic acid (Cupric Chloride is made using this, peroxide, and adding the copper) so this is something to keep in mind if you’re in a pinch (or a Macgyver situation).

The rest of the process is what we’re used to. She’s using photoresistant boards which can be masked with a sheet of transparency instead of using the toner-transfer method. Once they take a bath in the developer solution she puts them in a shallow dish of vinegar and hydrogen peroxide along with a teaspoon of salt. She wipes the surface with a foam brush every minute or so, and inspects them every ten minutes to see if they’re done.

She does discuss disposal. Seems that she throws the solution in the garbage after each use. The liquid will contain copper salts which are bad for wildlife. We’ve heard that you should neutralize the acid and make a block of concrete using the liquid, then throw it in the garbage. Does anyone have a well-researched, ethical, and environmentally friendly way of getting rid of this stuff?