Making Plastic Filament At Home

There’s one problem with the popularity of plastic-extruding 3D printers such as the RepRap and Makerbot; since they’ve become so popular, the price of plastic filament has skyrocketed over the past few years. Without a way to produce filament at a hackerspace or home lab, the price of 3D printed objects will remain fairly high. Project Spaghetti hopes to rectify that by building a machine to make plastic filament for 3D printers.

The folks behind Project Spaghetti – a loose amalgamation of makers going under the title of Open Source Printing, LLC – have successfully built a machine that is able to produce short lengths of plastic filament.

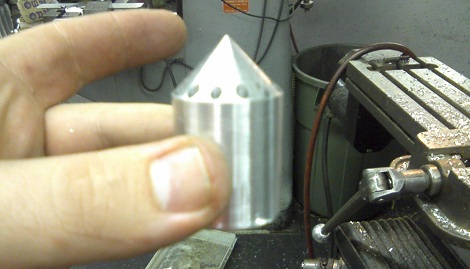
Early machines used a plunger to press small pellets of ABS plastic through a heated steel pipe to produce filament. There are a few problems with this approach, especially when the temperature is set to 480F, but the team was able to make a bit of filament with this design.

Although the team is using a piston to force melted plastic out of a nozzle, they do have a screw-drive ‘plan B’ in the works. This design should allow for continuous extrusion for theoretically endless reels of plastic filament, every RepRappers dream and a neat way to win 40 grand. Continue reading “Making Plastic Filament At Home”

3D Printer Control For The Raspi

Instead of dedicating his laptop to control his RepRap all night, [Walter] is using a Raspberry Pi as an Internet-enabled front end for his 3D printer.

Before [Walter] got his hands on a Raspberry Pi, he set up his laptop next to his RepRap and let the machine do its work for hours on end. Obviously, this tied up his laptop for a while so when his Raspi was delivered he was eager to offload the responsibilities of controlling a printer to his new Linux board.

Right now, [Walter] has his Raspberry Pi set up as a web interface able to control his printer similar to Pronterface. We have to note that the Raspberry Pi isn’t driving servos or feeding filament onto the bed; those responsibilities are still handled by the RepRap electronics, but the ability to use a 3D printer over the web is still pretty cool.

[Walter] is putting the finishing touches on his 3D printer web interface, after which he’ll upload everything onto the git. Planned features for future updates include uploading gcode from the web and an option to connect a webcam for visual feedback when controlling a remote printer.

Video demo after the break.

Continue reading “3D Printer Control For The Raspi”

Eventorbot 3D Printer

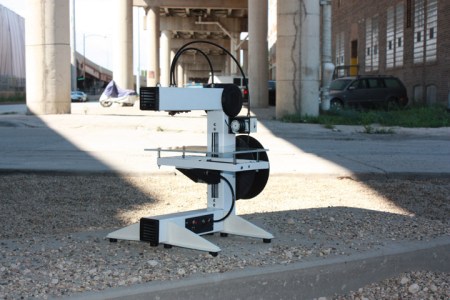
Tired of 3D printers that use t-slot construction? The Eventorbot is yet another open source 3D printer,  but it’s built out of steel and 3D printable parts. The design also aims to minimize the effect of vibrations by using a single solid frame. All of the wiring runs through the steel frame, which gives the printer a professional look.

The Eventorbot page on the RepRap wiki provides details on how to build your own, along with STL files for all the printable parts. If you want to see renders of the parts, they’re all available on Thingiverse. The material cost is $300-$500, and the assembled cost is quoted at $799.

Like many of the open source printers we’ve seen, this one uses the RepRap Mega Pololu Shield (RAMPS) to control the actuators. This is attached to a Sanguinololu motherboard, which runs the RepRap firmware.

The Eventorbot Youtube channel has a collection of videos detailing the assembly of the robot. Check out a video of a test print after the break.

Via Make

Continue reading “Eventorbot 3D Printer”

Playing Around With Kerf Bending

With laser cutters popping up in hackerspaces and maker’s tool sheds like weeds, it’s no surprise we’re seeing an explosion in manufacturing techniques that would be nearly impossible without a laser cutter. One of these techniques is kerf bending, a method of bending plywood simply by burning patterns along the desired bend. [Martin] just put up a great tutorial on kerf bending with a laser cutter, and even came up with a few very interesting patterns that can be used to build your own case with rounded corners.

[Martin]’s adventures into kerf bending began with a small radio transmitter case he built. This case used the very common ‘vertical slit’ method, but in the first version of the case, the slits were placed too far apart. By moving the slits closer together, [Martin] was left with a very easy to bend and very strong wooden case.

There are also a few other patterns [Martin] tried out. A herringbone pattern made for a wooden case nearly as bendable (and a little stronger) as the traditional vertical slit method. From there, [Martin] branched out into more esoteric patterns such as a medieval cross and Space Invader pattern, both ideal for your next highly stylized enclosure.

In the end, [Martin] says just about any pattern will work for kerf bending, so long as the design isn’t diagonal to the bend. We’d love to see some proper engineering analysis for kerf bending, so if you can figure out the optimal pattern for high strength, low machine time bends, send it in on the tip line.

DIY Laser Cutter From Non-DIY Parts

[Jerry] missed the laser cutters he had been using at the local TechShop. It closed down and after seeing some hardware in a surplus store he decided to build a laser cutter to call his own. You won’t be disappointed by his build log. It’s got a ton of hi-res images and plenty of explanation.

Often, cost is the key consideration in these types of builds. [Jerry] spent a little more than average, but look what he got back out of it. This started as a CNC machine aimed at loading silicon wafers for a company making electron microscopes. It’s barely been used, and the light-duty specs will work just fine with a laser cutter as the gantry won’t be moving much weight or fighting the rotational force of a mill motor. He tore out the stock controllers and built his own, adding a q-switched 355nm Frequency Tripled DPSS laser along the way. We’re not quite sure what that means… but in laymen’s terms it’s an ultraviolet laser source. See the finished unit cutting out some Kapton in the clip after the break.

Continue reading “DIY Laser Cutter From Non-DIY Parts”

Portable Radio Station Gets A Beautiful Case

[Martin] put together a simple portable radio unit to take some MP3s with him while he’s out and around. The build was simple; just a no-name Chinese MP3 player, a battery, and an FM radio transmitter. To give his project a little more pizzazz, he came up with a very handsome laser cut wooden case to turn what would be a bunch of wires and components into an attractive build.

[Martin]’s case makes wonderful use of the kerf bending technique. By cutting small staggered lines in a piece of plywood, [Martin] was able to bend his laser cut enclosure into a surprisingly tight radius. With the help of a pair of laser cut forms and a bit of hot water and glue, he was able to make the shape of his case permanent.

The top and bottom of his case are also laser cut plywood, but [Martin] included a translucent plexiglas logo on the top. When his radio unit is activated a LED inside his project box lights up, illuminating his personal logo.

Kerf bending is something we’ve seen before, and we’re looking forward to seeing more project boxes use it in the future, hopefully with the application of a veneer to cover the diamond-shaped holes.

Inebriator Servers Up All The Cocktails

The robotic bartender, lovingly named the Inebriator, is a work of mastery. We think you’ll be surprised by the simplicity and grace of its beverage dispensing system.

The most obvious part is the lineup of nine liquor bottles across the top with LED backlight for style. Each has a valve on it that is meant to be pressed on by the rim of a glass in order to dispense its payload. To dose the glass with alcohol the Inebriator drives a trolley along one axis beneath the line of bottles. When in position it has an actuator arm the rises up and depresses the bottle’s valve mechanism. Once all the liquor is in the glass it moves to the left side to be topped off with mixers. These are stored in bottles in a cooler under the table. They are pressurized with nitrogen, and an electronically actuated value lets the liquid flow. Drinks are selected on a character display, and there’s a weight sensor in the trolley to ensure that a drink isn’t mixed without a vessel to receive it.

You don’t want to miss seeing this in action after the break.

Continue reading “Inebriator Servers Up All The Cocktails”