Seeing With Another Person’s Eyes

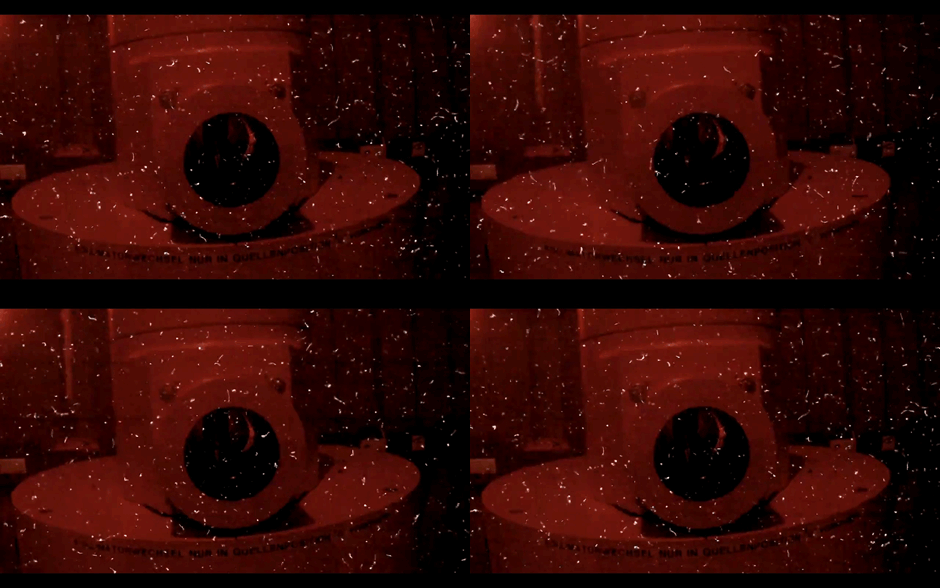
We suppose they could just trade shoes, but that wouldn’t be a hack. [Timothy] wanted to design a team-building exercise at work, and he figured the best way to get some empathy would be to have people swap eyes. He calls his project eyeSwap and it is supposed to, “put the eye back in team.”

[Tim] found a few CRT viewfinders in a junk box attached small video cameras to each one. During the ‘training phase’ of his team-building exercises, both people playing the game complete a few hand-eye coordination tasks to get a feel for the rig. After the training phase, the inputs are swapped; Alice’s cameras are sent to Bob’s viewfinders and vice versa. The participants then complete the same tasks they did during the training phase.

The tasks aren’t that hard – putting balls into holes, for example – but it does require a huge amount of communication and coordination. eyeSwap reportedly builds trust and empathy towards others, and looks like a lot more fun than a ‘trust fall.’

Check out the video of two people playing eyeSwap after the break.

Continue reading “Seeing With Another Person’s Eyes”

Auto-Focus Assist Hack Keeps Improving

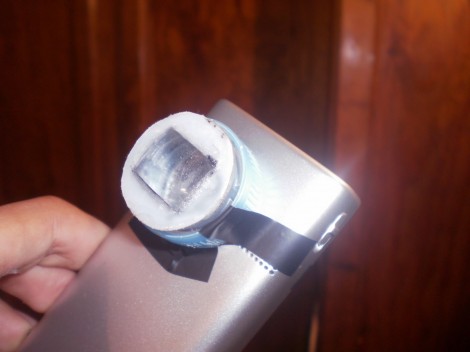
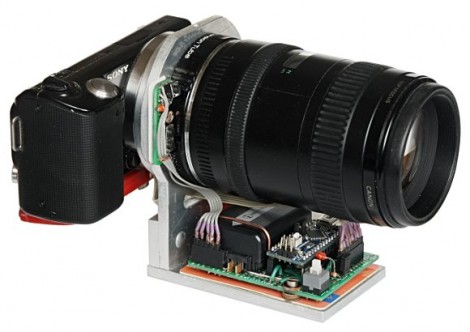
[Adrian Onsen] keeps making improvements on his auto-focus assist hack for DSLR cameras. The module seen above is version 3.0, which makes a few changes to the previous hardware and also presents a much more finished look.

With version 2 [Adrian] was using a defocused laser to illuminate dark subjects so the DSLR auto-focus could be used. It worked, but wasn’t really ideal. This time around he’s swapped out the laser diode for an autofocus assist lamp salvaged from a Canon 550EX he picked up ‘as is’ on eBay. It is mounted on the front of his project enclosure, using two alkaline batteries for power. It sounds like [Adrian] is struggling a bit with his circuit design. He want’s to make it work with either alkaline or rechargeable AA batteries (just two, down the from four AAAs used in version 2) but so far the rechargeable are a no-go. They power the circuit, but must not put out enough light for the sensor to work.

Future plans include getting rid of the external cords by adding a hot shoe connector.

The Picture Post – Observe Your World In Extreme Slow Motion

The “Picture Post”, a tool for a program going on through the University of New Hampshire, is a method of taking what amounts to extreme time-lapse photography. The purpose of this project is to observe the world around you with a 360 degree view taken at a regular interval.

The setup is quite simple consisting of a 9 inch diameter post, and an octagon to set your camera against.  Just place your camera one edge, take the picture and repeat around the octagon until done. You can register on their site to make your post official and contribute to society’s general knowledge about the environment and seasonal changes.

Although interesting in itself, this concept could be applied to many situations that one would want to record in this manner.  For instance, a “hacker post” could be set up in a hackerspace for members to record their projects on or even the progress of the building itself.  For another much less developed way to take photos, check out this trigger device using air freshener parts!

via [Make Magazine]

Zero-G Experiments Will Make Some Pretty Pictures

Does a yo-yo work in zero-g? How about a paper airplane? These questions were answered in 1985 on the Space Shuttle Discovery, but reproduction of results is the cornerstone of the scientific method. [Rob] is about to reproduce some of the awesome zero-g pictures by riding on a vomit comet and taking a few pictures of water globes colliding.

For the last few months, [Rob] has had a standby ticket on the G-Force One, a plane that takes passengers on parabolic arcs to simulate microgravity. He was lucky as his standby ticket allowed him to take a few experiments on board, so [Rob] decided there’s just not enough awesome pictures of water colliding in zero-g.

He built a rig out of micro t-slot aluminum. A DSLR is mounted to the frame along with a few ‘test tubes’ containing water. When [Rob] blows through a tube, a small sphere of water will be released to collide with other object. Think of it as the nerd’s version of water splash photography.

Of course, a trip through zero-g wouldn’t be complete without a few more experiments. [Rob] plans on testing a few toys to see if yo-yos ‘sleep’ without gravity (they don’t), and if a grandfather clock works on the moon (there’s a month-long day, so kind of). We can’t wait to see [Rob]’s pictures once he comes back to Earth.

DIY LED Photography Lights

led-light-box

[Markus] had been drooling over some LED panels to use as a soft light source for photography, but being a hobbyist, he didn’t want to spend a ton of money to buy them. He figured that he had enough electronics know-how to build his own panels, while saving a boatload of cash in the process.

He hoped to keep the total cost under £100, so along with new items like LED light strips, he would have to use some stuff he had sitting around, like the metal cooking containers that make up the body of the lights. While originally planned for use in a different project, it turns out that the cooking containers were ideal for his lighting setup, since they are both durable and great heatsink material.

The remainder of the build is pretty straightforward. [Markus] used a pre-made LED dimmer to control the panel’s brightness, along with some tinted plexiglas to diffuse the light while bringing the color temperature into a more usable range.

While he missed his £100 mark, the lights look great – we just might have to build a few of them ourselves.

Insane Macro Photography Rig

[fotoopa] just put up a Flikr build log of his 3D macro photography rig he uses to take pictures of insects in flight. Outside Hollywood or National Geographic, we’ve never seen a crazier photography rig.

[fotoopa]’s build is based around two cameras – a Nikon D200 and D300. These cameras are pointed towards the subject insect with two mirrors allowing for a nice stereo separation for 3D images. Of course, the trouble is snapping the picture when an insect flies in front of the rig.

For shutter control, [fotoopa] used two IR laser pointers pointed where the two cameras converge. A photodiode in a lens above the rig detects this IR dot and triggers the shutters. To speed up the horribly slow 50ms shutters on the Nikons, a high-speed shutter was added so the image is captured within 3ms.

[fotoopa]’s 2011 rig took things down a notch; this year he’s only working with one camera. Even though he didn’t get any 3D images this year, the skill in making such an awesome rig is impressive.

via (diyphotraphy.net)

Panning Time-lapse Rig

Here’s a simple camera setup that lets you make your own panning time-lapse videos. It uses a couple of motors driven by an Arduino to snap successive still images which can later be rolled into a video format.

[Acorv] was not thrilled with the fact that his new Lumix LX5 didn’t have a time-lapse option built-in. But luckily it does have a standard connector on top for an external flash. He saw on a forum post that someone had built a jig which mounts to the flash bracket and uses a servo motor to depress the shutter release button. He recreated that and had half of this hack done.

The panning portion is facilitated by the Gorillapod. This particular model offers a swivel feature. This is automated by connecting it to a stepper motor with a piece of string. As the stepper turns the string is wound on a spool and gradually pans the camera. Simple, and it seems to work great. Check out the video after the break to see a test which was shot at sunset on the shores of a lake.

If you have a camera which offers an IR remote shutter release the time-lapse portion can be handled with an IR intervalometer, making the mechanical build a bit easier.

Continue reading “Panning Time-lapse Rig”