Brute Force BIOS Hacking Using The Arduino

This clever hack uses an Arduino to do a brute force attack on a computer’s BIOS. In theory, this technique could be used for other programs, but it’s use would be limited since there’s no way to account for too many wrong passwords.

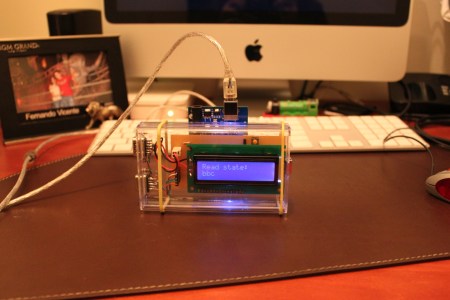
The Arduino generates and outputs the possible password emulating a USB keyboard. When this is done, the pixel in the middle of the screen is read. This is done by reading the analog red signal synced up with the corresponding horizontal and vertical pulses. As with any hack, there were some programming issues that had to be overcome (including one that locked up the keyboard emulator), but this was resolved, and the code is available if you wan to build your own.

Hardware for this build is simple, involving a LCD output, a button to stop everything, and a couple diodes to get the USB keyboard working correctly. This hack turned out quite nicely, and the code and schematics are included!

EagleUp Pulls Your PCBs Into SketchUp

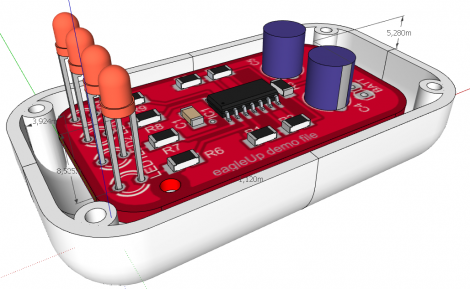
[Karl] wrote in to tell us about a software package called EagleUp that will import your Eagle CAD PCB designs into Google SketchUp. It bridges the gap between the two using the open source image processing software ImageMagick.

As you can see above, you’ll end up with a beautifully rendered 3D model of your hardware. This is a wonderful way to make sure that your enclosure designs are going to work without needing to wait for the PCBs to arrive from the fab house. It is available for Windows, OSX and Linux (although the last time we tried to run Sketchup under Wine nothing good came of it — perhaps it’s time to try again).

In [Karl’s] case, he’s working on an Arduino compatible board based around the Xmega. He mentions that EagleUp is a great way to get an idea of how component placement will end up, and to see if the silk screen layer is going to turn out well or not. Here’s a link to one of his test designs.

Electronic Recorder Conversion

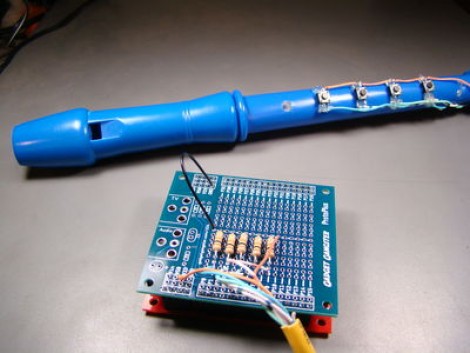
As we wrote the title to this feature we can see why [Jeff Ledger] calls it an electronic flute and not a recorder; this is a musical instrument and not something for archiving audio. Confusion aside, we’re all familiar with these plastic ‘musical’ instruments. Many elementary schools in our area require students to buy one as part of music class. So it shouldn’t be hard to find one if you want to try this for yourself (heck, [Jeff] grabbed his a the dollar store).

Basically, he’s replaced the finger holes with momentary press switches, then uses a Propeller dev board to turn the button presses into music. It’s simple and quick, but what does it for us is the breath actuator. Sure, you can set this up to play whenever a button is depressed, but [Jeff] went that extra mile and added a piezoelectric element to the bottom. When you blow through the instrument it flexes slightly, generating a tiny current that can be measured by the microcontroller. Check out the short clip after the break.

Do a little more work and you could turn this into some type of musical game controller. We’re thinking Zelda!

Continue reading “Electronic Recorder Conversion”

POV Bauble Uses DIY Accelerometer To Sync The Image

So we saw this tip come in and thought–oh, another POV device. We watched the video (embedded after the break), took a sip of coffee, then almost sprayed the beverage all over the computer when we realized that this uses a diy sensor to synchronize the POV image.

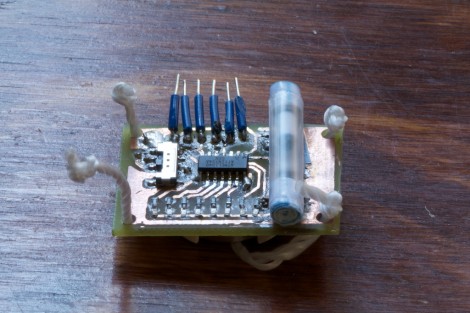
[Ch00f] came up with the idea for the sensor after seeing a similar implementation on a commercial POV toy. Instead of using a proper accelerometer to sense the motion, the toy uses a plastic bead in a channel. When you move the body of the toy the bead rolls to one end or the other, covering or exposing a reflective sensor.

A similar sensor is used here. A drinking straw servers as the channel, with a paper-covered nylon screw as the bead. [Ch00f] cut a window in the bottom of the straw for his reflective sensor, then sealed each end with a wad of paper.

This method works, but not as well as he had hoped. It seems the refresh rate and timing of the particular sensor he’s using is rather poor. If it were replaced with one that is simply and IR LED and phototransistor (like the sensors from [Jack’s] last video) he thinks it would work a lot better.

via Buildlounge.

Continue reading “POV Bauble Uses DIY Accelerometer To Sync The Image”

I Am Root! — Kindle Fire Edition

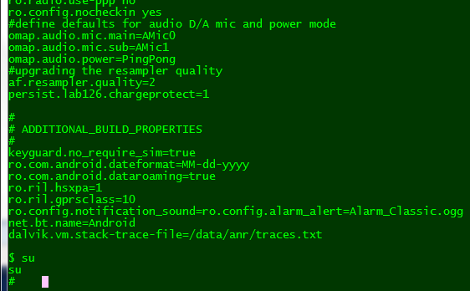
Amazon’s new tablet reader, the Kindle Fire has been rooted. Early this morning [Death2All110] posted the steps he took to gain root access to his device (which is so fresh out of the box it still smells new). The heavy lifting is done by a package called SuperOneClick which aims to root all manner of phones and devices running Android.

There’s a bit more than the one click necessary, but not by much. Using the Android Developer Bridge in conjunction with the SDK you need to put in a value that will be recognized as the VID. From there, turn on the ability to install apps from unknown developers, re-enumerate the device on your PC and run the one-click package.

What can you do with this? Well, it completely opens up the Android OS so that you can bend it to your will. We haven’t seen any demonstrations yet, but it should be even better than what we saw done with the Sony PRS-T1.

[Addictive Tips via Reddit]

Making Aerogel At Home

[Ben] outdid himself. He successfully made monoliths of silica aerogel in his garage. Aerogel, the light-weight solid that has been referred to as ‘hard air’ is really freaking expensive especially in non-granulated form.

The techniques behind producing aerogels have been on the Internet for a fairly long time. A few uncommon chemicals and a supercritical drying chamber are required for production, meaning it takes a lot of know-how to make hard air at home. Somehow, [Ben] got ahold of some tetramethoxysilane, the hard to come by ingredient and made a supercritical drying chamber out of pipe fittings and liquid Carbon Dioxide.

In the end, [Ben] was able to make a few small pieces of aerogel. The size of his pieces were constrained by his “mold” (actually a syringe) and the size of his drying chamber. It’s very possible [Ben] could build a larger supercritical drying chamber and make larger pieces of aerogel that would be sold commercially for hundreds of dollars.

Check out the very informative walkthrough of [Ben]’s process after the break. It’s 10 minutes long and makes for a great lunch break video.

Continue reading “Making Aerogel At Home”

Ice On Your Turkey Makes It Tender, Apparently

Turkey day is fast approaching and for those of us not cool enough to be rocking the deep-fried turkey this year we’ll have to suffer though a potentially dry oven-roasted bird. Chef [Justin] came up with a great way to prevent dried out white meat on a turkey using ice of all things.

The enemy of moist and tender breast meat is heat. Cooking meat for too long will dry it out. There’s a problem, though: the breast is the thickest part of the bird which means it will take longer than the legs or thighs to reach the necessary 160 degrees. [Justin] figured that if he could cool down the breast with ice, it will take longer to cook and both the white and dark meat will come out perfectly.

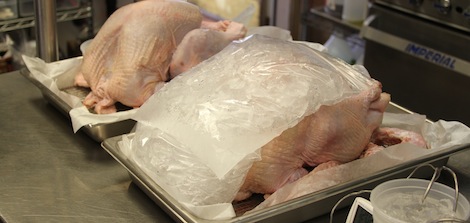
[Justin] set up a test with two 15-pound birds. Both turkeys were allowed to come up to room temperature, then ice packs were put on the breast of one bird for 15 minutes. This lowered the temperature of the experimental breast by a few degrees. Both birds were then thrown into the oven.

After coming out of the oven, both birds looked great. The bird treated with ice packs appeared to be more tender and moist. Sounds like the perfect thing to pull out of our bag of tricks next week.