The Weighted Companion Cube Will Never Threaten To Stab You And, In Fact, Is A Subwoofer

From the techPowerUp! forums comes an awesome weighted companion cube subwoofer built by the metonymical user named [Cube].

This build started off as a coffee table that was to have an oval glass top (no word if the edges were going to be blue or orange). The guts of the cube are taken from a 400 Watt sub. As any good sub builder would, [Cube] kept the air volume and port tuning of the donor box.

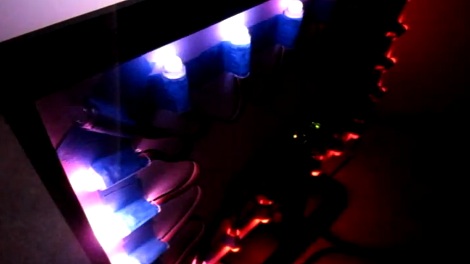
We’ve seen a companion cube sub before that featured EL wire for a ‘glowing cube’ effect, but [Cube] may have taken things a little too far by including glowing rings on each side of the cube. The rings lit by 2,500 LEDs mounted on pieces of perspex and wired point-to-point. While [Cube] claims he’s ‘not a electronics guru,’ he certainly has a lot of patience to assemble those lights.

Check out [Cube]’s YouTube build video after the link. Credit to [Todd] for sending this one in.

Continue reading “The Weighted Companion Cube Will Never Threaten To Stab You And, In Fact, Is A Subwoofer”

The Partyscroller LED Display

As [Plasma2002] put it, “Those jumbo screens at concerts that display your text messages can be a lot of fun. Wouldn’t it be great if you could have the same thing for your own parties or social gatherings?” The answer to this question came in the form of this hack, a scrolling marquee sign that guests simply had to text to get it to display messages. Apparently guests at the party loved the device, and who wouldn’t?

More importantly for [HAD] though, is that [Plasma2002] decided to show everyone how it’s done. He gives us an overview of the process via a nicely illustrated block diagram, then breaks everything down into the actual code used. A Google voice account is used as the dial-in number and everything is kept anonymous. A “bad-word” filter is used to keep everything semi-appropriate.

Really a cool device, and one that we hope will show up at hacker’s parties everywhere. Who knows, maybe something like this could enjoy mainstream success as well. Check out the video after the break to see this device in action! Continue reading “The Partyscroller LED Display”

Stream Music Anywhere In Your House With These WiFi Speakers

wifi_speakers

[Rui] needed an easy way to play music in several different zones from one centralized location, but he didn’t want to run any new wiring in the process.

He figured that the best way to do this would be to stream his music directly to his speakers over Ethernet. Earlier this year, he put together a handful of Ethernet-connected speaker nodes using a few Arduinos equipped with both Ethernet and MP3 shields. To interface with these speaker nodes, he wrote an application utilizing VLC’s network streaming engine. This software monitors his network for newly attached speakers, adding them to his inventory automatically. He can choose to play music on any set of speakers using a multicast audio stream.

The setup was pretty slick, but what about locations that didn’t already have Ethernet drops? He thought of that too, revising his design just recently. The newest set of speakers he constructed ditches the Ethernet board for a Wifly shield, all of which he crammed inside the speaker cabinets. Now, he has the ability to stream music anywhere he’d like, no matter what sort of infrastructure is in place.

If you have a need to do this in your home, [Rui] has made his software available for free on his site, so be sure to grab a copy.

Continue reading to see a short video of the speakers in action.

Continue reading “Stream Music Anywhere In Your House With These WiFi Speakers”

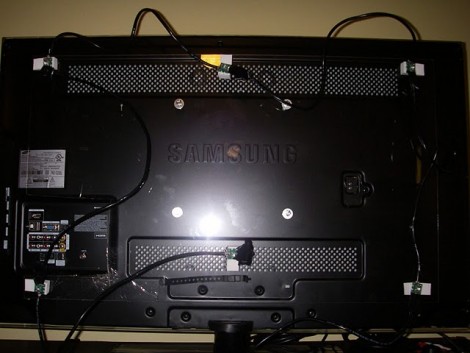
Adding Ambilight Clone System To Your Home Theater Just Got A Big Price Cut

Whenever we get a tip claiming a project is cheap and easy we raise a cynical eyebrow. But [Yonsje] isn’t telling us a story, his Amiblight clone really does boil down the complexity and slash the price.

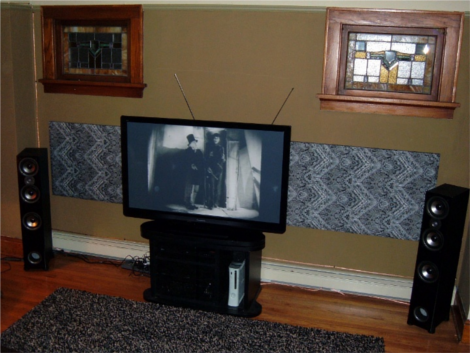
For the uninitiated, this is a clone of the Philips Amilight system that has been an option with some of their TVs over the years. It puts RGB LEDs on the back of the frame, pointed at the wall. They are tuned to the edge colors of the display, linking the color of the ambient light in the room to the colors on the screen. We’ve seen a ton of clones over the years, just search our blog for “Ambilight”.

Like the others, this iteration depends on you playing back video from a computer. [Yonsje] is using an Arduino with his own shield to connect to the HTPC. NPN transistors in the shield drive the RGB LEDs. The real cost savings is in his lighting source. A Deal Extreme RGB LED bar costs just $11.30 including shipping, and can be cut into six different segments for even spacing around your television. Check it out in the clip after the break.

Continue reading “Adding Ambilight Clone System To Your Home Theater Just Got A Big Price Cut”

Pass The Bomb Electronic Drinking Game

[Ragnar] and his friends were getting tired of the usual Friday night drinking games. They went through dice games, card game, and TV show based games before [Ragnar] retired to his workbench to whip up an electronic solution that would randomly pick a player and assign a certain number of drinks. That’s a novelty at first but not really a game. After letting the project sit for some time he revisited it and came up with a more advanced solution. The box seen above is his second attempt; a game called pass the bomb.

The case is a black aluminum project box. The user interface includes a 20×4 character LCD and three buttons. Check the video after the break for the menu system as well as english translations. Once turned on you can set the sensitivity for the accelerometer and choose the game. For now, pass the bomb is the only option – a game that counts down to a digital explosion. Carefully pass the device to the next player without upsetting the accelerometer or it’ll go BOOM and you’ll have to drink.

We’d prefer to enjoy a nice frothy beverage rather than searching for reasons to throw back some shots, but whatever floats your boat.

Continue reading “Pass The Bomb Electronic Drinking Game”

Playing DVDs On An IPad

[Harrison Jackson] figured out how to add DVD playback to an iPad. It doesn’t require a jailbreak, or any hardware modifications to your prized tablet. The work is done with some server-side processing and played back through the browser.

The popular open-source multimedia player VLC has the ability to encode from the command line during playback. [Harry’s] option flag mastery of the program allows him to convert a DVD to a 320×240 format that is iPad friendly. But this alone doesn’t get the video any closer to being on the iDevice. You’ll need to be running a webserver that can stream video. This example is on OSX, but since he’s using an Apache server it should be simple to reproduce on any Unix variant. Once you’ve enabled m3u8 files in the Apache mime-types, the iPad browser can be pointed to the file address VLC is kicking out and you’ll be watching a movie in no time.

We’ve wondered about replacing our home theater front-end with an ATV 2 running XBMC but the thought of having no optical drive in the living room requires some contemplation. If this becomes a feasible option (that isn’t downscaled from DVD quality) it will be a no-brainer to make that jump.

Don’t miss the demo video after the break. Full instruction are in the comment section of that clip.

Continue reading “Playing DVDs On An IPad”

A MAME Cabinet Fit For A Doctor (Who)

tardis_mame_console

While many people would be satisfied leaving a MAME console on their desk, others take the time to put their MAME creations in a nice, authentic arcade cabinet. Some people like [Simon Jansen] take the craft to a whole new level, crafting a TARDIS from the ground up in order to house a MAME console.

It all started with a computer that had no real purpose. [Simon] decided it would be great to use as a MAME console, so he started brainstorming ideas for an enclosure. As he tells it, he was staring out a window looking for inspiration when his eye caught a giant billboard for [Dr. Who], complete with a TARDIS. The rest was history.

The MAME cabinet is about 3/4 the size of an on-set TARDIS, and crafted mostly from MDF. Plenty of time was spent analyzing the different TARDIS designs featured on the show over the years, paying special attention to even the smallest of details. Once the construction of the TARDIS was complete, [Simon] started work on the MAME portion of the project.

His MAME console was built to completely fit inside the TARDIS when closed, but it also had to take into account the box’s inward folding doors, which take up a good bit of space. The base was also made from MDF, and includes a durable white plastic panel in which the controls are mounted.

The final result is amazing – it does the TARDIS justice, and it looks like plenty of fun to play as well.