Modular Systems Using SPI

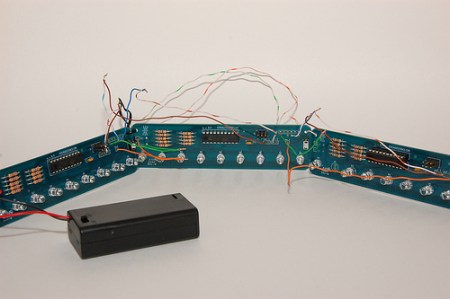
[Humberto] is at it again with a NerdKits video detailing the use of an SPI bus to communicate between microcontrollers. He started with a previous LED marquee project which was limited to a 5×24 LED Matrix and developed a modular solution to increase the size limitation.

The writeup and video embedded after the break do a great job of detailing the important differences between a stand-alone and a modular system. The good news is that the ATmega168 chips being used have a built-in interrupt based SPI protocol. Once wired correctly, a master control chip addresses each module separately, adding data to their buffer until a full frame has been transferred, then moves onto the next module.

Some of the caveats to this system such as digital transmission over long distances are discussed. We do wonder about power limitations if all LED’s in the marquee are illuminated at once. But that concern aside, if you’re thinking of playing around with an LED display don’t forget that there’s usually a huge price break for orders of 500 or 1000 LEDs!

Continue reading “Modular Systems Using SPI”

Fake Snow From An Arduino

The team at [Sosolimited] was contracted to create an interesting holiday window dispay for the HBO retail store in NYC. The Times Square display encorporates a board of LEDs and a machine for blowing the artificial snow particles around the enclosure.

The code for controlling the LED array was written on top of the open source C++ toolkit, openFrameworks and the entire setup is interfaced through an Arduino Duelmilanove. Multiple Sharp IR sensors were hooked up to the Arduino in order to detect the movement of observers, which in turn triggers fans to blow the ‘snow’ around. A National Control Devices relay board connects the heavy duty fans to the Arduino. This video demo shows just how attractive the project is in motion.

Advent Wreath From Parts You Have On Hand

Here’s an advent wreath made from six parts and a paper clip. Powered by a CR2032 3v button cell, the circuit has been free-formed using a paper clip as the conductor. We love the “dead bug” style of construction used with the ATtiny13 microcontroller because it adds an extra level of intrigue for the uninitiated. This project build on the flickering circuit we saw last year and uses the LEDs as light sensors, only turning on when a certain darkness level has been reached.

We used a tiny13 with our Menorah project last year and still have some lying around that we can use for this. We’re sure you’ve got at least a couple of low-pin-count micros on hand. If you don’t, you should!

Peggy2 X2, With Video

[youtube=http://www.youtube.com/watch?v=-ImjfHxXGfc]

Being avid fanatics of flashing lights, we always love to see the peggy2 in action. The video above shows another improvement, which is two peggy2 units working together as one. [iservice2000] chained the two together and wrote new code for the display. Using an Arduino to drive it all, he has gotten them to act as one. While video on the peggy2 isn’t new, this is the first time we’ve seen two of them chained together. The end result is going to be a scrolling sign that can be updated via the web, or that can display tweets. We did notice a bit of tearing, is that from the camera or the software?

[via littlebirdceo]

Light Up Your Limbs

Here’s a Christmas tree project we can get behind. The “tree” itself is made of twisted pairs of insulated copper wire.  At the end of each pair a surface mount LED has been soldered between the two conductors.  All of the wire limbs converge into a 4×4 matrix. One tree uses a prototyping shield and an Arduino, the other tree is just using an ATtiny2313 microprocessor. Take a look at the twinkling tree in the video after the break.

This artful creation uses one color of LEDs.  We’d love to see future improvements that incorporate multiple colors, enhance the fading effects, and perhaps add some interactivity such as pulsing to an inspiring rendition of Chestnuts Roasting on and Open Fire (which, consequently, is called “The Christmas Song“).

Continue reading “Light Up Your Limbs”

Fabric Display

[Eli] is sharing the building details on her fabric based display. For lack of a better name she’s calling this a fabric Lite-Brite. This is because LEDs can be added anywhere to spell out a message or create a simple drawing.

The device consists of a positive bus of conductive thread sewn onto a regular piece of fabric. A second piece of fabric separates this from a ground plane made of conductive fabric. The LED leads are then bent into a spiral and can easily be wrapped around the appropriate part of the conductor.

We’re happy to see this creative design coming from a hacker that frequents a hackerspace; Pumping Station One in Chicago. This would be a wonderful application for banners or flags at hackerspace events.

RGB Keylock Shield

Hackaday alum [Will O’Brien] cleaned up his messy breadboard with an RGB keylock Arduino shield. You may remember this two-part project from last year. It uses buttons backlit by an RGB LED to operate a door lock.

[Will] is still mulling over what type of kit options he will offer. We’re happy to see if the most important part, a laser-cut key bezel, will be available. This makes for a professional looking finish that made the original project difficult to replicate.