Recreating The Mac Plus With An FPGA

sad_mac_fpga_mac_clone_plustoo

[Steve] over at Big Mess O’ Wires has never been so happy to see the “Sad Mac” icon.

A little over a month ago, he decided to take on the task of building his own Mac clone using modern technology. Not to be confused with Mac emulation on modern hardware, he is attempting to build a true Mac clone using an FPGA that is functionally identical to the original.

He is calling his creation the “PlusToo”, with the goal of producing a modern version of the Macintosh Plus. The Plus shares a good amount of hardware with its other original Mac brethren, allowing him to replicate any of the other machines such as the Mac 128K, with a few simple configuration changes.

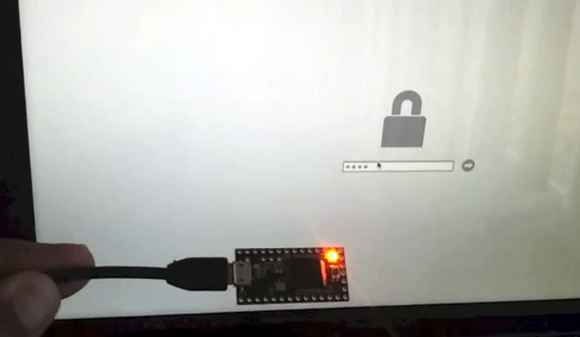
Building this clone is an incredible undertaking, and it’s a lot of fun to watch the construction progress bit by bit. [Steve] has been diligently working for a little over a month now, recently getting the clone to run 68000 code from the Mac ROM, resulting in the Sad Mac image you see above. While the logo has been dreaded among Mac users for years, it signals to [Steve] that things are coming along nicely.

Add A Real Life Hardware Terminal To That Newfangled Computer Of Yours

vt200_serial_hardware_terminal_over_usb

If you find a crusty old IT guy and give him half a chance, he’ll probably regale you with stories of how things were done “in the old days” where no one had their own computer and everyone worked on mainframe-connected dumb terminals. [JSTN] yearned for a true to life terminal display that he could attach to his 2010 Mac Pro, and since there’s no chance anybody is bringing one to market any time soon, he pieced one together on his own.

He dug up a digital VT220 terminal, and got to work trying to interface this office relic with his shiny new Mac. He found a few helpful tips from someone

Hacking 14 Year Old Power PC Mac Back To Life

For a while now I have been battling a dying 2.6Ghz dual core computer, but due to laziness and budget I just let it ride. At first it would occasionally crash in games, then it got to where it would crash during routine activities. After a year of this it would nail 105 degrees C in like 20 seconds and that is where the drama starts!

I threw my 2ghz “electronics” computer into my main machine’s case and used that for a few months. It’s motherboard had suffered from every electrolytic capacitor on it being puffy, but it has worked fine for nearly 5 years. I was surprised by the sound of what ended up being 2 caps blowing off of the geforce 7600 video card. In shock and excitement I removed the blown caps, slapped her back in and got another 4 months out of it before 2 more capacitors blew and took out a voltage regulator (and who knows what else with it).

Only armed with the craptop, I was stuck in a pickle! Then a co-worker came up to me and said “hey man you want this mac I only want its zip drive”. Well of course, going bonkers without my avrgcc, datasheets, and calculators, I took on the 14 year old Apple Power Macintosh 9600/300 as my bench machine, and I will now show you how I turned it from a novelty relic to a daily useful machine after the break.

Continue reading “Hacking 14 Year Old Power PC Mac Back To Life”

Apple Laptop Batteries Vulnerable To Firmware Hack

dead_and_busted_macbook_batteries

When you think about hacking laptops, it’s highly unlikely that you would ever consider the battery as a viable attack vector. Security researcher [Charlie Miller] however, has been hard at work showing just how big a vulnerability they can be.

As we have been discussing recently, the care and feeding of many batteries, big and small, is handled by some sort of microcontroller. [Charlie] found that a 2009 update issued by Apple to fix some lingering MacBook power issues used one of two passwords to write data to the battery controllers. From what he has seen, it seems these same passwords have been used on all batteries manufactured since that time as well. Using this data, he was subsequently able to gain access to the chips, allowing him to remotely brick the batteries, falsify data sent to the OS, and completely replace the stock firmware with that of his own.

He says that it would be possible for an attacker to inject malware into the battery itself, which would covertly re-infect the machine, despite all traditional removal attempts. Of course, replacing the battery would rectify the issue in these situations, but he says that it would likely be the last thing anyone would suspect as the source of infection. While using the battery to proliferate malware or cause irreversible damage to the computer would take quite a bit of work, [Charlie] claims that either scenario is completely plausible.

He plans on presenting his research at this year’s Black Hat security conference in August, but in the meantime he has created a utility that generates a completely random password for your Mac’s battery. He says that he has already contacted Apple to in order to help them construct a permanent fix for the issue, so an official patch may be available in the near future.

[Thanks, Sergio]

Hacking Your MacBook Air Restore Drive To Install OSX Lion

macbook_air_restore_media_unlocker

[Josh Wright] wrote in with a handy little hack just in time for today’s release of Mac OSX Lion. If you’re not familiar with the new version of the OS, Apple has decided to change things up this time around, completely eliminating physical distribution media.

In the event that you need to run a factory restore, this becomes an issue for some users. Computers with DVD drives can run a burned copy of the previously downloaded Lion installer, but MacBook Air owners are left hanging. Their restoration process is more time consuming, requiring a system restore and the download of OSX Lion, followed by the subsequent upgrade process. [Josh] thought it would be great if you skip the initial restore step and jump straight to installing Lion, so he hacked his USB restore media to do just that.

While copying the OS to a USB drive might sound trivial, the process is not as straightforward as it sounds – not surprisingly, Apple has put measures in place to prevent mere mortals from altering the contents of the drive. [Josh] put together an easy to follow tutorial that walks you through removing the drive’s protection and copying your brand new OSX Lion restore image to it.

While you might be asking, “Why jump through all these hoops when a normal flash drive would suffice?”, we think that his writeup is quite helpful. We see no reason to tie up a usable flash drive to store your restoration disc when you already have a perfectly good (albeit locked) drive at your disposal.

♦The only caveat to the process is that you need a Windows machine, virtual or otherwise, to complete the first step – a requirement that elicited a hearty chuckle from us.

AppleCrate II Doubles The Cluster Computing Fun

apple_crate_II

Back in 2004, Apple hobbyist/guru [Michael Mahon] built a cluster of Apple IIe main boards dubbed the “AppleCrate” as an experiment in parallel computing. Now that a few years have passed, he is back with a new iteration of the device, aptly named AppleCrate II.

AppleCrate II was built to address some of the design limits of his first cluster project as well as to expand his parallel computing capabilities. His gripes with the first model were primarily structural in nature. The new system is organized in horizontal layers, using metal standoffs between each main board, rather than relying on a shaky wooden superstructure to keep things together. He also found his previous 8-processor configuration a bit limiting, so the AppleCrate II has 17 nodes – 16 slaves and one main board dedicated to running the operation. The cluster even uses his own homebrew networking stack known as NadaNet to enable communications between the boards.

The project is pretty impressive, so be sure to swing by his site if you want to learn more.  He has a ton of technical details there, as well as copies of all of the software he used to get the cluster up and running.

[via BoingBoing]

Apple Studio Display Connector Ports

[Warrior_Rocker] pulled off his own Apple Studio Display hack by removing the cable and adding ports. As we saw in Wednesday’s post, these displays use a cable with a proprietary connector that combines DVI, USB and Power. Instead of altering the cable, [Warrior_Rocker] removed it completely. By wiring up a standard barrel jack for power, a USB type-B socket, and a DVI port, he can now use standard video, power, and USB cables to connect to the monitor.

This project was actually submitted to us on May 25th and we missed it. It’s sad that sometimes tips fall through the cracks, and we’re sorry that we missed this particularly well-executed hack. [Warrior_Rocker] wrote in asking why his project didn’t qualify after seeing the similar post on Wednesday. So please don’t take it personally if your project doesn’t get posted. If you think it fits right in here at Hackaday and haven’t heard anything after two weeks or so, consider sending to us again.