Another Ball Sucking Machine Leaves You Wanting More

Pneumatic Sponge Ball Accelerator

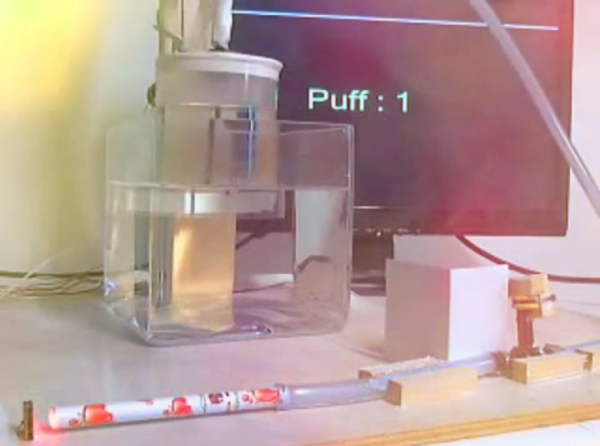
[Niklas] told us about his newest art project that he is calling a Pneumatic Sponge Ball Accelerator. This isn’t a home workshop type of project, it is a full fledged art exhibit displayed at the Tschumi Pavilion in Groningen / The Netherlands. One-thousand black sponge balls move from a big glass ball-reservoir bubble to another via a 150 meter long track of clear plastic tubing. The balls move up to an impressive 4 meters a second. Admirers of the installation can operate the machine and its airflow from outside the pavilion by pressing their hand up to a touch sensor installed on the wall of the exhibit.

All of the ball movement is powered by an ordinary home vacuum. Since it would be a short display if all the balls traveled in one direction, ending up in just one of the glass bubbles, [Niklas] came up with a simple yet functional valve that reverses the flow of air in the tube. This is done by a rotatable disk with two holes in it. Depending on its position, it connects one of the two bubble to the vacuum, leaving the other vented to outside atmosphere. Since the vacuum side of the path is low pressure and the ambient atmosphere is relative high pressure, the air travels towards the vacuum bringing the foam balls with it. No balls get sucked into the vacuum because the outlet tube is at the top of each bubble.

Pneumatic Sponge Ball Accelerator


Find two videos after the break, they are well worth watching.

Continue reading “Another Ball Sucking Machine Leaves You Wanting More”

Don’t Blink, Ken… Or The Weeping Barbie Will Get You

WeepingBarbies
That which holds the image of an Angel becomes itself an Angel. Have fun with that.

Barbie dolls have been around since 1959, but never before have they been this terrifying. [anthropolywog] decided to kick the creepy factor up a notch by modifying some poor, defenseless Barbie dolls into weeping angels.

If you aren’t familiar with the weeping angel concept, you probably don’t watch Dr. Who. The weeping angel episode, titled “Blink“, is now considered a classic Dr. Who episode. The basic premise is that some creepy, weeping stone statues can move only when no one is looking at them. Even closing your eyes for a moment to blink is enough to get them to move. It’s actually quite terrifying, but also awesome.

[anthropolywog] started by purchasing several ordinary Barbie dolls. She then cut off all of the arms at the elbow. This is because the Barbie arms do not normally bend at the elbow, and this was required to get that classic weeping angel pose. The hair was glued up into a bun, similar to the weeping angels from the show. The Barbies were then hot glued to wooden stands to make it easier to work on them.

Crinkle cotton fabric was then cut into a simple dress shape and draped over the dolls. The entire doll was then sprayed with a mixture of Elmer’s glue and water. This stiffens up the fabric and makes the whole thing look more statuesque.

The most complicated part was the wings. [anthropolywog] hand-made the wings from cardboard and craft feathers. This process took several hours of work in order to get something that would look right.

The dolls were primed for paint separately from the wings. The wings were then attached, and the whole doll was painted with “natural stone” textured spray paint. The final touch was to re-draw the faded eyes and mouths with a fine tipped permanent marker. You can see in the photo that the result turned out very well.

[via Reddit]

Brighten Your Day With Studio Strobe Power Hack

large capacitor bank for flash circuit

[OiD] picked up a couple of cheap studio strobes off eBay and was not happy with the power control. So he rewired it. These lights are like supercharged flashes for professional photographers, and contain some very large capacitor banks. His first hack didn’t work out too well, and he wound up welding the innards of a switch together. He was successful however, in his second attempt to tame the large voltages.

He’s using two 1N5408 diodes, which are rated at 3 amps, for charging the capacitor bank. A massive 60EPS08 diode, rated at 60 amps with a Frankenstein worthy surge rating of 950 amps is used to separate the charge between the two capacitor banks, and allows one to discharge into the flash tube.

Consisting of just a handful of components, [OiD]’s hack greatly improves the performance of the strobe’s power adjustment settings. He does an excellent job at documenting the hack for all to see. Be sure to check out his bog for full details.

A Cloud Of Lightning Detectors

strikes

Here’s an interesting project to plot every lightning strike on Earth. Blitzortung is a project that uses many extremely low-cost sensor boards packed with an amplifier, microcontroller, and an Ethernet socket to detect lightning strikes. When multiple stations send all that data up to a server, the location of lightning strikes can be calculated, even if they’re hundreds of miles away from any station.

Each station works by detecting a change in the local EM field caused by a lightning strike with either a large loop antenna or a smaller ferrite core antenna. These signals can be amplified and turned into usable data, time stamped, and sent out on the Internet. From there, it’s a simple time of flight calculation to precisely locate where lightning strikes.

The hardware is actually pretty simple, with based on an STM32F4 Discovery board. A controller includes an Ethernet port, GPS unit, LCD, and all the hardware associated with detecting lightning strikes.

If you’d like to see what’s possible with a huge network of lightning detectors connected to the Internet you can check out LightningMaps for a look at what’s possible.

Thanks [Sean] for sending this in.

Hackaday’s Wikipedia Page Needs Help

Wikipedia-logo-en-bigHey, did you know we have a Wikipedia page? We didn’t either. Until today you could search for “Hackaday” and nothing would come up. That’s because it’s listed as “Hack a Day” and it hadn’t seen any TLC in at least a couple of years.

Here’s the great thing about Wikipedia, they want factual information so they discourage people with Conflicts of Interest from editing the pages. That means that having the Hackaday Staff edit the page is a sticky issue. I did indeed edit the page in order to add more sections (History, Hackaday Projects, Accolades) to make it easier for the community to work on the article. I disclosed this in the “Talk” section, requested the logo be uploaded, and began a discussion suggesting the page be moved.

Ethically this is about all I think we should do. It’s up to you now. We’d love to see a well-written, immaculately cited Wikipedia article for this great thing we’re all involved in.

Delving Deep Into High Speed Digital Design

scope capture showing ringing affect in a high speed digital signal

In high speed digital circuits, fast doesn’t necessarily mean “high clock rate”. [Jack Ganssle]  does an excellent job at explaining how the transition time of signals in high speed digital circuits is just as important as the speed of the signal itself. When the transition time is large, around 20 nanoseconds, everything is fine. But when you cut it down to just a few nanoseconds, things change. Often you will get a ringing effect caused by impedance mismatch.

As the signal travels down the trace from the driver and hits the receiver, some of the signal will get reflected back toward the driver if the impedance, which is just resistance with a frequency component, does not exactly match. The reflected signal then heads back to the driver where the impedance mismatch will cause another reflection. It goes back and forth, creating the ‘ringing’ you see on the scope.

[Jack Ganssle] goes on to explain how a simple resistor network can help to match the impedance and how these should be used in circuits with fast transition times, especially where you will be taking readings with a scope. As the scope probe itself can introduce impedance and cause the ringing.

In case you didn’t pick up on it, [Jack Ganssle] also happens to be one of the judges for The Hackaday Prize.

Continue reading “Delving Deep Into High Speed Digital Design”

Make plastic string

Super Simple Way To Re-use Plastic Bottles

One of our tipsters just sent in a fascinatingly simple trick for re-using plastic bottles and turning them into useful plastic string. It’s in Russian but between the translated English subtitles and visual demonstration, it’s quite easy to understand.

YouTube DIY survivalist [Адвокат Егоров] makes a lot of really cool tutorial videos on anything from making knives, forming parts with heated PVC pipe, making rings out of coins, or even how to increase the yield of your potato farm (what?). In this one he shows us how to make a very simple jig using a small piece of aluminum extrusion which can slice a plastic bottle into long ribbons which can then be used for many different things.

The jig is adjustable and you can easily produce different widths of the ribbon with ease. Why would you want plastic ribbon? He uses it as twine for tying things (it’s very strong), as well as a grip for his tools — simply by wrapping it around the handle of something tightly, and then using a hot air gun, you can form it in place to create a plastic handle.

Again, the video is in Russian, but you can translate the subtitles — it kind of helps.

Continue reading “Super Simple Way To Re-use Plastic Bottles”