Kilonode: How To Test A Huge Xbee Mesh Network

So let’s say that you’re a developer on the Xbee team. You need to test the extremes of what the RF radio modules can do when in a large network. But in addition to numerous nodes, you also need to test the effects of distance on the radios. Since it’s not reasonable to distribute hundreds of the devices (each with their own power source) throughout town, you build a test setup like the 1 kilonode Xbee rig which the project manager, [Jared Hofhiens] is showing off.

He’s holding one blade from the rack-mounted system. Each of those squares is an Xbee module, there’s 32 etched onto the board. On the edge furthest from him there are a set of connectors which mate with the rack connectors, hooking the blade up to a set of terminal servers. These servers allow developers to ssh into individual modules. On the near side of the blade there’s a set of attenuation adjustment circuits. They allow adjustments of 0-40 dB of attenuation in 10 dB increments to adjust how strong the RF signals are, simulating distance between modules.

Thirty-two of these cards are mounted in the three racks seen above to make up the 1024 module node. We really appreciate this look behind the scenes and think you’ll enjoy the video tour after the break. If it leaves you wanting more check out how one company builds cloud storage. Continue reading “Kilonode: How To Test A Huge Xbee Mesh Network”

Failed Kayaking Data Logger Is Something We Want To See Succeed

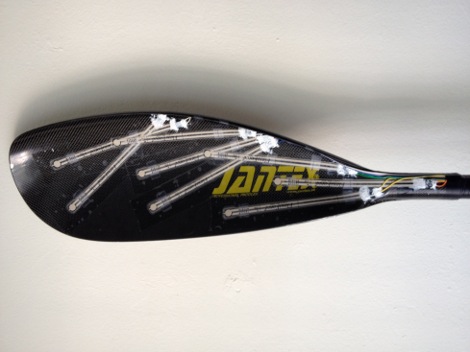
How can your love of hobby electronics and your participation in the Canadian National Kayaking Team be combined? Why not use your technical know-how to provide a performance edge? [Geoff Clarke] decided to rig up a paddle for data capture to see if they could learn anything.

Here you can see that a series of flex sensors were applied to one of the business ends of the paddle. These are connected to a microcontroller which is constantly monitoring them and dumping the data onto an SD card. The design will provide about nine minutes of data before the storage is used up. That sounds like a number that might need improving. We could see this being useful to log a series of practice runs on the same course, but with different athletes. By graphing and comparing the data, you should be able to make observations about how the paddle is being held and when force is applied that could help the rest of the team improve.

But we’re way ahead of ourselves. The rig was given a premature test-run and the flex sensors were destroyed by the salt water. We wish this had worked out and hope that [Geoff] will give it another try after rethinking the water proofing.

WebKit On Chumby Lets Developers Avoid Flash

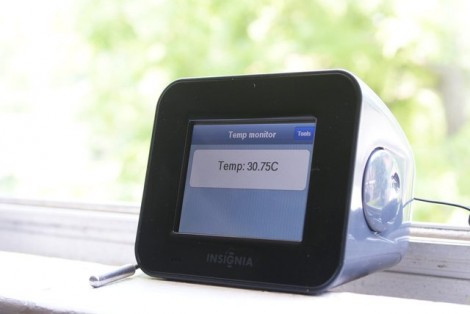
[Huan Truong] was looking for an Internet interface for one of his projects. In this case it’s a temperature logger, but it could be just about anything. He decided to give the Chumby a try, but was turned off by its use of Flash as the app framework. He decided to open up more options by running WebKit via his custom Chumby’s firmware.

In the video after the break he shows the boot sequence and demonstrates his first app. The device runs through a screen calibration as it powers on. When the app comes up it looks and responds much more like an Android or iPhone app than the Chumby interfaces we’re accustomed to. This technique gives you pretty wide range of app development languages. That’s because all the Chumby really cares about is the index.cgi file that serves as the interface. Development and debugging can be done on a desktop (not that it couldn’t before but Flash development under Linux was always a pain).

It looks like this idea isn’t new, but we don’t recall seeing any other projects that used WebKit as an alternative Chumby interface.

Continue reading “WebKit On Chumby Lets Developers Avoid Flash”

Making Capacitive Touch Sensors With Pencil And Paper

capacitive-touch-sensor

There are few things more frustrating than being in the middle of working on a project and realizing that you are missing some crucial component that ties the whole thing together. According to Murphy’s Law, this sort of thing will only happen when parts are completely impossible to procure.

If you’re ever hunting for a touch sensor but can’t get your hands on one, [Alan Chatham’s] tutorial on simple DIY capacitive touch sensors might be just what you need to keep things moving along.

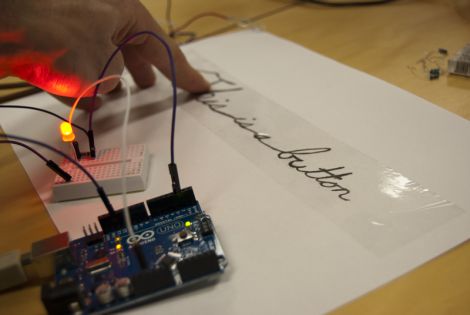
[Alan’s] sensors rely on the conductive properties of graphite, which is easily found in just about any pencil on the market. The sensors are created by simply drawing on a piece of paper with a pencil, then wiring the images or text up to your favorite microcontroller via some paperclips and a couple of resistors.

Paper and pencil might not make for the most durable means of input, but we’re pretty sure that [Alan’s] capacitive touch sensors would be very helpful in a pinch. He doesn’t have video of the sensors in action just yet, though he says he’ll put something together here shortly.

[Adam Savage] Giving A Speech About The Maker Movement

[youtube=http://www.youtube.com/watch?v=_otrgJ8Lmx4&t=1m1s]

[Adam Savage] gives an interesting talk titled “why we make” at the Bay Area MakerFaire. Many have been comparing the leaps we’ve been taking in home engineering/hacking/making etc, to the early days of computers. People are making things at home that are actually making a difference.

[Adam] is a huge collector and maker of movie prop replicas. When he was talking to someone and showing off some of the amazing replicas that determined individuals are constructing in their homes, the person lamented the lack of originality. [Adam] does a good job of representing the other side of that argument. He explains how the drive to replicate these things is sometimes what is pushing the methods and technology further and supporting the community. It is an interesting video to watch, if only for the fun stories you get to hear.

Though he does open the speech by mentioning that he wants to play with an Arduino, you should continue watching. He’s done some amazing work and has some great insight.


The Engineer Guy Explains How MEMS Accelerometer Chips Work

There’s a good chance that you use a MEMS accelerometer every single day. It’s the small chip that let your smart phone automatically adjust its screen orientation. They’re great chips, and since they’re mass-produced you can add them to your projects for a song (if you can abide the tiny packaging). But we have no idea of how they are made and only a inkling of how they work. [Bill Hammack] has filled that knowledge gap with this explanation of how MEMS accelerometers are made and how they function.

Our base knowledge comes from the acronym: Micro Electro-Mechanical Systems. There’s something in the chip that moves (so much for solid state electronics; and it makes us wonder if these wear out). [Bill] includes a diagram in his video after the break which shows the silicon-based system that moves as it is affected by gravity. This changes the capacitive properties of the structure, which can be measured and reported to a microcontroller for further use. The structure is built using an intricate etching process which we never want to try out at home.

Looking for a project in which to use one of these devices? We’ve always been fond of this POV device.

Continue reading “The Engineer Guy Explains How MEMS Accelerometer Chips Work”

Automatic Capacitor Charger Lets You Have Fun With Sparks

[GranTotem] is delighted by the sparks put out when a capacitor is rapidly discharged. But he’s not impressed at the relatively slow process of connecting them to a power supply for a recharge. So he built this auto-charging station for his capacitors that provides a shockingly good time almost continuously. Check out the video to see what we mean.

We always like to see the guts of the project, and that’s why we chose this image for the feature. But when everything is properly seated in the project box [GranTotem] has managed to achieve a really clean look. There are two barrel jack connectors on the end, one for 16V and the other for 20V inputs. The lid of the enclosure hosts an on/off switch, adjustment knob, and two banana connector terminals. Once switched on, a relay connects and disconnects the capacitor from the power supply at regular intervals which are adjusted by the knob. Just connect a couple of probes to those banana terminals and let the sparks reign down.

Continue reading “Automatic Capacitor Charger Lets You Have Fun With Sparks”