Physical Computing Just Got A Lot Easier

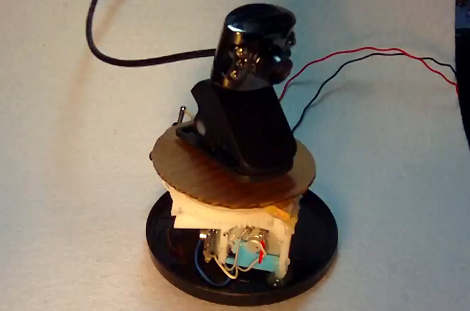
Putting microcontrollers in everything and tying appliances into the internet has become the DIYers’ bread and butter. There’s a ton of benefits from an Internet-enabled coffee maker, but actually building these projects takes a little bit of knowledge. Enter [Dave] and [John] with Twine – a little Internet enabled box that connects physical reality to the digital world.

The hardware inside a Twine is a small board that combines WiFi, an accelerometer and temperature sensor. The Twine is programmed ‘in the cloud’ with a simple if/then condition. A Twine will send you a text, email or tweet when the condition is met. For example, you could put a Twine on a door and program the accelerometer to text you when someone comes knocking.

Twine isn’t an entirely closed system; there’s a plug for additional sensors (moisture detection, for example), and the data from sensors can be pushed out to a server. You can pick up a twine for $100 from the Kickstarter; it’s a little rich for our blood, but we’re sure it’ll be a useful device.

Exterior-grade Electrical Box As Project Enclosure

The quest for a project box is always a balance between cost, complexity, and style. We think [Pcmofo] really finds the mark with his exterior electrical box enclosures. He took the time to document his fabrication process for those that want to replicate his look.

These grey plastic boxes are meant to keep the elements away from home and commercial electrical systems. They’re easy to find and come in many different sizes (this one is 8″ square and 4″ deep). The plastic is very rigid, but still easy enough to work with simple tools.

[Pcmofo] starts by eyeballing the placement of his components. Once he has a good idea of where each should be located he grabs a caliper and uses Adobe Illustrator or Inkscape to design a template. This is attached with painter’s tape, and rough openings are made using a drill press. The holes are brought to the final size by hand using files for a nice finished edge. When it comes time to mount hardware, the plastic is strong enough to hold threads if you are careful when using the tap to cut them.

The example enclosure houses a temperature controller for fermenting beer. You can see some video of the enclosure embedded after the break.

Continue reading “Exterior-grade Electrical Box As Project Enclosure”

Reverse Voltage Protection With A P-FET

[Afroman’s] latest video shows you how to add reverse voltage protection with minimal power loss. At some point, one of your electronic concoctions will turn out to be very useful. You want to make sure that a battery plugged in the wrong way, or a polarity mistake with your bench PSU doesn’t damage that hardware. It’s easy enough to plop in a diode for protection, but as [Afroman] points out, that wastes power in the form of heat when the circuit is working correctly. His solution is to add a P channel MOSFET which only allows power to flow when the polarity of the source voltage is correct.

The schematic above shows the P-FET on the high side of the circuit. The gate is hooked to ground, allowing current to move across the DS junction when the battery is connected. This design also uses a clamping diode to keep the gate voltage within a safe range. But there are P-FETs out there that wouldn’t need that diode or resistor. This method wastes ten times less power than a simple diode would have.

We’ve embedded the video after the break where [Afroman] shares the math and reasoning behind his component choices.

Continue reading “Reverse Voltage Protection With A P-FET”

Pick Up That Can, [Jeri]

We all need an excuse to play Half-Life 2 sometimes. [Jeri Ellsworth] put together a My First Crowbar controller to throw a few headcrabs across the room. It’s pretty much Half-Life 2 for the Wii.

The build is very simple – just a tilt switch hot glued to the underside of a childs-size crowbar. Two leads go from the tilt switch to the contacts on a (PS3?) controller. All you need to do to attack is swing the crowbar wildly.

[Jeri] has us wondering what other awesome game controllers could be made. Of course we’ve been wanting a real-life Gravity Gun or Portal Gun for years now, but right now we’re thinking about a real Katamari. We might need more hot glue.

As far as building our own, we’re thinking about using one of the Cheap DIY tilt switches we saw the other day. It’s a simple build, and sure looks like a lot of fun.

Continue reading “Pick Up That Can, [Jeri]”

Cheap DIY Tilt Switches Are Great In A Pinch

diy-cheap-tilt-switch

[fjordcarver] was looking for some mercury-free tilt switches that wouldn’t break the bank and that were easy to build. He also wanted something cheap, so instead of buying some tilt switches he devised his own that fit all of the criteria he set out. Now, these switches are not your typical fare, and they’re not small either. They are however, cheap, effective, and easy to manipulate/repair.

He picked up a package of metallic craft beads at the store and emptied out two bottles, saving one set of beads that happened to be conductive, i.e. not coated with paint or coloring. The beads were split between two jars, which were then sealed with corks that had a pair of straightened paperclips inserted through them. The bottles were oriented facing away from one another, then attached together with a piece of house wire. One of the leads from each jar was attached to this common wire, while the others were extended with hook up wire for use in the circuit he was building. Pictures definitely explain the mechanism far better than words can, so be sure to check out his tutorial to get a better look at them.

While they might look a bit rough, he says they work great, so give them a try if you have the need.

Multivibrator In Theory And Practice

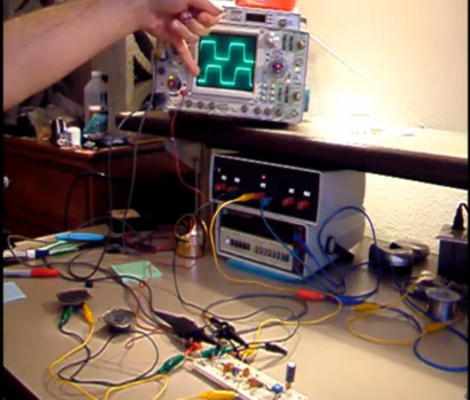
We must admit that we’ve been guilty of using a microcontroller to make two LEDs blink alternately in the past. It’s not the worst transgression, but it stems from our discomfort with analog circuits. Luckily, [Ray] published an illustrated guide on building multivibrator circuits. This is a simple method of assembling a two-output oscillator. All it takes is a pair of NPN transistors, which are then switched by on and off based on a resistor-capacitor (RC) timer.

[Ray] does a good job of walking us through how the circuit works at each stage of one complete cycle. You’ll need to read carefully, but the supplementary schematics he uses to water down snap shots of the various electrical states really helped us understand.

Of course, blinking LEDs isn’t the sole purpose of a multivibrator. It is a method of producing a clean square wave which can be used as a clock signal for TTL logic chips. Oh, who are we kidding, see the blinky goodness for yourself in the video after the break.

Continue reading “Multivibrator In Theory And Practice”

Make Your Own Spray Paint Cans

[Mikeasaurus] found a way to build his own refillable spraypaint canister. The donor vessel used here is a plastic soda bottle. It’s a great choice since it is engineered to house a pressurized liquid and you can find them for free by intercepting a satisfied soda consumer before they reach the recycling bin.

He repurposed the spray nozzle from a commercial spray paint can. By first releasing all of the pressure from the empty paint he could then use a hack saw to remove the top disk. He used Sugru to attach it to the bottle cap which has a hole drilled in the center to accept the feed straw. We wonder if there wouldn’t be a better way to attach this from the inside of the cap for better resistance to bottle pressure?

The final piece of hardware is a Shrader valve from a bicycle inner tube. This lets you pump up the pressure in the bottle. You’ll need to dilute the paint you use to make it sprayer-friendly. [Mikeasaurus] diluted his six to one which might have been a bit too much judging from the drips seen in the video after the break.

Continue reading “Make Your Own Spray Paint Cans”