Trying To Measure The Speed Of Light With An Arduino

We know that measuring the speed of light with an Arduino is possible. It’s just that the implementation is hard.

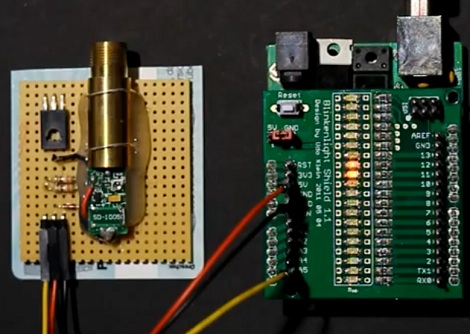
Last month we saw [Udo]’s blinkenlight shield that can be used as a line scan camera. It’s a neat piece of kit, but [Udo] really wants to submit something for the Buildlounge laser cutter giveaway, so he figured measuring the speed of light would be an easy project. If a kid and a chocolate bar can do it, surely it can’t be too hard.

[Udo] hit upon the idea of pulsing a laser pointer and measuring the time of the reflection. Because his blinkenlight shield can be used as a light sensor, all that’s needed is a mirror and a pretty long line of sight. There’s a few problems with the setup though: with the Arduino running at 16 MHz, a photon will travel 19 meters in one clock cycle.

Even with some very clever coding, we’re not really sure detecting an emitted photon is possible at such (relatively) slow clock speeds. We’re thinking [Udo] could source a few hundred meters of optic fiber so the entire experiment could fit on a desk, but feel free to drop a note in the comments if you’ve got a better idea. [Udo]’s demo of his blinkenlight/laser mashup is after the break.

Continue reading “Trying To Measure The Speed Of Light With An Arduino”

diy-laser-scanner

Cheap DIY Laser Scanner Is Quite Impressive

With the introduction of the Kinect, obtaining a 3D representation of a room or object became a much easier task than it had been in the past. If you lack the necessary cash for one however, you have to get creative. Both the techniques and technologies behind 3D scanning are somewhat complicated, though certainly still within reach as maker [Shikai Chen] shows us. (Google Translation)

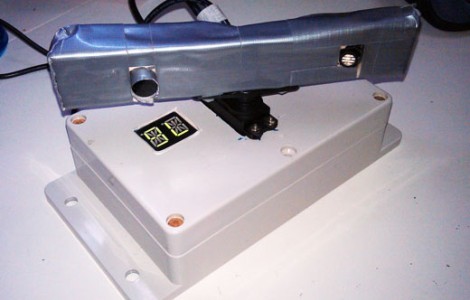
He wanted to create 3D scanned images, but he didn’t have the resources to purchase a Kinect. Instead, he built his own scanner for about 1/6th the cost. Interestingly enough, the scanner resembles what you might imagine a very early Kinect prototype looked like, though it functions just a little bit differently than Microsoft’s creation. The scanner lacks any sort of IR emitter/camera combo, opting to use a laser and a USB VGA camera instead. While scanning, the laser shines across the target surface, and the reflected light is then picked up by the camera.

So how does this $25 DIY laser scanner measure up? Great, to be honest. Check out the video below to see how well his scanner works, and be sure to take a look through his second writeup (Google Translation) as well for more details on the project.

[via Seeedstudio]

[youtube=http://www.youtube.com/watch?v=jLZ-s9KRzG8&feature=player_embedded&w=470]

Multivibrator In Theory And Practice

We must admit that we’ve been guilty of using a microcontroller to make two LEDs blink alternately in the past. It’s not the worst transgression, but it stems from our discomfort with analog circuits. Luckily, [Ray] published an illustrated guide on building multivibrator circuits. This is a simple method of assembling a two-output oscillator. All it takes is a pair of NPN transistors, which are then switched by on and off based on a resistor-capacitor (RC) timer.

[Ray] does a good job of walking us through how the circuit works at each stage of one complete cycle. You’ll need to read carefully, but the supplementary schematics he uses to water down snap shots of the various electrical states really helped us understand.

Of course, blinking LEDs isn’t the sole purpose of a multivibrator. It is a method of producing a clean square wave which can be used as a clock signal for TTL logic chips. Oh, who are we kidding, see the blinky goodness for yourself in the video after the break.

Continue reading “Multivibrator In Theory And Practice”

Milling Interlocking Wooden Rings

[Johan von Konow] wanted to make something special as a wedding gift to his wife. He decided a pair of interlocking miniature rings would be the perfect keepsake. He started his search for a way to mill the wooden rings from a solid piece of wood, and documented his journey for our enjoyment.

This project poses an interesting challenge. Most CNC mills offer three axes of freedom, but he only had a 2D mill meant for routing PCBs. This means the cuts can only be made from the top down at one depth. In order to fabricate the rings he needed to cut from more than one side. With more study, [Johan] discovered that it would be necessary to cut the wood stock from eight different angles before the rings would be complete.

The solution to the problem was to first mill a jig to hold the wood stock. It has positions to hold the stock at each different angle. The final step before starting the cut was to mill the stock itself to perfectly fit his custom jig. We think it turned out great, thanks in part to hand filing, sanding, and polishing to smooth the marks left from milling.

Make Your Own Spray Paint Cans

[Mikeasaurus] found a way to build his own refillable spraypaint canister. The donor vessel used here is a plastic soda bottle. It’s a great choice since it is engineered to house a pressurized liquid and you can find them for free by intercepting a satisfied soda consumer before they reach the recycling bin.

He repurposed the spray nozzle from a commercial spray paint can. By first releasing all of the pressure from the empty paint he could then use a hack saw to remove the top disk. He used Sugru to attach it to the bottle cap which has a hole drilled in the center to accept the feed straw. We wonder if there wouldn’t be a better way to attach this from the inside of the cap for better resistance to bottle pressure?

The final piece of hardware is a Shrader valve from a bicycle inner tube. This lets you pump up the pressure in the bottle. You’ll need to dilute the paint you use to make it sprayer-friendly. [Mikeasaurus] diluted his six to one which might have been a bit too much judging from the drips seen in the video after the break.

Continue reading “Make Your Own Spray Paint Cans”

Binary Division When Your Processor Lacks Hardware Division

[Hamster] wanted to take a look at division operations when the chip you’re using doesn’t have a divide instruction. He makes the point that the divide instruction takes a lot of space on the die, and that’s why it’s sometimes excluded from a chip’s instruction set. For instance, he tells us the ARM processor used on the Raspberry Pi doesn’t have a divide instruction.

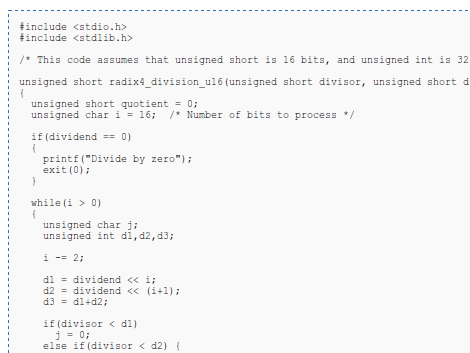
Without hardware division you’re left to implement a binary division algorithm. Eventually [Hamster] plans to do this in an FPGA, but started researching the project by comparing division algorithms in C on an AMD processor.

His test uses all 16-bit possibilities for dividend and divisor. He was shocked to find that binary division doesn’t take much longer than using the hardware instruction for the same tests. A bit of poking around in his code and he manages to beat the AMD hardware divide instruciton by 175%. When testing with an Intel chip the hardware beats his code by about 62%.

He’s got some theories on why he’s seeing these performance differences which we’ll let you check out on your own.

An Introduction To Stepper Motors

If you’ve been reading Hack a Day for long enough, you know about our infatuation with stepper motors. These precious little devices put the oomph into our CNC routers, 3D printers, robots, and other miscellaneous projects. Steppers aren’t your run-of-the-mill motors, though. [Steaky] posted a great introduction to stepper motors that lets you hit the ground running building any moving project you could imagine.

Apart from identifying a stepper and figuring out if it works, [Steaky] goes over how to make these motors turn. The theory behind an H-bridge is easy enough, but theory isn’t something often presented in schematics or stepper driver datasheets.

We’ve pulled more than our fair share of steppers from flatbed scanners and old printers. There’s nothing wrong with scavenging old parts, and whether you’re making a robot band to play your kid’s birthday party, robochess, or one of the many 3D printers or CNC machines, there’s going to be a stepper motor in your future.