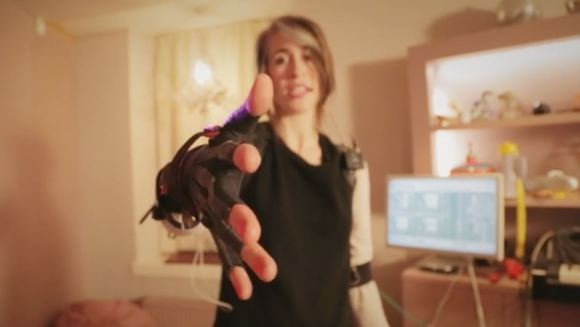
Turning An IPhone Into A Karaoke Machine

setup

Instead of booking an MC for your next karaoke party, take a look at [Paulo]’s build that turns any iPhone into a karaoke machine.

There are thousands of YouTube videos out there of songs with lyrics – a much more advanced version of the mainstay of any karaoke get together, suitcase full of CDs and a video monitor. The only problem in turning these YouTube videos into a karaoke party is putting a drunken slob into the mix. [Paulo] recently solved this problem with a karaoke mixer that adds a microphone input to any analog audio feed.

But this is only halfway to a karaoke machine. To finish the build, [Paulo] created an amplifier (with a fabulous Manhattan-style PCB) for an iPhone’s audio output. The video output can be sent directly to a monitor, allowing for the full karaoke experience.

Since [Paulo]’s karaoke mixer uses an XLR jack for the mic, it’s still possible to make karaoke worse by adding vocal and other miscellaneous effects.

Making Karaoke Worse

kaoss belt

Karaoke just isn’t fair. Not only do you have people who can’t sing choosing to belt out extremely difficult to sing songs, but the variety of songs generally isn’t that great. In an effort to make the karaoke situation at the pubs he frequents better – or worse, depending on how you look at it – [cosmic blooper] is now bringing a vocal effects processor to karaoke. Yes, now he’s got pitch shifting that takes him into [Bieber] territory, and auto tune to emulate the [T-Pain] and the Black Eyed Peas.

To bring the world of synths and effects to a karaoke party, [cosmic blooper] took a battery-powered Kaoss Pad and attached it to his belt with the help of some sheet metal. An RCA to XLR adapter connects the Kaoss Pad to the karaoke microphone, while a mic of questionable quality takes [blooper]’s voice to be transmuted into a horrifying display of effects and pitch shifters.

There’s no video of [cosmic blooper]’s karaoke machine in action, but he tells us he’ll be getting one up soon.

Music Challenge Has You Flapping Your Wrist To Make Sounds

glove-based-music-challenge

This glove controller let you play a musical game. The challenge is to perform the correct wrist motions at the right tempo to play the intro to the song Where is my Mind by the Pixies. This is demonstrated in the video clip after the break.

We often see flex sensors used on the fingers of glove projects, but this one does it all with an accelerometer. That module, along with the Piezo buzzer used for playback are affixed to the small breadboard on the back side of his hand. Rubber bands connect the Arduino to his third and forth fingers. The tempo and rhythm are pre-programmed but the tone generated is based on the gravity reading at the start of each note. If you don’t have your hand positioned correctly the wrong tone will be played.

The code was published in link at the top. It would be fun to see this altered as a hacked Simon Says game.

Continue reading “Music Challenge Has You Flapping Your Wrist To Make Sounds”

Building A Velocity Sensitive Keyboard

keys

Cheap toy pianos don’t usually have MIDI, and getting a velocity-sensitive keyboard from something out of the toy aisle at Walmart is nearly out of the question. If you’re willing to tear one of these toy pianos apart and build your own control electronics, though, the sky is the limit, as [JenShen] shows us with his home built velocity sensitive keyboard.

Usually, velocity-sensitive keyboards have two buttons underneath each key. By having a microcontroller measure the time difference between when each button is pressed, it’s possible to sense how fast each key was pressed. [JenShen] took the idea of a velocity-sensitive keyboard in another direction and instead used a force sensitive resistor strip, cut up into many pieces to provide velocity and aftertouch data.

[JenShen]’s keyboard adds these resistive buttons to the button matrix he already made. The result is a very inexpensive velocity sensitive keyboard with aftertouch, an impressive feat for an Arduino and only a few components.

You can check out the keyboard in action after the break.

Continue reading “Building A Velocity Sensitive Keyboard”

Duct Tape Bagpipes

Duct Tape Bagpipes

Looking to build your own instrument out of plumbing and tape? [Scott] made his own set of Membrane Bagpipes out of PVC pipes, a plastic bag, and duct tape.

Bagpipes are made out of a few parts. The drones are pipes that are tuned to play a single note. They are tuned by the fixed length of the pipe. The chanter is a tube with finger holes. This lets you play various notes depending on which holes you cover. The blowpipe is used to fill the bag with air that will pass through the membranes on the drones and chanter. Finally, there’s the bag which stores air.

[Scott]’s build uses PVC for the drones and chanter. The membranes are made out of cut up bits of plastic bags. Some crafty duct tape work makes up the bag, and seals it on to the various parts. A check valve is used to stop warm, duct tape flavoured air from blowing back into your mouth.

It’s pretty amazing what people can do with a few rolls of duct tape. The pipes aren’t exactly in tune, but they certainly work. Check out a video of them in action after the break.

Continue reading “Duct Tape Bagpipes”

Raspberry Pi Becomes A Guitar Effects Processor

One of the more interesting use cases for the Raspberry Pi is exploiting its DSP capabilities in interesting ways. There’s a lot of horsepower inside the Raspberry Pi, more than enough to do some very interesting things with audio, all while being powered by a small wall wart adapter. [Pierre] over on the Pure Data mailing list has a proof-of-concept working that uses the Raspi as a guitar effects processor. The results are very encouraging – [Pierre] is able to use his Raspi as a delay, pitch shifter, and of course a classic flanger, phaser, and chorus with a latency of about 16 ms.

There are a few steps necessary to get low latency with the Raspi’s audio interface. [Pierre] is running his Pi headless, and allocated more RAM to the CPU.

If you’d like to try this out for yourself, [Pierre] has a tutorial for setting up Pure Data with the Raspberry Pi. He’ll be updating his blog soon with more tutorials and verified USB audio interfaces later.

Check out the processor in action after the break.

Continue reading “Raspberry Pi Becomes A Guitar Effects Processor”

Tired Of Playing The MacBook? Play The Raspberry Pi!

pithingy

Hit up any club, party, or get together where musicians are present and you’ll probably find a DJ booth stacked to the gills with faders, various MIDI devices, and a MacBook. However abundant an OS X-based DJ platform is, we haven’t heard hide nor hare of a Raspberry Pi being used as a sequencer, MIDI device, or MaxMSP box.

[James] over at Illuminated Sound put together a great tutorial for making all those cool electronic music devices play nice with a Raspberry Pi. He used a Novation Launchpad, an 8×8 MIDI controller that can act as faders, a keyboard, or even a functional equivalent to the pads on an MPC.

Hardware is nothing without software, so [James] used Puredata and libusb to turn the MIDI data into notes and audio effects.

[James] added a download that includes the Launchpad driver and a Puredata sketch to test everything out. You can see how it all fits together in the video after the break.

Continue reading “Tired Of Playing The MacBook? Play The Raspberry Pi!”