Hands On With The Super Tiny Arudino: FemtoDuino

photo(30)

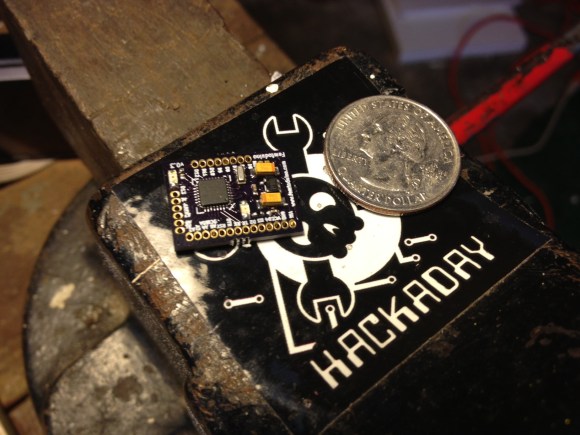
We originally heard about the FemtoDuino last year. It looked good enough and tiny enough, but we didn’t really have a need for it. Recently though, we started on a new project (which you can follow on the forums!) which required an easy modification to an existing circuit. Space and weight were quite important so we decided to pick up a couple femtoduinos at $25 each, and give them a try.

Continue reading “Hands On With The Super Tiny Arudino: FemtoDuino”

Cracking A SAM7XC Cryptographic Coprocessor

attacking-RFID-crypto-coprocessor

[Adam Laurie] spent time tearing into the security of the SAM7XC chip produced by Atmel. Even if he hadn’t found some glaring security holes just reading about his methodology is worth it.

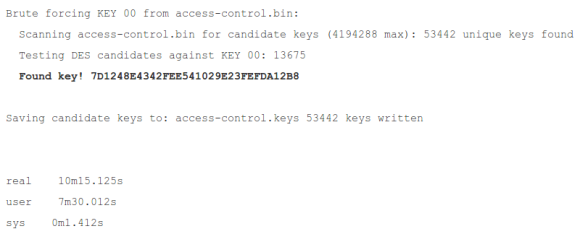
The chip is used in a secure RFID system. The chip is added to the mix to do the heavy lifting required when using encryption. [Adam] grabbed a couple of open source libraries to put it to the test. The firmware is locked down pretty tight, but his explorations into the content of the RAM yield a treasure trove of bits. After investigating the sample code for the chip he’s shocked to learn that it uses RAM to store the keys at one point. The rest of his journey has him dumping the data and sifting through it until he gets to the “Master Diversification Key”. That’s the big daddy which will let him decrypt any of the tags used.

He reported his findings to Atmel in September of 2011. Their response is that they have no way of protecting RAM from exploit. [Adam] asserts that the problem is that the sample software wasn’t designed with the vulnerability of RAM in mind. The keys should never be stored there specifically because it is vulnerable to being dumped from a running system.

Automatic Volume Control Puts The Kibosh On Loud TV Commercials

automatic-tv-volume-control

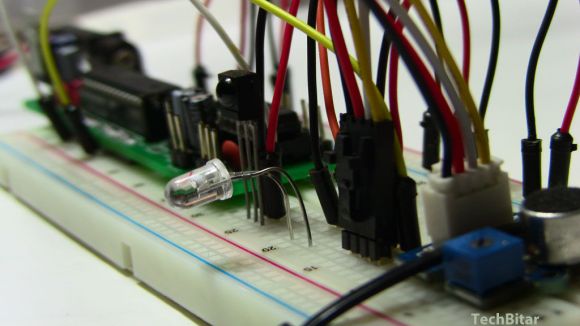
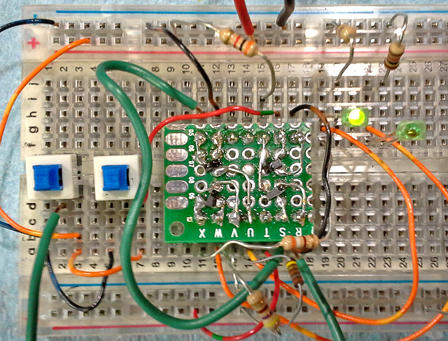
If you’re having a hard time tuning out those loud commercials why not let your electronics project do it for you? This is an Arduino-based setup which adjusts television volume when it goes above a certain threshold. It uses a microphone, rather than a direct audio signal, so you can set it based on what is actually heard in the room.

The control scheme uses the IR LED and IR receiver seen on the breadboarded circuit above. The receiver lets you teach your volume up and down buttons from your remote control to the system. The one failing we see in the design is that the volume level is hard-coded, requiring you to flash new code to make adjustments (perhaps an enterprising reader could add a potentiometer for making easy adjustments?).

We can’t help but be reminded of the setup which reads the closed caption info to mute topics you’ve added to a blacklist.

Script Lets You Import Eagle Boards For Use In FreeCAD

eagle-designs-imported-for-freecad

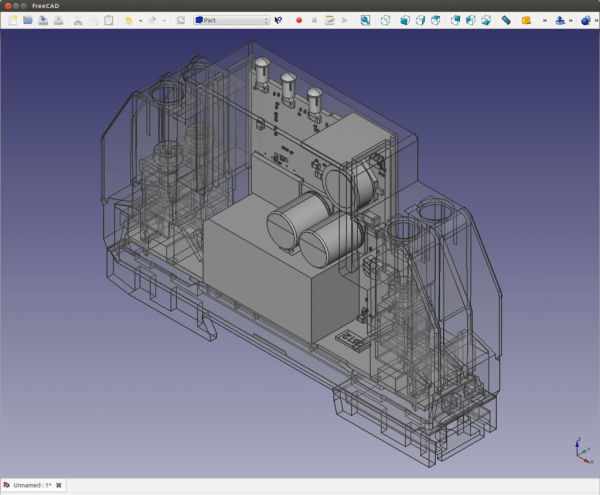
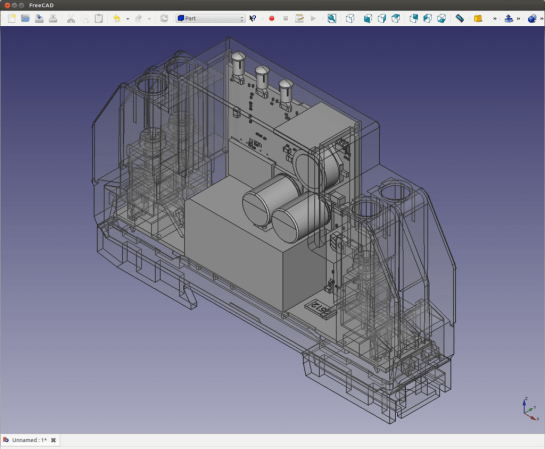
[Christian Aurich] wanted to use his Eagle CAD circuit board design in a proper CAD program in order to design enclosures. There are already a few options along these lines, but they didn’t quite fit his needs so he developed a script to import Eagle boards into FreeCAD. The script is packaged as a python macro for FreeCAD.

In describing the shortcomings of what’s already out there [Christian] does mention the use of EagleUp to model boards in Google SketchUp. But he feels the way the data is produced by SketchUp makes these models work well with 3D printing, but says they’re not easy to use with mechanical design CAD software. He also feels that the photo-realistic renderings are useless when developing enclosures.

It’s worth mentioning that this approach is only possible because CadSoft’s migration to XML makes it dead simple to get at the data.

Digging Deeper Into The Apollo Saturn V LVDC

LVDC-NAND-proto

[Fran] went all-out with her reverse engineering of the Apollo Saturn V LVDC board. Regular readers will remember that she was showing of the relic early this year when she took the board to her Dentist’s office to X-ray the circuit design. Since then she’s been hard at work trying to figure out how the thing functions using that look inside the board and components. When we say ‘hard at work’ we really mean it. Not only did she explore many different theories that resulted in dead ends, she also built her own version of the circuits to make sure they performed as she theorized. Above you can see her version of the NAND/AND gates used on the hardware.

We find her explanation of how the logic devices were originally fabricated to be very interesting. They started with a ceramic substrate and used additive processes to form the traces and add the gates. We’ve embedded her video explanation after the jump.

Continue reading “Digging Deeper Into The Apollo Saturn V LVDC”

GLCD Clock Project Packed With Great UI And Features

glcd-clock-packed-with-features

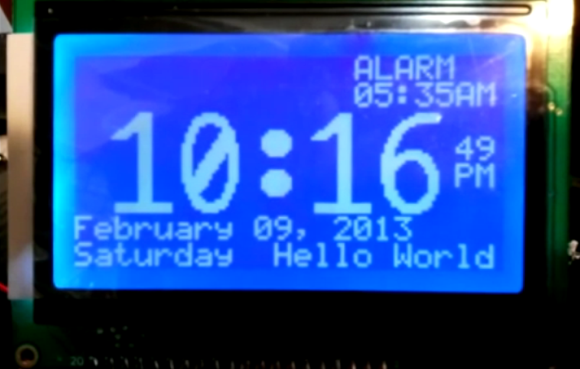
This Graphic LCD clock doesn’t have a fancy case, but [Gregory Wright] built in so many great features we think it will serve as inspiration for many projects to come. If he does decide to add a case it will be quite easy as there are no buttons to work around.

Without buttons how can the thing be adjusted? He decided to go with an IR remote control for all settings. This gives him a lot more options than a handful of buttons would have. Plus, heavy sleepers will need to find the remote control in order to shut off the alarm. We also think it’s interesting that the 595 shift registers he used have a low enough data high threshold (3.15V when VCC is 4.5V) that he didn’t need level converters to drive the 5V display with his 3.3V MSP430 Launchpad.

Check out his video after the break to learn about all the features he included in the UI. Our favorite is shown on the bottom right where it says “Hello World”. This is an area dedicated to a custom message for each day. He uses it to remind him about trash day (now there’s a feature!).

Continue reading “GLCD Clock Project Packed With Great UI And Features”

Harry Potter Location Clock Spies On Your Smart Phone

harry-potter-clock

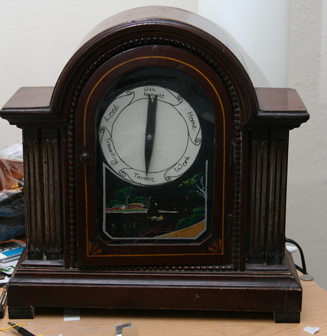
The location clock found in the Harry Potter books makes for a really fun hack. Of course there’s no magic involved, just a set of hardware to monitor your phone’s GPS and a clock face to display it.

[Alastair Barber] finished building the clock at the end of last year as a Christmas gift. The display seen above uses an old mantelpiece clock to give it a finished look. He replace the clock face with a print out of the various locations known to the system and added a servo motor to drive the single hand. His hardware choices were based on what he already had on hand and what could be acquired cheaply. The an all-in-one package combines a Raspberry Pi board with a USB broadband modem to ensure that it has a persistent network connection (we’ve seen this done using WiFi in the past). The RPi checks a cellphone’s GPS data, compares it to a list of common places, then pushes commands to the Arduino which controls the clock hand’s servo motor. It’s a roundabout way of doing things but we imagine everything will get reused when the novelty of the gift wears off.