How Duck Tape Became Famous

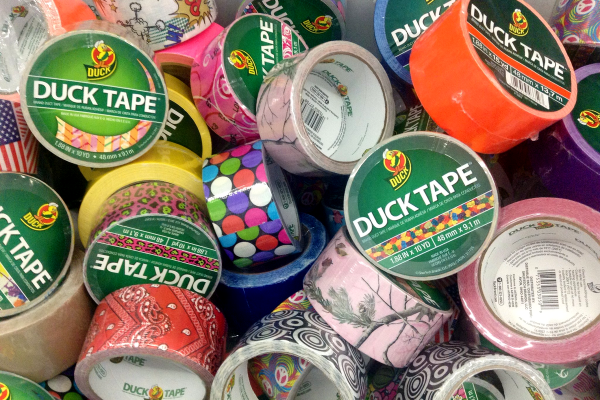
If you hack things in the real world, you probably have one or more rolls of duck tape. Outside of the cute brand name, many people think that duck tape is a malapropism, but in truth it is the type of cloth traditionally used in our favorite tape: cotton duck. However, as we’ll see, it’s not entirely wrong to call it duct tape either. Whatever you call it, a cloth material has an adhesive backing and is coated with something like polyethylene.

Actually, the original duck tape wasn’t adhesive at all. It was simply strips of cotton duck used for several purposes, including making shoes and wrapping steel cables like the ones placed in 1902 at the Manhattan Bridge. By 1910, the tape was made with adhesive on one side and soaked in rubber, found use in hospitals for binding wounds. In May 1930, Popular Mechanics advised melting rubber from an old tire and adding rosin to create a compound to coat cotton tape, among other things.

Continue reading “How Duck Tape Became Famous”

How Many Punches Does It Take?

Do you ever wonder just how many punches you have thrown? The answer is going to be different if you happen to use a punching bag as part of your exercise routine. So is the case with the [DuctTapeMechanic] and while restoring an old speed ball punching bag, he decided to combine his passions for sports and electronics by adding a punch counter.

Perhaps most interesting in this build is the method used to monitor the bag. A capacitance proximity sensor most often used for industrial automation is mounted in the wooden base. He just calls it “an NPN capacitive sensor” without mentioning part number but these are rather easy to find from the usual places. It has no problem sensing each punch — assuming you swing strong enough so that the bag comes near the sensor. Two battery packs, an Arduino, and an optocoupler round out the bill of materials. We were a little disappointed not to see any duct tape in the construction of this project, but since the electronics are outside and exposed to the elements, maybe duct tape will be used to install a roof in a future episode.

The [DuctTapeMechanic] likes to repurpose items which would otherwise be thrown away, which is something to be applauded. The frame of this punching bag was welded from a discarded metal bed frame (a regular occupant of crawl spaces and self storage places), and you might remember he repurposed the electric motor from a discarded clothes dryer last month, changing it into a disk sander.

Continue reading “How Many Punches Does It Take?”

Shred The Gnar Without Paddling For Waves

[Ben Gravy] isn’t your average pro surfer. For one thing, he lives in New Jersey instead of someplace like Hawaii or Australia, and for another he became famous not for riding the largest waves but rather for riding the weirdest ones. He’s a novelty wave hunter, but some days even the obscure surf spots aren’t breaking. For that, he decided to build a surfboard that doesn’t need waves. (Video, embedded below the break.)

The surfboard that [Ben] used for this project isn’t typical either. It’s made out of foam without any fiberglass, which makes the board less expensive than a traditional surfboard. The propulsion was handled by an electric trolling motor and was hooked up to a deep cycle battery mounted in the center of the board in a waterproof box. The first prototype ended up sinking though, as most surfboards can’t support the weight of a single person on their own without waves even without all the equipment that he bolted to it.

After some reworking, [Ben] was able to realize his dream of riding a surfboard without any waves. It’s not fast, but the amount of excitement that he had proves that it works and could fool most of us. This hack has everything, too: a first prototype that didn’t work exactly right and was fixed with duct tape, electricity used in a semi-dangerous way, and solving a problem we didn’t know we had. We hope he builds a second, faster one as well.

Continue reading “Shred The Gnar Without Paddling For Waves”

Visit Tapigami Tape City, Where Tape Is The Fabric Of Society

With so many cool things going on at Bay Area Maker Faire, it takes something special to stand out from the crowd. Covering several hundred square feet of floor and wall with creations made of tape would do the trick. Welcome to Tapigami Tape City, a traveling art exhibit by [Danny Scheible].

Many of us used construction paper, glue, and tape to express our creativity in our youth. Tapigami’s minimalism drops the paper and glue, practitioners of the art stick to tape. It is an accessible everyday material so there is no barrier to entry to start having fun. And while tape does have some obvious limitations, it is possible to get quite creatively elaborate and still use tape almost exclusively.

The Tapigami booth is very happy to accommodate those wishing to learn the way of tape. At their table, young and old alike are welcome to sit down and start building basic shapes out of masking tape. This begins with cones, cylinders, and cubes which are then combined into more complex creations — it’s kind of like OpenSCAD, but all with tape.

Attendees of Bay Area Maker Faire should not miss seeing Tape City in person, it’s quite the sight to behold in the south-east corner of Zone 2. (Not far from the Tindie/Hackaday booth, stop by and say hi!) And while it’s plenty of fun to stick to tape, we can see the Hackaday demographic taking these concepts up a few notches. If you’ve pulled off something mind blowing using tape, you know where our tip line is.

Continue reading “Visit Tapigami Tape City, Where Tape Is The Fabric Of Society”

Monstrous USB Power Bank

At some point, cleaning out the spare parts bin — or cabinet, or garage — becomes a necessity. This is dangerous because it can induce many more project ideas and completely negate the original purpose. [Chaotic Mind], considering the pile of  batteries he’s collected over the past decade, decided that instead of throwing them out, he would recycle them into a grotesque USB power bank.

Inside the bulk of this power bank are an eye-popping 64 18650 Lithium Ion cells, mostly collected from laptop batteries, and wired in a parallel 8×8 pattern with an estimated capacity of over 100,000mAh(!!).  The gatekeeper to all this stored energy is a two-USB power bank charger board from Tindie.

Ah — but how to package all this power? The handy man’s secret weapon: duct-tape!

Continue reading “Monstrous USB Power Bank”

Increase The Range Of An ESP8266 With Duct Tape

For the longest time now, I’ve wanted to build a real, proper radio telescope. To me, this means a large parabolic reflector, a feed horn made of brass sheet, coat hanger wire, and at least for the initial experiments, an RTL-SDR dongle. I’ve done the calculations, looked at old C-band antennas on Craigslist, and even designed a mount or two that would make pointing the dish possible. I’ve done enough planning to know the results wouldn’t be great. After months of work, the best I could ever hope for is a very low-resolution image of the galactic plane. If I get lucky, there might be a bright spot corresponding to Sagittarius A.

There are better ways to build a radio telescope in your back yard, but the thought of having a gigantic parabolic dish out back, peering into the heavens, has stuck with me. I’ve even designed a dish that can be taken apart easily and transported because building your own dish is far cooler than buying a West Virginia state flower from a guy on Craigslist.

Recently, I was asked to come up with a futuristic, space-ey prop for an upcoming video. My custom-built, easily transportable parabolic antenna immediately sprang to mind. The idea of a three-meter diameter parabolic dish was rejected for something a little more practical and a little less expensive, but I did go so far as to do a few more calculations, open up a CAD program, and start work on the actual design. As a test, I decided to 3D print a small model of this dish. In creating this model, I inadvertently created the perfect WiFi antenna for an ESP8266 module using nothing but 3D printed parts, a bit of epoxy, and duct tape.

Continue reading “Increase The Range Of An ESP8266 With Duct Tape”

Green Light LEGO, Red Light Stop

Master LEGO craftsman [Baron von Brunk] had the same childhood passions as a lot of us—LEGO (obviously), Transformers, and Nintendo. But he also harbored a passion for traffic lights and road signs. His latest offering, a fully functional LEGO traffic light, is some pretty fantastic plastic. You might recall that we featured [Baron von Brunk]’s LEGO mosaic lamps a few weeks ago. This project is that one on steroids.

The body is made of 1700+ LEGO and Technic pieces. [Baron von Brunk] was kind enough to provide his LDD file, though he says it should be considered a rough guide to construction. The red, yellow, and green 1×1 areas are each lit with a 48-SMD LED floodlight bulb. Colored lights are available, but he used the solid white variety for greater luminescence. The lights are driven by a traffic light controller typically used for model railroads.

[Baron von Brunk] ended up lining the inside with black 1x1s and metallic reflective duct tape to keep the light from leaking out of the masonry. He used some Technic bricks on the rear door to form hinges, and Technic pins to hold the LED lamps.