Portable Gaming Console Uses SSD1289 And Propeller

building-a-portable-video-game

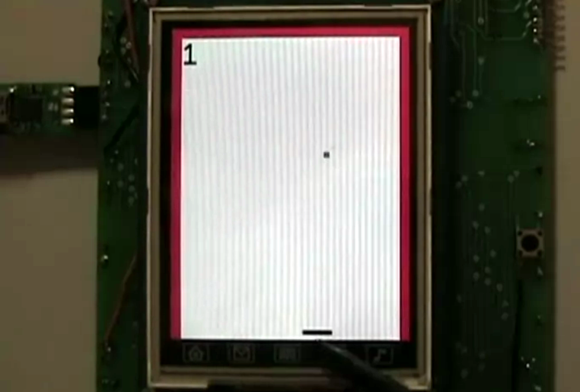
[Samir] dabbles in hobby electronics and decided to put his skills to the test by building this portable gaming console (Note: this site uses an HTTPS address which cannot be used through Google Tranlator. It does work for the Chrome browser translator). The image above is a screenshot from his Breakout-style game. The paddle at the bottom is controlled with the touchscreen. You move it back and forth to keep the ball from traveling past the bottom edge (it bounces off of the red borders on the sides and top).

The main PCB is larger than the 3.2″ LCD footprint, but [Samir] made sure to include a lot of peripherals to make up for it. The board sports a Parallax Propeller chip to run the games. It interfaces with the SSD1289 screen (this is a cheap and popular choice) but that really eats up a lot of the IO pins. To control the game the touchscreen can be used as we’ve already mentioned. But there are two other options as well. There is an expansion port which uses a shift register (74HC165) to serialize the input. For prototyping this allowed [Samir] to use an Atari joystick. He also rolled a Bluetooth adapter into the project which we would love to see working with a Wii remote. Rounding out the peripherals are an SD card slot, audio jack for sound, and an RTC chip for keeping time.

There are several videos included in the post linked above. After the break we’ve embedded the game-play demo from which this screenshot was taken.

Continue reading “Portable Gaming Console Uses SSD1289 And Propeller”

Telepresence Upgrade With A Minimum Of Effort

telepresence-upgrade-with-very-simple-parts

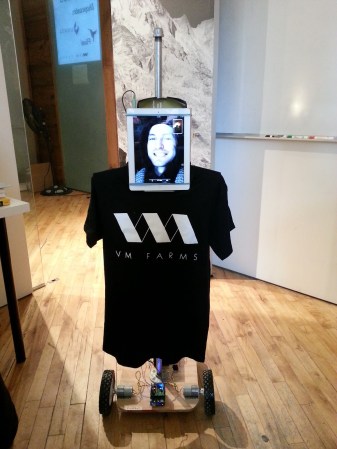
This telepresence upgrade lets an employee take part in the office from more than four thousand kilometers away. It’s an upgrade of their previous setup which used a laptop on a rotating platform to add a bit of control to the video conferencing experience. But all that original version could do was swivel, this one lets you drive your virtual self around for fifteen hours between battery charges.

The real work is in the base of the robot, as the audio and video are handled by a tablet independently from the locomotion. The team spent about four hundred bucks to throw the thing together. It starts with a hunk of plywood. Two 3A motors were mated with lawnmower wheels for the front of the bot. Dragging under the back of the base are a couple of casters that make it possible to turn without skidding. A motor shield and a WiFi shield for the Arduino make it possible to control the thing over the Internet. They even added some functionality on the client side to use a PlayStation 3 controller. Check out the completed machine in the clip after the break.

Continue reading “Telepresence Upgrade With A Minimum Of Effort”

TV Show Inspires This Smaller Pong Paddles Hardware Hack

smaller-pong-paddles

When we read “smaller paddles” we immediately thought of the physical controllers that you hold in your hands. But this hack alters the size of the virtual Pong paddles displayed on the TV screen.

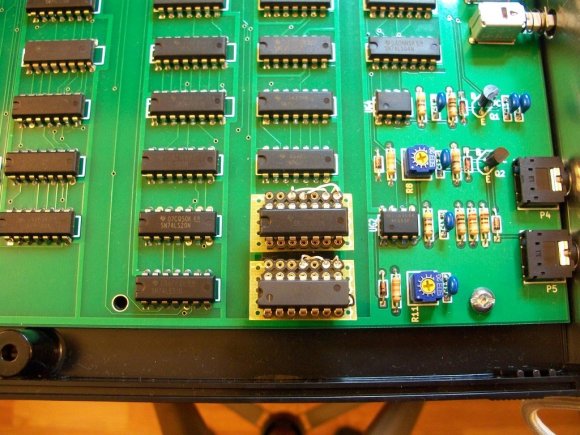
We remember quite well the episode of That 70’s Show where Red and Kelso take apart their Pong machine to hack it. The video after the break which [Blues Image] put together shuffles scenes from that episode in with images of his hack. The characters are adamant that the game is too easy and reducing the size of the virtual paddles is the only thing that will make it fun again. After building his own hardware from the original schematics, [Blue Image] figured this challenge was worth a try.

His solution is in the form of two man-in-the-middle boards which insert a way to reroute the pins without altering the main board. One of the chips is used to draw the paddles, the other checks for collisions with the ball. By changing the pin-out the paddles are reduced from fifteen pixels down to seven.

Continue reading “TV Show Inspires This Smaller Pong Paddles Hardware Hack”

Mobile Chicken Coop Includes Wireless Sensors

mobile-chicken-coop-build

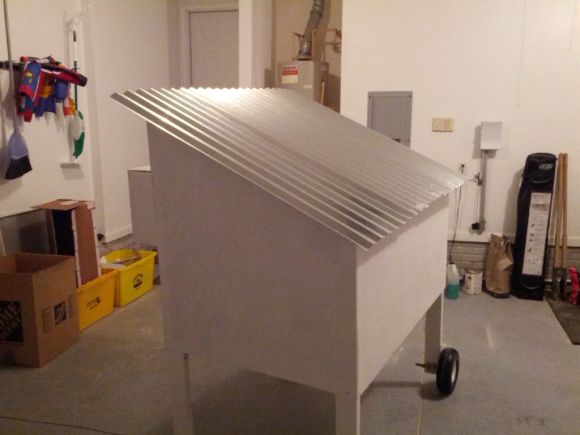
In and of itself this mobile chicken coop is a pretty nice build. There are some additional features lurking inside which you don’t find on most coops. [Neuromancer2701] built-in a set of sensors which can be accessed wirelessly. It makes it a snap to check up on the comfort of the hens without leaving the couch.

At the heart of the sensor system is an Arduino along with an Xbee module. The build isn’t quite finished yet, but so far three sensors have been implemented. A thermistor is used to read the temperature inside the coop. To make sure there’s enough water, two sheets of foil tape were applied to the water reservoir. The CapSense library measures the capacitance between these plates which correlates to the water lever (we’ve seen this type of water level sensor before). And finally, there’s a sensor that can tell if the door to the coop is open or shut.

He’s having trouble automating the door itself. This can be pretty tricky, especially if you go for a super complicated locking mechanism like this one.

DIY NES Controller Makes No Changes To The Design

We like this project for its sheer simplicity. After all, recreating the hardware in the controller for a modern gaming system is next to impossible. [Guillermo A. Amaral B.] had a bunch of parts sitting around and decided to try his hand at recreating an original Nintendo Entertainment System controller.

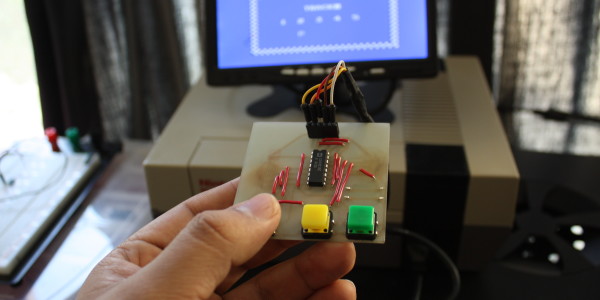
If you’re not familiar with the electronics inside this brand of retro gaming hardware you might be surprised to find that there’s barely any logic hardware at all. The chip in the middle of the board is a 4021 parallel to serial shift register. It connects to the buttons and uses the clock signal coming through the cable to pulse out the button states over a serial wire. So all that [Guillermo] did was lay out the chip with connects for each button.

In the image above his thumb is obscuring the 5-way switch used for directional control and select (center click). The yellow and green buttons serve as A and B, with the start button on the opposite side of the board due to a mistake in his board layout. He does have some future plans for this. He’s working on a Raspberry Pi project that will monitor and record the controller serial data so that you can play it back. It sounds like a player piano for video games.

Want to see a really small version of this? The same hardware in a smaller package was put together a couple of months ago to build the world’s smallest NES controller.

[via Adafruit]

Great Antenna For Software Defined Radio Is Really Easy To Make

The University of Kent’s hackerspace, TinkerSoc, recently had a talk on software-defined radio using an incredibly inexpensive USB TV tuner. Of course this is nothing new to Hackaday readers, but they did manage to build one of the best antennas for their TV dongle. It’s a discone antenna, and is perfectly suited for tuning into a whole bunch of really cool things such as weather balloons and aircraft transponders.

The idea discone antenna looks exactly like its namesake; a metal disk attached to a metal cone. Of course with the frequencies the RTL software-defined radio deals with, it’s rarely necessary to build antennas out of sheet metal. The team at TinkerSoc built their discone out of galvanized garden wire and attached it to the input of their TV tuner.

All the dimensions for their discone antenna were gleaned from [ve3sqb]’s antenna design programs. Since TinkerSoc designed their antenna for 110 MHz, it ended up being pretty large. For higher frequencies, though, a discone antenna become fairly small and more than portable enough for a mobile rig.