A Simple Fix To Resurrect Your Broken Iclicker

simple_iclicker_battery_fix

If you are currently attending college, the odds are that you are familiar with iclicker classroom remotes. If you have one of these, you might also be aware that they tend to be flaky at times, particularly when it comes to powering on. [Todd] received a few “broken” iclickers lately and has found an easy to fix design issue that might possibly save yours (and others) from the trash heap.

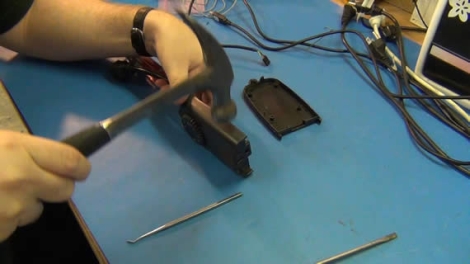
When he started pulling the units apart to diagnose them, he noticed that something with the battery contacts was not quite right. They are held in place by the device’s plastic shell which is pretty common, however in the iclicker, the portion of the plastic case that holds the positive battery contact is too big, preventing some batteries from making a complete circuit.

Now you might be thinking to yourself that AA batteries are all the same, but they are not necessarily created equal. Through a small bit of testing, [Todd] found that many different batteries experienced intermittent connectivity issues depending on the height of the positive terminal, and that due to their design, Duracell batteries flat out didn’t work. With the careful removal of a portion of the plastic surrounding the positive contact, [Todd] was able to fix each of his “broken” remotes.

He hopes that this information helps some people resurrect their non-functioning units, because a few minutes work sure beats buying another $30 iclicker.

Salvaging A Commercial-grade Pick And Place Machine

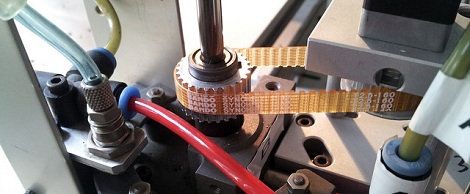
Why build a pick and place machine from the ground up when you can start with a full featured, but non-functional unit, and bring it back to life. That’s exactly what [Charliex] is doing with this Juki 360 rebuild.

A bit of background is in order here. [Charliex] is working alongside other hackers at Null Space Labs to restore this hardware. The Los Angeles based hackerspace sponsored the hardware badges at this year’s LayerOne, each of which was hand assembled. They’d like to avoid that tedium next year, which led to this project.

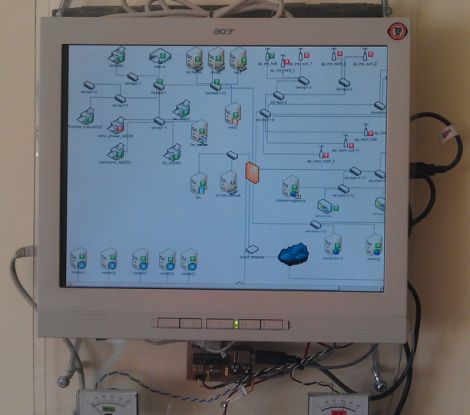
The seller of the used Juki 360 listed it in working condition, but it seems that they were polishing a turd since it is basically non-functional. The link at the top of this post is the second testimonial of their work so far. It covers the use of an Arduino board as a replacement interface, as well as a bunch of sensor repair, pneumatic testing, and motor driver firmware tweaking. If you’d like to see the initial teardown and hardware diagnostics don’t miss the first post in their adventure.

Water Vortex Exhibit Repair Gives A Look At The Bearing And Gasket Design

[Ben Krasnow’s] water vortex machine has been an exhibit in the lobby of the San Jose City Hall for quite some time now. Unfortuantely he recently had to perform some repair work on it due to the parts inside the water chamber rusting.

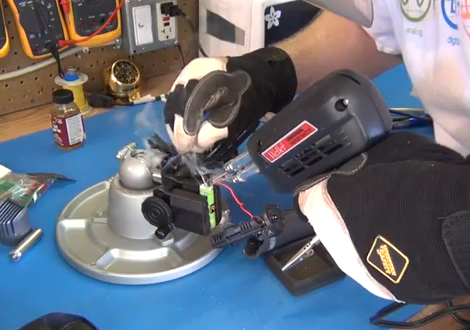
This is the same water vortex that we saw about a year ago. It uses a power drill to drive an impeller at the bottom of a water column to produce the vortex. That impeller was made from painted steel and after being submerged for eight months it began rusting, which discolored the water. [Ben’s] repair process, which you can watch after the break, replaces the shaft and the impeller. He reused a plastic PC cooling fan as the new impeller. The replacement shaft is stainless steel, as is all of the mounting hardware that will be in contact with water. But for us, the most interesting part of the repair is his explanation of the shaft gasket and bearings. Two thrust bearings and two radial bearings ensure that the shaft cannot move axially, which would cause a problem with the gasket. He had intended to swap out the oil seal for an all Teflon seal but the machined acrylic wasn’t conducive to the part swap. Instead, he replaced it with the same type of gasket, but bolstered the new one with some silicone to stave off corrosion.

Continue reading “Water Vortex Exhibit Repair Gives A Look At The Bearing And Gasket Design”

Resurrecting An Electric Razor

[Salvatore Ventura] likes a close shave from an electric razor, and nothing shaves closer than a new set of blades. After shelling out for some sharp ones, the rechargeable batteries died so he set out to replace them with a couple of double A’s (not the ones pictured above as those are alkaline).

This fix actually increased the original battery life of the razor by about 30%. That’s thanks to a larger capacity than the battery that had come with the razor. But [Salvatore] didn’t get to enjoy the windfall for very long. One morning the charge light was blinking on the razor and it wouldn’t spin up at all. After testing the batteries with a multimeter he found that they had a full charge and figured it was the main board that had gone out.

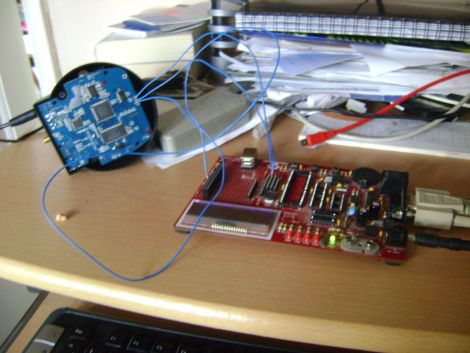
The real question is, what is that board actually doing? A bit of study led him to the conclusion that it is just a charging circuit, and an on/off switch. He kissed the board goodbye, wired up the AA battery holders directly. Now he jams a paper clip into the recharging jack, shorting the pins to complete the circuit. He could even keep using rechargeables with an external charger if he was careful not to run them too low.

Who Knew Thinkpad Batteries Require A Jump Start?

Lithium battery packs reaching the end of their life usually have a lot of kick left in them. That’s because they’re made up of multiple cells and it only takes the failure of one to bork the entire battery. One of the most interesting examples we’ve heard of this is in the Toyota Prius, but that’s a story for another time. In this case, [Mika] wanted to resurrect the battery from his IBM Thinkpad T40. He identified the offending cell and replaced it, but couldn’t get any juice out of the battery after the repair.

He was measuring 0V on the output, but could measure the cells instead of the control circuitry and was getting over 11V. Clearly, the control circuit wasn’t allowing an output. We completely understand the concept here (think about that really bad press about exploding laptop batteries). It seems there’s a lockout mechanism when the control circuit loses power. [Mika] managed to get past this by shorting voltage into the control circuit, a method he likes in the video after the break to jump starting a car.

We’ve seen similar cell replacement for power tools, like a Dremel or a Makita drill.

Continue reading “Who Knew Thinkpad Batteries Require A Jump Start?”

Power Tool Battery Charger Repair

drill_battery_charger_repair

[Webby] inherited a cordless drill from his dad and when he finally got around to using it, found that the charger was dead in the water. He disassembled it and narrowed the issue down to the charger’s primary transformer, but didn’t know where to go from there. A friend suggested that the coil’s thermal fuse might have blown, and upon further investigation, [Webby] discovered that his friend was right.

He removed the dead fuse and soldered in a piece of wire just for testing – not surprisingly the charger sprang to life. He picked up a new thermal fuse to replace the old one, but he wasn’t quite satisfied with the fix just yet. If the fuse burned out once already, there’s little to stop it from happening again, so he decided that installing a small cooling fan would be a good idea. He mounted the fan on the outside of the case after cutting some vent holes, leeching power from the charger itself.

While simply adding a fan to the charger might not be everyone’s idea of a perfect solution, it has worked out quite well for [Webby] in the past, so if it isn’t broken…

[via HackedGadgets]

Bypassing Manufacturer-imposed Battery Lockouts

sony_battery_cell_swapping

When [Barret] went to use his camera the other day it kept shutting down on him, and upon inspecting the battery, he found that it was a bit swollen. Knowing that he needed a replacement, he turned to an aftermarket battery he had sitting around, but grew pretty annoyed when his Sony Cybershot camera would not accept it.

Apparently a recent firmware update causes his camera to reject non-Sony batteries, a situation he describes as “battery DRM”. There was no way he was going to pony up another $50 to Sony instead of using the perfectly good $10 battery he already had, so he decided to rectify the issue himself.

He stripped both batteries of their plastic coatings, revealing the lithium cells and their charging circuits. He desoldered the PCB from his Sony battery, transplanting it to his aftermarket battery after a little bit of trimming. He wrapped everything up with some tape and gave his franken-battery a spin. It worked a treat, and he was so satisfied with it that he did a similar swap in his aging Logitech mouse.

As more and more companies lock competitors out of the user-replaceable consumables market, these sorts of hacks are certain to become more and more prevalent.