Hackaday 10th Anniversary: Demoscenes And Blink(1)

There were two LA hackerspaces represented at our 10th anniversary party, and members from both of them were able to give a talk on the projects coming out of their labs. [Arko] from null space labs showed up with a few of his creations including CUBEX, his high altitude balloon payload and a demoscene board he’s been working on. [Tod] from Crashspace showed up with the rest of the Crash crew and helped out with the morning build-offs and labs.

A Demoscene Board

Demoscenes, for one reason or another, aren’t extremely popular in the US. In Europe, you can find teams working on programatically generated music videos year-round, coded for Commodore 64s, Amigas, even stranger computers, and x86 assembly. There’s an art to the whole thing, but for those of us on this side of the pond, there aren’t many venues to demonstrate impeccable graphics programming skill.

[Arko] wants to change this. He’s designed a demoscene board around a PIC micro with hardware graphics acceleration, USB OTG, VGA out at 640×480, and an audio out port. It’s meant to be a platform to create demos on, and already [Arko] has ported the famous Craft demo from [lft] to his platform. Edit: the Craft demo was playing on the older ATmega88 version of the board. The PIC board is a little more capable.

Being that there are so few Demo parties in the US, only building a board to play demos would be just a bit shortsighted. [Arko]’s main reason for giving this talk was to tell everyone about the LayerOne Demoparty next year just a few miles from the Hackaday Hackaspace. It coincides with the LayerOne conference, and the board itself will soon be available for sale in the Hackaday store.

Blink(1) and How To Kickstarter

When it comes to electronics and tech Kickstarters, Blink(1) defines what it means to have a minimum viable product. It’s a USB plug, a small microcontroller, and an RGB LED. That’s it. [Tod] wanted to take this simple project and learn how to turn it into a product. [Tod] emphasised the ‘learn’ part of his plan; the alternate title for this talk was, “How to Fail Multiple Times and Still Ship 20,000 Units.”

The Blink(1) started as a standard My First Arduino Sketch, blinking three LEDs, quickly moving over to a USB LED device. This rather large USB dongle sat there for a few years until he decided to turn this into a product. It turned out building a product is a lot more involved than building a kit, with considerations to the enclosure, the packaging, and the inevitable CNC mold fails. Assembly – and the success of his first Kickstarter – was also an issue. [Tod]’s friends ended up assembling most of the kits.

Despite these problems, [Tod] was still able to ship a few thousand units and is now working on another production run with SeeedStudio. It’s a remarkable story, with the Blink(1) used by Google, Disney, Microsoft, Facebook, and a whole bunch of other huge companies. The Blink(1) is also in the mainline Linux kernel, something you can’t say about a lot of Kickstarters out there.

Help Save Nullspace Labs

Nullspace Labs

A few days ago, the folks at Nullspace Labs in downtown LA got a surprising memo: their building is going to be gutted in a month. With thirty days left, they need money to cover first and last months rent, and help with moving. We can imagine that moving a Hackerspace is no small feat, since they tend to accumulate tons of awesome stuff.

The Hackerspace has started a crowd funding campaign, and has posted a call for help. They are looking for money, new members, or help with moving. If you’ve never been, you can check out our tour of Nullspace Labs.

It’s tough deciding what Hackerspace news to cover. We can’t run individual features on every tip we get promoting Hackerspace events, developments, crowd funding campaigns, and calls for help. We’re featuring this one because we just visited them, they’re awesome, and they’ve also been the source for many great stories over the years, like craning in a laser cutter or developing a modular LED orb. So here’s a question for you: Should we be presenting more Hackerspace news that is perhaps only relevant at the local level? If you think we should, how would we present it? There’s the option of doing occasional links-post-like roundups. But if you have a better idea we’re all ears.

Touring Null Space Labs, Another LA Hackerspace

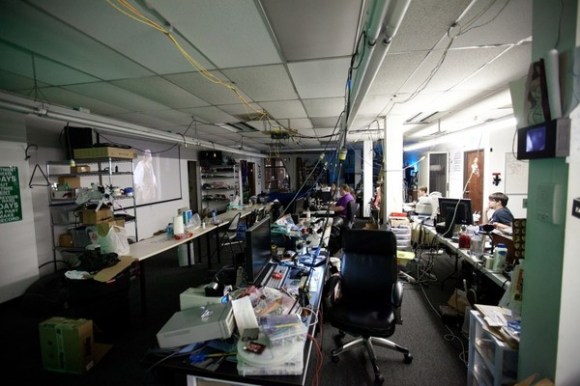
Null Space Labs prides itself on being the only hackerspace that’s not saving the world. Instead, they focus on more important matters such as repairing an industrial pick and place machine, hoisting laser cutters through third story windows, and generally being extremely awesome. Since some of the Hackaday crew is in LA, we decided to check in on the folks at Null Space, and they graciously granted us a tour.

It’s not an overstatement that Null Space is better stocked than any university EE lab. They have at least four million electronic components, and they honestly have no idea how many different types of components they have. As for tools, a 22 GHz spectrum analyzer and 2 GHz scope are tucked away behind a direct to garment printer. A gigantic laser printer, pro 3D printer, PCB milling and through-hole plating stations, and pick and place machine are just a few more of the fun toys available to Null Space members.

In the video below, [M] walks us through the main electronics work area, filled to the brim with tools and storage cabinets. After that, [arko] shows off the PCB mill and the back room with reels of parts strewn asunder.

Continue reading “Touring Null Space Labs, Another LA Hackerspace”

Hoisting A Laser Cutter To The 3rd Floor (and Other Fun You’ll Probably Never Have)

The folks at Null Space Labs bought a 40W CO2 laser tube in order to build their own laser cutter. Unfortunately nobody really wants to build a laser cutter; they just want to play with a laser cutter. So they ended up biting the bullet and ordering a $4000 model from China. That’s it hovering in midair. This is the story of acquiring the unit and playing around with it once it arrived.

Check out those orange cones in the picture. Hackerspace members put them out to keep the parking spots clear so no damage was caused in the event of an accident. But since they’re located in Los Angeles some of the road warriors didn’t really care and just moved the cones anyway. Luckily the crane hoist to the third floor (they removed one of the windows) ended up going rather well.

So what do you do with a laser cutter like this one? Crack it open and make some improvements. The manufacturer says it can’t cut through steel. Well that’s only if you don’t add some O2 to the cutting process. And the stock mirrors… they’ve got to go. Turns out a simple upgrade boosted the power by about 20% (we’re wondering how they measured that). While we’re talking about optics, might as well upgrade the lens as well. You can see where they’re going with this, and [CharlieX] tells us it is just the first in a series of posts he’ll be working on.

384-LED Ball Receives Animation Wirelessly And Knows Its Orientation

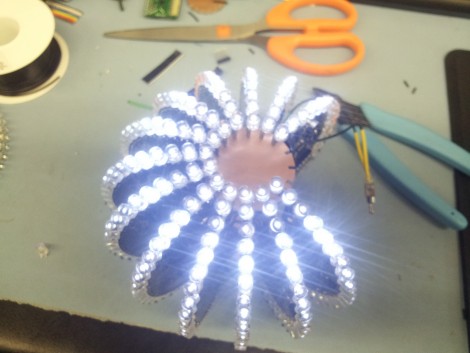
We get a ton of tips about Kickstarter projects. Here is a great example of what we need to see in order to feature one of them. This LED Blinky Ball developed by Null Space Labs is the target of a rather ambitious fundraising campaign. But in addition to the fundraising write-up they’ve shared extensive details about the prototype.

The ball is made up of sixteen slices; each is its own circuit board hosting an LED driver. All slices use the same PCB design, but one of them has an ATmega328 populated on the board to act as master. Optional components on the master board include an accelerometer, and a Bluetooth module to receive animation data. To get the full effect of the most recent prototype you’re going to want to see the video on their Kickstarter page.

Think this ball looks familiar to you? The original design was developed by [Nikolai] as a performance piece for a friend. This version was inspired by our feature of that earlier project.

So, use this as a template if you’re planning to submit your Kickstarter links to Hackaday’s tips line. We want to juicy details on the project!

Repairing A Commercial-grade Pick And Place Machine

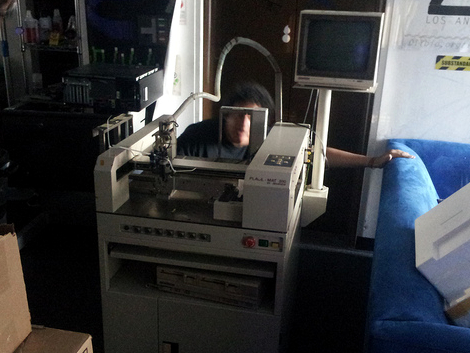
It looks like Null Space Labs has a new pick and place machine. This immense repair job began when [Charliex] and [Gleep] found a JukiPlacemat 360 pick and place machine. The idea of having their very own pick and place machine proved intoxicating, possibly too much so because the didn’t return the machine when they found out it wasn’t working.

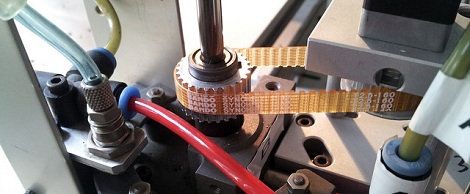
After a ton of work that involved adding a camera, [Charliex] and the rest of the builders at Null Space Labs finally have their own pick and place machine that works. This was a complete rebuild from the ground up. So many things didn’t work on the machine, they might have been better off building one from scratch. Aside from the massive effort that went into turning the shell of a machine into a working unit, we really have to commend everyone who worked on it.

The team added a nice GUI to control the machine. The guys have already run a successful test and ovened a few boards, so everything works as it should have at purchase. It’ll be great for making next year’s LayerOne conference badges.

Salvaging A Commercial-grade Pick And Place Machine

Why build a pick and place machine from the ground up when you can start with a full featured, but non-functional unit, and bring it back to life. That’s exactly what [Charliex] is doing with this Juki 360 rebuild.

A bit of background is in order here. [Charliex] is working alongside other hackers at Null Space Labs to restore this hardware. The Los Angeles based hackerspace sponsored the hardware badges at this year’s LayerOne, each of which was hand assembled. They’d like to avoid that tedium next year, which led to this project.

The seller of the used Juki 360 listed it in working condition, but it seems that they were polishing a turd since it is basically non-functional. The link at the top of this post is the second testimonial of their work so far. It covers the use of an Arduino board as a replacement interface, as well as a bunch of sensor repair, pneumatic testing, and motor driver firmware tweaking. If you’d like to see the initial teardown and hardware diagnostics don’t miss the first post in their adventure.