Printing A Boat Made Out Of Milk Jugs

Today, groups from all over the Pacific Northwest will take up their oars and head over to Green Lake for the 42nd annual Seafair Milk Carton derby. The team who builds the fastest boat made out of milk cartons wins the regatta (and $10,000). This year, we’d put our money on the 3D printer group from the University of Washington; they printed a boat large enough to carry a person using crushed melted milk jugs.

After building a huge extruder to feed shredded HDPE plastic through a nozzle, the team repurposed an old plasma cutter to serve as an 8-foot-long 3D printer. There were a number of problems the team ran into – getting layers to fuse together, finding a suitable printing surface, and perfecting the art of squeezing melted milk jugs through a heated metal tube – but the final result is impressive, to say the least.

As far as how lake-worthy the UW team’s boat is, we have no idea. The milk jug regatta will be held later today, and if you have an update of how the team fared, send us a tip.

3D Printing With A Delta Robot That Seems To Simplify The Concept

This 3d printing delta robot really seems to solve a lot of the hurdles faced by previous offerings. With other delta printers we’ve looked at the motor control of the three arms is usually a it complicated. On this build the motors can just be seen in this image at each corner under the build platform. Each motor has a belt that loops from the bottom to the top for the machine, driving an arm along two precision rods.

It’s also interesting to note that the printer head doesn’t have a motor mounted on it for feeding the filament. Instead, the motor is mounted remotely. You can see it above the soda can in this image. It feeds the filament through a hollow tube spanning the gap between the extruder and the motor. This acts as a Bowden cable. With less mass to move this may make it easier to control the location of the print head.

After the break you can catch a clip of the team showing off the speed and dexterity of the delta bot, followed by a printing demo.

Continue reading “3D Printing With A Delta Robot That Seems To Simplify The Concept”

RA 3D Printer Controller Board Does Everything, Has Disco Lights

3D printers are getting far, far more complicated than a 4-axis, plastic-squirting CNC machine. These days, you really haven’t earned your geek cred unless you’ve hacked an LCD and SD card interface into your 3D printer, or at least experimented with multiple extruders. There’s a problem with the controller boards everyone is using, though: most boards simply don’t have enough output pins, greatly reducing the number of cool things a 3D printer can do.

Enter RA. It’s a new 3D printer controller board with IO for any imaginable setup. Going down the feature list of RA, we’re wondering why we haven’t seen some of these features before. A 24-pin ATX power header is soldered directly to the board, giving RA users a stupidly easy way to power their printer. Of course there are outputs for LEDs, camera triggers (printer time-lapse movies are really cool), light rings, buzzers, an LCD/rotary encoder/SD card control panel, and support for two heated beds for gigantic printers. If printing in one color isn’t good enough for you, RA has support for three extruders

Compared to other 3D printer boards such as RAMPS or the Sanguinololu, the number of outputs on this board is simply amazing. If you’re planning to build a huge, feature-laden 3D printer, you probably couldn’t do much better than what RA is offering.

3D DLP Printer Builds An Orange TARDIS

This micro-sized TARDIS is the latest print from [Ron Light]’s Sedgwick 3D DLP printer. Yes, it’s orange, but the print quality for such a small object is pretty astounding.

The Sedgwick 3D printer is currently available as a kit on Kickstarter. For five hundred bones, the Sedgwick provides all the parts – minus a DLP projector and resin – to make your own miniature Type 40 with a broken chameleon circuit. There’s a lot more this printer can do, from miniature cathedrals to hollow geodesic spheres.

This is the latest in what will be a long line of DLP projector / resin 3D printers, and the most affordable one to date. The last one we saw was an awesome $2400 machine that included a projector and resin. At $500 for a projector-less kit, the Sedgwick still handily beats even the cheapest option we’ve seen so far.

[Ron Light] is from Kansas City, and our boss man [Caleb] ran into him at the KC Maker Faire a few weeks ago. You can check out that little interview and a few videos of the Sedgwick doing its thing after the break.

Continue reading “3D DLP Printer Builds An Orange TARDIS”

Printing Mounting Boards And Boxes For Hobby Projects

That’s a great base board for these Gadgeteer components. [Rob Miles] has been designing and printing mounting boards and enclosures for several of his projects. He just got into printing parts with the Ultimaker last week, and we’d say he’s found his stride. The board pictured here features nubs that act as stand-offs, and on the underside there are countersunk spaces for the bolt heads used as fasteners.

He started designing with Autodesk 123D but the interface didn’t really suit his working style. He switched over to FreeCAD and that experience fit him like a glove. He starts out with the sketch view to draw his parts, then extrudes that into the 3D model for further refinement before having the printer turn the digital into the real. This is the third board he produced in just one day of experimenting, but he is also showing off an enclosure he made for his thermal printer.

If you’re not working with boards that have nice mounting holes like these, don’t fret. We’ve seen 3d printed mounting systems that cradle the board, like these Raspberry Pi enclosures.

[Thanks Peter]

Printing And Programming A Self-balancer

The Hackaday staff isn’t in agreement on 3d printers. Some of us are very enthusiastic, some are indifferent, and some wonder what if they’re as widely useful as the hype makes them sound. But we think [Jason Dorweiler’s] self balancing robot is as strong a case as any that 3d printing should be for everyone!

Don’t get us wrong. We love the robot project just for being a cool self-balancer. Seeing the thing stand on its own (video after the break) using an Arduino with accelerometer and gyroscope sensors is pure win. But whenever we see these we always think of all the mechanical fabrication that goes into it. But look at the thing. It’s just printed parts and some wooden dowels! How easy is that?

Sure, sure, you’ve got to have access to the printer, it needs to be well calibrated, and then you’ve got to make the designs to be printed out. But these hurdles are getting easier to overcome every day. After all, there’s no shortage of people to befriend who want nothing more than to show off their Makerbot/RepRap/etc.

Continue reading “Printing And Programming A Self-balancer”

Salvaged Robot Arm Makes A Big 3d Printer

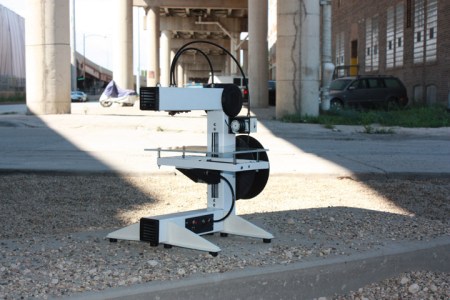
Wow, building a precision 3d printer is amazingly easy if you can get your hands on an industrial-quality robot arm. [Dane] wrote in to tell us about this huge extruder printer made from an ’80s-era SCARA robot arm. It is capable of printing objects as large as 25″x12″x6.5″.

This 190 pound beast was acquired during a lab clean out. It was mechanically intact, but missing all of the control hardware. Building controllers was a bit of a challenge since the it’s designed with servo motors and precision feedback sensors. This is different from modern 3d printers which use stepper motors and no feedback sensors. A working controller was built up one component at a time, with a heated bed added to the mix to help prevent warping with large builds. We love the Frankenstein look of the controller hardware, which was mounted hodge-podge as each new module was brought online.

You can see some printing action in the clip after the break. A Linux box takes a design and spits out control instructions to the hardware.

Continue reading “Salvaged Robot Arm Makes A Big 3d Printer”