Making Laser Cutter Designs Work In A 3D Printer

The main mechanical tools in a hacker’s shop used to be a drill press and a lathe. Maybe a CNC mill, if you were lucky. Laser cutters are still a rare tool to find in a personal shop, but today’s hackers increasingly have access to 3D printers. What happens when you have a design for a laser cutter (2D parts) but only have access to a 3D printer? You punt.

[DIY3DTECH] has a two-part video on taking a 2D design (in an SVG file) and bringing it into TinkerCad. At that point, he assembles the part in software and creates a printable object. You can see the videos below.

Continue reading “Making Laser Cutter Designs Work In A 3D Printer”

Update: What You See Is What You Laser Cut

If there’s one thing about laser cutters that makes them a little difficult to use, it’s the fact that it’s hard for a person to interact with them one-on-one without a clunky computer in the middle of everything. Granted, that laser is a little dangerous, but it would be nice if there was a way to use a laser cutter without having to deal with a computer. Luckily, [Anirudh] and team have been working on solving this problem, creating a laser cutter that can interact directly with its user.

The laser cutter is tied to a visual system which watches for a number of cues. As we’ve featured before, this particular laser cutter can “see” pen strokes and will instruct the laser cutter to cut along the pen strokes (once all fingers are away from the cutting area, of course). The update to this system is that now, a user can import a drawing from a smartphone and manipulate it with a set of physical tokens that the camera can watch. One token changes the location of the cut, and the other changes the scale. This extends the functionality of the laser cutter from simply cutting at the location of pen strokes to being able to cut around any user-manipulated image without interacting directly with a computer. Be sure to check out the video after the break for a demonstration of how this works.

Continue reading “Update: What You See Is What You Laser Cut”

Sprite Graphics Accelerator On An FPGA

A demo running on a FPGA sprite accelerator

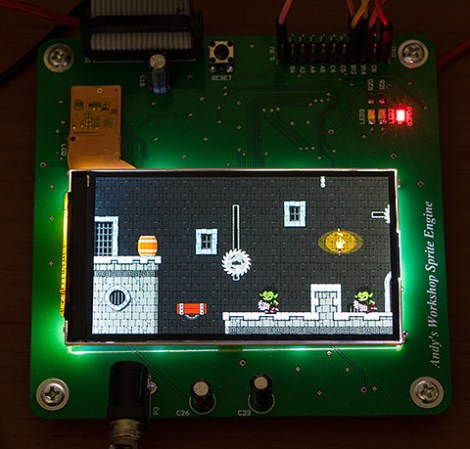
Graphics accelerators move operations to hardware, where they can be executed much faster. This is what allows your Raspberry Pi to display high definition video decently. [Andy]’s latest build is a 2D sprite engine, featuring hardware accelerated graphics on an FPGA.

In the simplest mode, the sprite engine just passes commands through to the LCD. This allows for basic control. The fun part sprite mode, which allows for sprites to be loaded onto the FPGA. At that point, you can show, hide, and move the sprite. By overlapping many sprites, you something like the demo shown above.

The FPGA is from Xilinx, and uses their Block RAM IP to store the state of the sprites. The actual sprite data is contained on a 128 Mb external flash chip, since they require significant space.

The game logic runs on a STM32 Cortex M4 microcontroller which communicates with the FPGA and orders the sprites around. The FPGA then deals with generating frames and sending them to the LCD screen, freeing up the microcontroller.

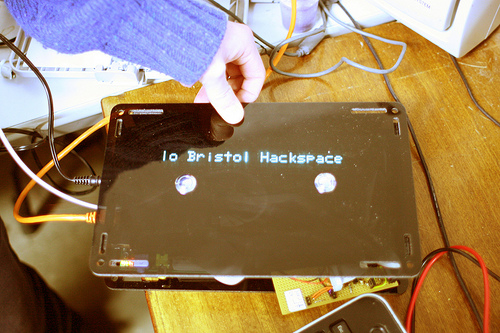
If you’re wondering about the LCD itself, it’s 3.2″, 640 x 360, and taken from a Ericsson U5 Vivaz cellphone. [Andy] has a detailed writeup on reverse engineering it. After the break, he gives us a video overview of the whole system.

Continue reading “Sprite Graphics Accelerator On An FPGA”

OpenSCAD Is For Use With 2D Machine, Not Just 3D Printing

openscad-for-2d-machining

Here’s an enclosure which was designed with OpenSCAD and cut out on a CNC router. [Matthew Venn] wrote about the project because he sees tons of 3D printing hacks that use the software, but almost never hears about it as a tool for laser cutting or CNC router/mill work. When we read that we thought we must have seen a lot of 2D hacks but a search of Hackaday’s previous offerings proved us wrong. Just this week we heard about the software in use with the Makerbot. Or you could go back about a year and read about creating 3D molds. But nothing on 2D work.

His post is a quick read and shows off the bare bones of the case designs he’s been working with for a few years. By referencing the code itself, and playing with how it changes the render in OpenSCAD he makes a strong case for quick and easy enclosure design. If you use this technique make sure to document your experience because we want to hear about it!

Drag And Drop Images For 3D Printing

This piece of software called OmNomNom works with OpenSCAD to turn 2D images into 3D models. It’s literally a drag-and-drop process that renders almost instantly.

Here the example is a QR code, which is perfect for the software since it’s a well-defined black and white outline in the source image. But the video after the break shows several other examples that don’t rely on this simplicity. For instance, the Superman logo, which uses four different colors, is converted quite easily. There’s also a depth map of [Beethoven’s] bust that is converted into a 3D object. The same technique can be used to create terrain from topographic source images.

Once the file has been converted to a model it can still be tweaked like normal. This allows you to customize size and depth to suit your needs. This is where OpenSCD comes into play, but if you don’t use that program you can still export an STL file directly from OmNomNom for use on your 3D printer.

Continue reading “Drag And Drop Images For 3D Printing”

G-speak Spatial Operating Environment

[vimeo 2229299]

Our fascination with multitouch is fairly well known, but it expands even further to cover all sorts of man machine interaction. Embedded above is a tech demo of g-speak, a spatial operating environment. The user combines gestures and spatial location to interact with on screen objects. If it seems familiar, it’s because one of the company’s founders advised on Minority Report. We doubt all this hand waving is going to catch on very quickly though. Our bet is on someone developing a multitouch Cintiq style device for people to use as a secondary monitor. It would bridge the gap between between our standard 2D interactions and gestures without making a full leap to 3D metaphors.

[via Create Digital Motion]