Truck Bed Liners Improve 3D Prints

There are at least two kinds of 3D printer operators: those who work hard to make their prints look better after they come off the bed and those who settle for whatever comes off the printer. If you are in the latter camp, you probably envy people who have smooth prints with no visible layer lines. But the sanding and priming and multiple coats of paint can put you off.

[Teaching Tech] has a few tricks that might change your mind. He shares his technique for using different coatings for 3D prints that provide good quality with a lot less effort. The coatings in question are polyurethane used for coating pickup truck beds and bitumen rubber used for waterproofing. In the United States, bitumen is known as asphalt, and both materials are relatively cheap, available, and safe to use.

According to the video you can see below, there’s no need to sand or prime the print. In addition to covering imperfections and sealing gaps, it produces watertight prints that have UV resistance and some measure of protection against heating.

Continue reading “Truck Bed Liners Improve 3D Prints”

3D Printer? Laser Cutter? CNC? Yes, Please

Most of us have, or, would like to have a 3D printer, a laser engraver, and a CNC machine. However, if you think about it naively, these machines are not too different. You need some way to move in the XY plane and, usually, on the Z axis, as well.

Sure, people mount extruders on CNCs, or even lasers or Dremel tools on 3D printers. However, each machine has its own peculiarities. CNCs need rigidity. 3D printers should be fast. Laser engravers and CNCs don’t typically need much Z motion. So common sense would tell you that it would be tough to make a machine to do all three functions work well in each use case. [Stefan] thought that, too, until he got his hands on a Snapmaker 2.0.

As you can see in the video below, the machine uses different tool heads for each function. The motion system stays the same and, curiously, there are three identical linear motion modules, one for each axis.

Continue reading “3D Printer? Laser Cutter? CNC? Yes, Please”

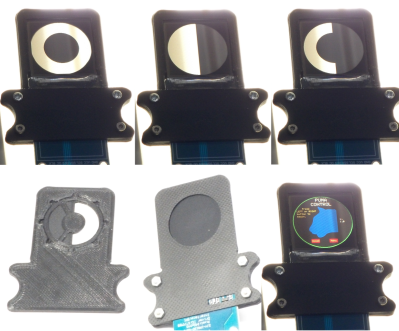
This Joy-Con Grip Steers Its Way To Sweaty Victory

Here at Hackaday we’re always exited to see hacks that recycle our favorite childhood consoles into something new and interesting. In that context, it’s not so uncommon to see mods which combine new and unusual control methods with old devices in ways that their manufacturers never intended. What [Mike Choi] has built with the Labo Fit Adventure Kit is the rare hack that combines radically new control schemes with a modern console: without actually modifying any hardware.

Face button pusher in blue

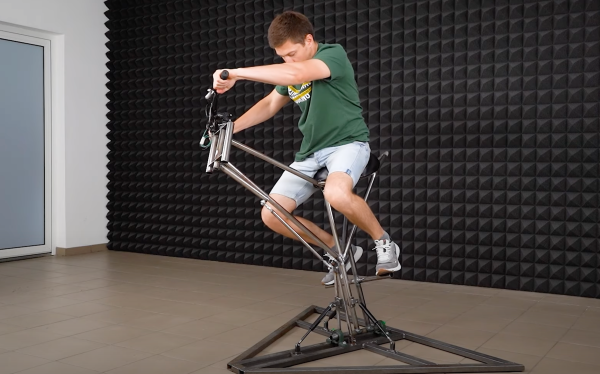
In short, the Labo Fit Adventure Kit lets the player play Mario Kart on the Nintendo Switch by riding a stationary exercise bike, steering with a wheel, and squeezing that wheel to use items. The Fit Kit combines the theme of Labo, Nintendo’s excellent cardboard building kit for the Nintendo Switch with the existing Ring-Con accessory for the unrelated Nintendo game Ring Fit Adventure plus a collection of custom hardware to tie it all together. That hardware senses cadence on the stationary bike, watches for the user to squeeze the handheld wheel controller, and translates those inputs to button presses on the controller to play the game.

Shoulder button pusher in green

The most fascinating element of this project is the TAPBO module which adapts the Joy-Con controller to remote input. The module includes electronics, actuators, and a clever mechanical design to allow it to be mounted to the Ring-Con in place of an unmodified Joy-Con. Electrically the components will be familiar to regular Hackaday readers; there is a breakout board for a Teensy which also holds an XBee module to receive inputs remotely and drive a pair of servos. The entire module is described in detail starting at 4:42 in the video.

Mechanically the TAPBO relies on a pair of cam-actuated arms which translate rotational servo motion into linear action to press shoulder or face buttons. The module directly measures flex of the Ring-Con with an added flexible resistor and receives cadence information from another module embedded in the stationary bike via Zigbee. When these inputs exceed set thresholds they drive the servos to press the appropriate controller buttons to accelerate or use an item.

We’ve focused pretty heavily on the technical aspects of this project, but this significantly undersells the level of polish and easy to understand documentation [Mike] has produced. It includes a TAPBO Amiibo in customized packaging, and more. Check out the full video to get the complete scope of this project.

Continue reading “This Joy-Con Grip Steers Its Way To Sweaty Victory”

3D Printing A Full Scale Fiberglass Speedboat

It’s an age-old problem. You draw up a nice 6.5-meter long motorboat and then discover the shape won’t allow for a fiberglass mold. What do you do? If you’re [Moi], you grab a few Kuka robots and 3D print it using thermoplastic with embedded glass fibers. A UV light cures the plastic and you wind up with printed fiberglass. That’s the story behind the MAMBO, a 3D printed powerboat.

Despite the color, the fiberglass isn’t blue out of the gate — the boat is painted. Still, it looks nice with lines inspired by [Sonny Levi]’s Arcidiavolo design from 1973. MAMBO stands for Motor Additive Manufacturing BOat. It has a dry weight of about 800 kg and is fitted with a cork floor, white leather seats, and an engine. We presume none of those things were 3D printed.

Although it wasn’t fiberglass, we’ve seen a 3D printed boat before. In particular, the University of Maine’s giant 22,000 square foot printer cranked one out. We’ve also seen boats printed in standard PLA filament, which then had fiberglass cloth and resin applied after printing. True that one was only RC, but there’s no reason the concept couldn’t be scaled up if you had the patience.

3D Printed Box Gets Bigger

If you ever watched Dr. Who, you probably know that the TARDIS looked like a police call box on the outside, but was very large on the inside. When asked, the Doctor had some explanation of how something can look small when it is far away and large when it is close up, which never made much sense. However, [iQLess] has been 3D printing boxes in a small area, that fold out to be much larger boxes. (Video, embedded below.) The design comes from someone called [Cisco] who has a lot of interesting print in place designs.

You can find the design on the Prusa site or Thingiverse. The boxes do take a while to print, according to the video below. What was interesting to us, though, is that you should be able to print a design like this to create a box larger than your printer.

Continue reading “3D Printed Box Gets Bigger”

Low Cost Metal 3D Printing By Electrochemistry

[Billy Wu] has been writing for a few years about electrochemical 3D printing systems that can handle metal. He’s recently produced a video that you can see below about the process. Usually, printing in metal means having a high-powered laser and great expense. [Wu’s] technique is an extension of electroplating.

Boiling down the gist of the process, the print head is a syringe full of electroplating solution. Instead of plating a large object, you essentially electroplate on tiny areas. The process is relatively slow and if you speed it up too much, the result will have undesirable properties. But there are some mind-bending options here. By using print heads with different electrolytes, you can print using different metals. For example, the video shows structures made of both copper and nickel. You can also reverse the current and remove metal instead of depositing it.

This looks like something you could pretty readily replicate in a garage. Electroplating is well-understood and the 3D motion parts could be a hacked 3D printer. Sure, the result is slow but, after all, slow is a relative term. You might not mind taking a few days to print a metal object compared to the cost and trouble of creating it in other ways. Of course, since this is copper, we also have visions of printing circuit board traces on a substrate. We imagine you’d have to coat the board with something to make it conductive and then remove that after all the copper was in place. When you build this, be sure to tell us about it.

We’ve seen electroplating pens before and that’s really similar to this idea. Of course, you can also make your 3D prints conductive and plate them which is probably faster but isn’t really fully metal.

Continue reading “Low Cost Metal 3D Printing By Electrochemistry”

Cura Plugin Offers Custom Support

[Chuck] likes the ability of Simplify3D to add support to parts of a model manually. However, not everyone wants to spend $150 for a slicer, so he’s shared how to install a plugin that allows you to do the same trick in Cura.

The plugin is “Cylindric Custom Support.” That doesn’t sound very exciting, but you get five choices of shapes you can create custom supports easily. There are also size and angle parameters you can use to customize the effect.

Continue reading “Cura Plugin Offers Custom Support”