Tiny Pneumatic Tool Made From A Single(-ish) Bolt

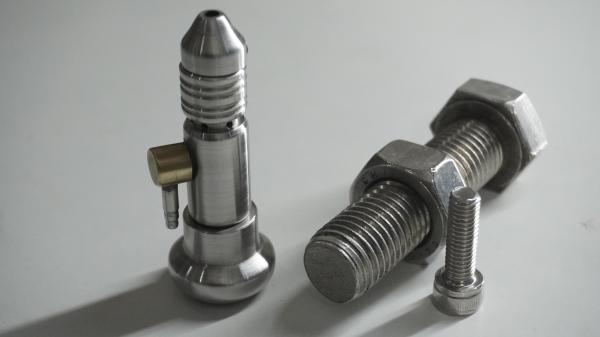
We’ve noticed a couple of things about the “Widget from a Single Bolt” genre of metalworking videos. The first thing is that almost all of them need to use a freakishly large bolt, and many of them also rely on other materials to complete the build. And secondly, these builds all pretty much depend on a lathe to transform the bolt into the intended widget.

While this single-bolt pneumatic graving tool build is guilty on that first count, it somehow manages to avoid needing a lathe. Not that [AMbros Custom] wouldn’t have greatly benefited from a lathe to make this somewhat specialized and unusual tool a reality. A graving tool or graver is used during metal engraving, the art of making controlled cuts into flat metal surfaces to render complicated designs. A powered graver like this can make engraving faster and more precise than a traditional manual graver, which is typically powered by light taps with a special hammer.

The lathe-less build [AMbros] undertook was quite ambitious given the number of moving parts and the tight tolerances needed for a pneumatic tool. The real hero here is the hand drill pressed into service as an impromptu lathe; teamed with various tools from files to emery cloth to even a Dremel and an angle grinder, it did a respectable job turning down the various parts. The entire build is shown in the video below, and it’s worth a watch just to see what ingenuity can accomplish when coupled with sheer persistence.

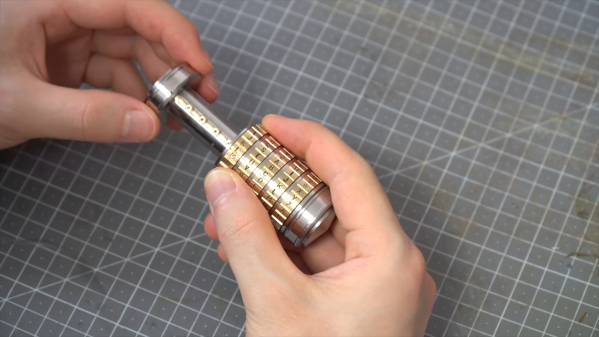
Hats off to [AMbros] for sticking with what was admittedly a problematic build, and here’s hoping a lathe is in his future. With that, he may be able to pull off other impressive “single-bolt” builds, like this combination padlock. Or throw another bolt or two in and pull off this cryptex-like safe.

Continue reading “Tiny Pneumatic Tool Made From A Single(-ish) Bolt”

Art of 3D printer in the middle of printing a Hackaday Jolly Wrencher logo

3D Printering: To Print Stainless, You Do Half The Work

Everyone wants to print using metal. It is possible, but the machines to do the work are usually quite expensive. So it caught our eye when MakerBot announced a printer — armed with an experimental extruder — that can print stainless steel parts. Then we read a bit more and realized that it can only sort of do the job. It needs a lot of help. And with some reasonable, if not trivial, modifications, your printer can probably print metal as well.

The key part of the system is BASF Ultrafuse 316L Stainless Steel filament, something that’s been around for a few years. This is a polymer with metal incorporated into it. This explains the special extruder, since metal-bearing filament is hell on typical 3D printer nozzles. However, what comes out isn’t really steel — not yet. For that, you have to send the part to a post-processing facility where it is baked at 1380 °C in a pure hydrogen atmosphere using special equipment. This debinding and sintering produces a part that the company claims can be up to 96% pure metal.

Continue reading “3D Printering: To Print Stainless, You Do Half The Work”

Bolts, Brass, And Machining Chops Make Up This Tiny Combination Safe

Another day, another video that seriously makes us doubt whether eschewing the purchase of a lathe in favor of feeding the family is a value proposition. This time, [Maker B] shows us what the queen of machine tools can do by turning a couple of bolts into a miniature safe.

We’ll state right up front that this build doesn’t source all its material from a single bolt. It’s more like two bolts and a few odd pieces of brass, but that doesn’t detract from the final product one bit. [Maker B] relieves the two chunky stainless steel bolts of their hex heads and their threads on the lathe, forming two nesting cylinders with a satisfyingly tight fit. A brass bar is machined into a key that fits between slots cut in the nesting cylinders, while discs of brass form the combination dials. Each disc is stamped around its circumference with the 26 letters of the alphabet; we thought the jig used for stamping was exceptionally clever, and resulted in neat impressions. The combination, which is set by placing a pin next to a letter in each disc, protects the admittedly limited contents of the tiny safe, but functionality is hardly the point. This is all about craftsmanship and machining skills, and we love it.

If you’ve sensed an uptick in resource-constrained builds like this lately, you’re not alone. The “one bolt challenge” has resulted in this wonderfully machined combination lock, as well as the artistry of this one-bolt sculpture. We’re all in favor of keeping the trend going. Continue reading “Bolts, Brass, And Machining Chops Make Up This Tiny Combination Safe”

Laser-Etch Stainless With Only Plaster & Alcohol

Many hobbyists and hackerspaces have the $500 Chinese 40W lasercutters which most of us know are about as successful at etching metals as a featherduster is at drilling. [Frankie] and [Bryan] have figured out a way to use the laser to chemically activate an etching process. See experiment part 2 as well.

First, to be clear, they are using a quality 40W Epilog Zing, not the cheap one, but40W is40W. They mixed the plaster (calcium sulfate) with Isopropyl until it resembled white ketchup. After either thinly painting or airbrushing the material onto the stainless surface (both worked), the mixture is dried with a heatgun then put into the laser. 100% power and 5% speed was what worked for them.

The result was an engrave with a noticeable bite. Something they claim had no effect at all without the mixture.

Stainless steel is an alloy of iron and some chromium – not the same as chrome-plated steel. [Frankie]’s explanation of the chemistry is that the surface layer of the stainless is a transparent chromium oxide. With the heat of the laser, the calcium and chromium swap dance partners. Calcium takes the oxygen and chromium takes the sulfate. The calcium oxide washes off but the chromium sulfate causes the etch.

Next time you’re at your local space, give this a try.