From Printer To Vinyl Cutter

Some might look at a cheap inkjet printer and see a clunky device that costs more to replace the ink than to buy a new one. [Abhishek Verma] saw an old inkjet printer and instead saw a smooth gantry and feed mechanism, the perfect platform to build his own DIY vinyl cutter.

The printer was carefully disassembled. The feed mechanism was reworked to be driven by a stepper motor with some 3D printed adapter plates. A solenoid-based push/pull mechanism for the cutting blade was added with a 3D printed housing along with a relay module. An Arduino Uno takes in commands from a computer with the help of a CNC GRBL shield.

What we love about this build is the ingenuity and reuse of parts inside the old printer. For example, the old PCB was cut and connectors were re-used. From the outside, it’s hard to believe that HP didn’t manufacture this as a vinyl cutter.

If you don’t have a printer on hand, you can always use your CNC as a vinyl cutter. But if you don’t have a CNC, [Abhishek] shares all the STL files for his cutter as well as the schematic. Video after the break.

Continue reading “From Printer To Vinyl Cutter”

Print Your Own Flexures

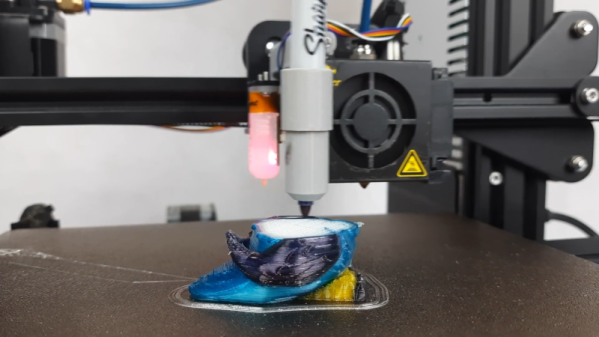
Game developer and eternal learner [David Tucker] just posted a project where he’s making linear flexures on a 3D printer. Tinkerer [Tucker] wanted something that would be rigid in five of the six degrees of freedom, but would provide linear motion along one axis. In this case, it is for a pen or knife on a CNC flatbed device. [David]’s design combines the properties of a 1-dimensional flexure and a spring to give a constant downward force. Not only is this an interesting build in and of itself, but he gives a good explanation and examples of more traditional flexible constructs. He also points out this site by MIT Precision Compliant Systems Lab engineer [Marcel Thomas] which provides a wealth of information on flexures.

Continue reading “Print Your Own Flexures”

3D Printing Food University Style

While refitting a 3D printer for food printing isn’t really a new idea, we liked the detailed summary that appeared from a team from the University of Birmingham which converted an i3 clone printer to use a syringe extruder.

The syringe in question was meant for veterinarian use and is made of metal. The paper suggests that the metal is a better thermal conductor, but it was’t clear to us if they included a heating element for the syringe. In the pictures, though, it does appear to have some insulation around it. In any case, we imagine a metal syringe is easier to keep clean, which is important if you are depositing something edible.

Continue reading “3D Printing Food University Style”

Printed Catamaran

If you want to send some instruments out on the lake or the ocean, you’ll want something that floats. Sure, if you need to be underwater, or if you can fly over the water there are other options, but sometimes you want to be on the surface. For stability, it is hard to beat a catamaran — a boat with two hulls that each support one side of a deck. If that sounds like the ocean sensor platform of your dreams, try printing the one from [electrosync].

The boat looks super stable and has a brushless motor propulsion system. The design purpose is to carry environmental and water quality monitoring gear. It can hold over 5 kg of payload in the hull and there’s an optional deck system, although the plans for that are not yet included in the STL files.

Continue reading “Printed Catamaran”

Smooth 3D Prints With Alcohol

There was a time when most 3D printers used ABS, which is a great plastic for toughness, but is hard to print with since it tends to warp. Worse still, it stinks and the fumes may be bad for you. Most people have switched over to printing in PLA these days, but one thing you might miss with this more forgiving plastic is vapor smoothing with acetone; a smoothed print doesn’t show layer lines and looks more like plastic part that didn’t go through a nozzle.

[Major Hardware] likes the look of vapor smoothed parts, but doesn’t like working with ABS and acetone fumes, so he’s started using Polysmooth. As you can see in the video below, the results look good, but be warned that the filament is relatively pricey. Plus you need to use a $300 machine that atomizes your alcohol into a mist. We feel certain you could do the same thing for less since it appears to just be like a humidifier, but we’d also suggest being careful putting flammable substances in a consumer-grade humidifier and certainly don’t use a vaporizer.

The filament sounds like it is on par with PLA for ease of printing. The material has a higher glass temperature than PLA but less than ABS. The tensile strength and Young’s modulus (a measure of stiffness) numbers are comparable to ABS. Although all smoothing has some imperfections and you probably need to experiment with times and other parameters. The smoothing did fuse some movable joints, so anything that moves or fits together is probably a bad candidate for this process. We’ve also heard that thin-walled parts can get soft in water due to alcohol residue, but you can dry or soak the part clean to avoid that.

If you want to try your own hand at making a mist, this might get you started. After all, if it can handle acetone, we imagine alcohol isn’t any worse. While it isn’t as easy to handle as alcohol, we hear the solvents such as THF or ethyl acetate can smooth regular PLA. Heat guns and open flames are popular, too.

Continue reading “Smooth 3D Prints With Alcohol”

3D Printed Calipers Work Like Clockwork

Most of us use calipers when working with our 3D printers. Not [Albert]. He has a clockwork caliper design that he 3D printed. The STL is available for a few bucks, but you can see how it works in the video below. We don’t know how well it works, but we’ll stick with our digital calipers for now.

The digital readout on this caliper is more like a sophisticated watch. A window shows 10s of millimeters and two dials show the single digits and the number after the decimal point.

Continue reading “3D Printed Calipers Work Like Clockwork”

Finite Element Analysis Vs Real World

In advanced engineering circles, the finite element method — or, more commonly, finite element analysis — is a real staple. With the advent of more powerful home computers, though, even your home projects can benefit. The technique itself is very general, but you usually see it used for structural analysis. However, you might wonder how well it corresponds to reality. That is if analysis shows a segment of your part is weak (or strong) does that hold true when you actually build the part? [Fiveohno] wondered the same thing and decided to do some testing, which you can see in the video below.

Of course, like any simulation, the accuracy will only be as good as your data input and model. But if you work carefully, it should match up pretty well to the real world, so it is interesting to see the results of a real-world test. In fact, a video from Solidworks that shows a similar part points out — inadvertently — what not to do. For example, the force used in that analysis was too low and at a point where the part was at relatively low stress instead of at the maximum stress.

Continue reading “Finite Element Analysis Vs Real World”