A wrench is shown lying on a machinist’s mat. The end of the wrench holds a ratcheting wheel, on top of which are six independent metal blocks arranged into a hexagon.

Building A Shifting Ratchet Wrench

Convenient though they may be, [Trevor Faber] found some serious shortcomings in shifting spanners: their worm gears are slow to adjust and prone to jamming, they don’t apply even force to all faces of a bolt head, and without a ratchet, they’re rather slow. To overcome these limitations, he designed his own adjustable ratchet wrench.

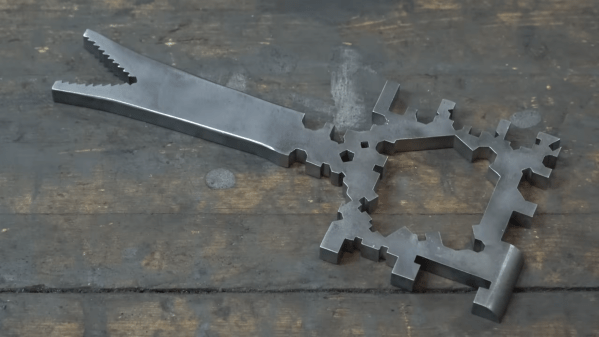
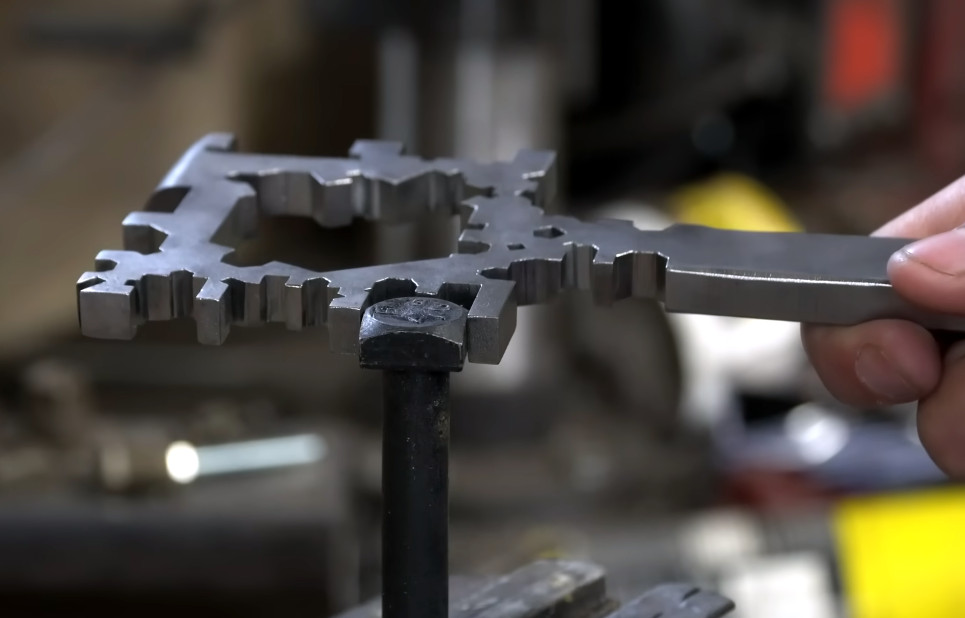
The adjustment mechanism is based on a pair of plates with opposing slots; the wrench faces are mounted on pins which fit into these slots, and one plate rotates relative to the other, the faces slide inwards or outwards. A significant advantage of this design is that, since one plate is attached to the wrench’s handle, some of the torque applied to the wrench tightens its grip on the bolt. To let the wrench loosen as well as tighten bolts, [Trevor] simply mirrored the mechanism on the other side of the wrench. Manufacturing proved to be quite a challenge: laser cutting wasn’t precise enough for critical parts, and CNC control interpolation resulted in some rough curves which caused the mechanism to bind, but after numerous iterations, [Trevor] finally got a working tool.

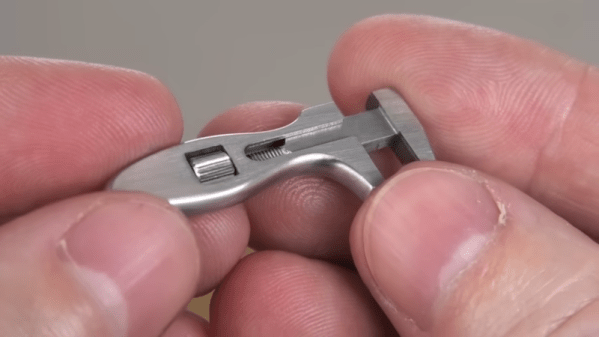
To use the wrench, you twist an outer ring to open the jaws, place them over the bolt, then let them snap shut. One nice touch is that you can close this wrench over a bolt, let go of it, and do something else without the wrench falling off the bolt. Recessed bolts were a bit of an issue, but a chamfer ought to improve this. It probably won’t be replacing your socket set, but it looks like it could make the odd job more enjoyable.

If you prefer a more conventional shifting wrench, you can make a miniature out of an M20 nut. It’s also possible to make a shifting Allen wrench.

Continue reading “Building A Shifting Ratchet Wrench”

DIY Adjustable Wrench? Nuts!

What do you do if you want a tiny little adjustable wrench? If you’re [my mechanics] you build your own. Where do you get the stock metal? Well, he started with an M20 nut. A few milling operations, a torch, some pliers, and work with a vice resulted in a nice metal blank just the right size to make each part of the wrench, including a new nut for the adjustment.

Want to do this yourself? If you do, we hope you have a well-equipped machine shop. You should also be comfortable working with red-hot metal.  Overall, it is an amazing piece of work, and you can watch the whole process in the video below.

Honestly, precision metalworking is a little out of our comfort zone. Like the recent wood bending we’ve seen, we always think, “Yeah, I could so do that!” Then we realize that we really couldn’t. But still fun to watch and maybe a few ideas we might be able to apply next time we have to bend a little metal.

The wrench is a scale model of a larger one, and it looks great. We would have liked to see it in use with a tiny nut, but we imagine it would work just fine. If you get excited about making things from a single piece of metal, may we suggest a nutcracker?

Continue reading “DIY Adjustable Wrench? Nuts!”

One-Size-Fits-All Wrench Points To A Nut Job

When [Hand Tool Rescue] came across a 1919 patent for a one size fits all wrench, he couldn’t help but recreate it. Described in the patent as “a new, original, ornamental design for a wrench”, the wrench had a slot for possibly every fastener that the inventor could think of. Not only did it have slots for several hexagonal fasteners, but many others for octagonal, square and even a pentagonal fastener.

[Hand Tool Rescue] reckons there are 47 slots for various sizes and types of fasteners, not counting the ones whose purpose he could not fathom. Just in case he missed any fastener sizes, the original designer decided to add an alligator wrench at the other end of the handle, potentially negating the need for any of the other slots. The tool even features a sharp edge along one of the sides, possibly for use as a scraper of some kind.

Why such a crazy design was patented, or what were the functions of some of its slots are questions that will likely remain unanswered. At best, we can all take guesses at solving the mystery of this tool. [Hand Tool Rescue] scales the original drawing such that one of the slots has a width of 1 inch, and then uses that as a template to recreate the wrench. He starts with a slab of 3/8th inch thick, grade 4140 steel, which has a high strength to weight ratio and can be case hardened after machining, making it suitable for this ornamental project.

He then embarks on his journey of excessive milling, drilling, filing, band sawing and shaping (using a slotting attachment), totaling about 11 hours worth of drudgery. Of course, one could argue that it would have been much easier, and accurate, to have used modern machining methods. And we are spoilt for choices here among laser cutting, water jet cutting or even EDM machining, any of which would have done the job faster, cleaner and more precisely. But we guess [Hand Tool Rescue] wanted to stick to traditional methods as would have been available in 1919 to an inventor who wanted to make a prototype of his awesome, all in one wrench.

If you can help explain the overall function of this wrench, or identify some of the more vague slots in it, then [Hand Tool Rescue] would be happy to get the feedback. And talking about less desirable wrenches, check out how this Sliding Wrench Leaves a Little to be Desired.

Continue reading “One-Size-Fits-All Wrench Points To A Nut Job”

Sliding Wrench Leaves A Little To Be Desired

[Ben Conrad] received an interesting tool as a gift that purported to be a better mousetrap. It was a crescent wrench (made by the Crescent company, even) that didn’t have a tiny adjusting wheel like a traditional wrench. Instead, it had a slide running down the length of the handle. The idea is that you would push the slide to snug the wrench jaws against the bolt or nut, and that would be fast and easy compared to a conventional wrench. As [Ben] notes, though, it doesn’t work very well. Most of us would have just dumped it in the back of the tool chest or regifted it. [Ben] tore his apart to find out what was wrong with it.

A typical adjustable wrench has four parts. This one has 19 parts and looks like a conventional wrench with an extra slide and screw running down the length of the handle. [Ben] found the parts were poorly made, but that wasn’t the main problem.

Continue reading “Sliding Wrench Leaves A Little To Be Desired”