3D Print Your Own Seiko-Style “Magic Lever” Energy Harvester

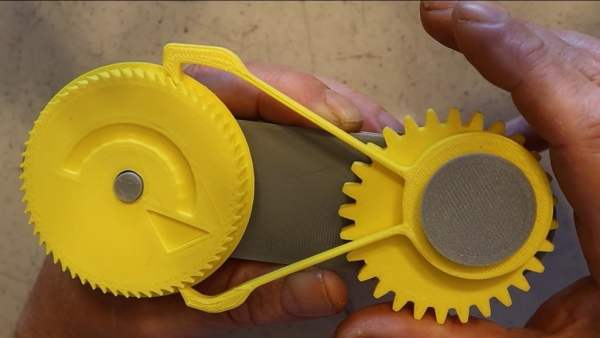
Back in 1956, Seiko created their “magic lever” as an integral part of self-winding mechanical watches, which were essentially mechanical energy harvesters. The magic lever is a type of ratcheting arrangement that ensures a main gear only ever advances in a single direction. [Robert Murray-Smith] goes into detail in this video (here’s a link cued up to 1:50 where he begins discussing the magic lever)

There is a lot of naturally-occuring reciprocal motion in our natural world. That is to say, there is plenty of back-and-forth and side-to-side, but not a lot of round-and-round. So, an effective mechanism for a self-winding watch needed a way to convert unpredictable reciprocal motion into a unidirectional rotary one. The magic lever was one way to do so, and it only has three main parts. [Robert] drew these up into 3D models, which he demonstrates in his video, embedded below.

The 3D models for Seiko’s magic lever are available here, and while it’s fun to play with, [Robert] wonders if it could be integrated into something else. We’ve certainly seen plenty of energy harvesting projects, and while they are mostly electrical, we’ve also seen ideas about how to harvest the energy from falling raindrops.

Continue reading “3D Print Your Own Seiko-Style “Magic Lever” Energy Harvester”

A 3D Printed Ratchet That Can Really Take The Torque

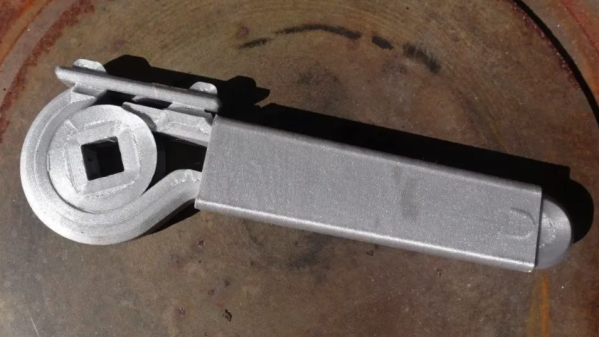
Printed tools aren’t exactly known for their durability, but [Gladius] shows us that with some thoughtful design, it’s possible to print a ratcheting wrench that can handle surprising amounts of torque.

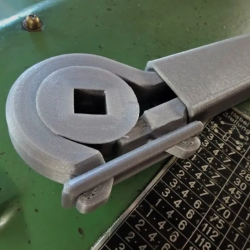
Look closely, and you can see that the parts are almost entirely made up of perimeters (click to enlarge).

This particular wrench is inspired by NASA’s 3D printed ratcheting wrench, and also from an early 1900s design. It sports a 1/2 inch square socket into which modern adapters can be fitted, allowing those steel parts to do their job while the wrench itself delivers the muscle.

[Gladius] found that the strongest results came from slicing parts — especially the handle — so that they come out consisting almost entirely of perimeters, with virtually no traditional infill. Want to know more? There’s a discussion on reddit where [Gladius] goes into added detail about measurements and performance.

Over the years, we’ve seen our share of powerful prints. For example, what the Crimson Axlef*cker can do looks downright intimidating. Speaking of printing things that move, we want to remind you about this handy tip for easily and reliably joining motor shafts to printed parts by (mis)using jaw couplings.

Printable One-Way Driver Skips Ratchet For A Clutch

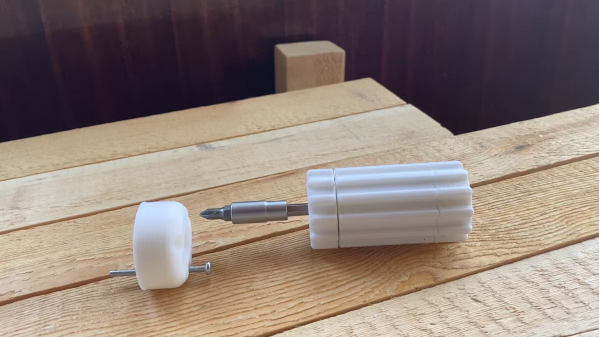
Ratcheting screwdrivers can help you work faster, even if their bulk means they’re not the best option for working in tight spaces. [ukman] decided to build a similar device of his own, relying on a slightly different mechanism — an overrunning clutch.

The design is similar to a freewheel used on a bicycle, allowing free movement in one direction while resisting it in the other. As the screwdriver is turned in one direction, the shaft is wedged by a series of cylinders that lock it in place. However, the geometric shape of the clutch allows the shaft to turn in the other direction without getting wedged in place. The result is a screwdriver that can be turned, rolled back, and turned further. Thus, screws can be tightened without loosening one’s grip on the tool.

With its 3D printed construction, it’s probably not the best tool for heavy-duty, high-torque jobs, but it looks more than capable of handling simple assembly tasks. We’ve seen some other nifty screwdrivers around these parts, too.

Continue reading “Printable One-Way Driver Skips Ratchet For A Clutch”

Hackaday Podcast 087: Sound-Shattering Gliders, Pressing Dashcam Buttons, And Ratcheting Up Time

Hackaday editors Mike Szczys and Elliot Williams dish up a hot slice of the week’s hardware hacks. We feature a lot of clocks on Hackaday, but few can compare to the mechanical engineering elegance of the band-saw-blade-based ratcheting clock we swoon over on this week’s show. We’ve found a superb use of a six-pin microcontroller, peek in on tire (or is that tyre) wear particles, and hear the sounds of 500 mph RC gliders. It turns out that 3D printers are the primordial ooze for both pumping water and positioning cameras. This episode comes to a close by getting stressed out over concrete.

Take a look at the links below if you want to follow along, and as always, tell us what you think about this episode in the comments!

Take a look at the links below if you want to follow along, and as always, tell us what you think about this episode in the comments!

Direct download (60 MB or so.)

Continue reading “Hackaday Podcast 087: Sound-Shattering Gliders, Pressing Dashcam Buttons, And Ratcheting Up Time”

Linear Clock Ratchets Up The Action

On the face of it, making a clock that displays the time by moving a pointer along a linear scale shouldn’t be too hard. After all, steppers and linear drives should do the job in a jiffy. Throw an Arduino in and Bob’s your uncle, right?

Wrong. At least that’s not the way [Leo Fernekes] decided to build this unique ratcheting linear clock, a brilliant decision that made the project anything but run-of-the-mill. The idea has been kicking around in [Leo]’s head for years, and there it stayed until inspiration came in the unlikely form of [This Old Tony], one of our favorite YouTube machinists. [Old Tony] did a video on the simple genius of latching mechanisms, like the ones in retractable pens, and that served as an “A-ha!” moment for [Leo]. For a ratchet, he used a strip of bandsaw blade oriented so the teeth point upward. A complex bit of spring steel, bent to engage with the blade’s teeth, forms a pawl to keep the pointer moving upward until it reaches the top.

[Leo] decided early on that this would be an impulse clock, like the type used in schools and factories. He used a servo to jog a strip of tape upward once each minute; the tape is engaged by jaws that drag the pointer along with it, moving the pawl up the ratchet by one tooth and lifting the pointer one minute closer to the top. The pointer releases at the top and falls back to start the cycle over; to arrest its freefall, [Leo] had the genius idea of attaching magnets and using eddy currents induced in the aluminum frame for the job. Finished off with a 3D-printed Art Deco scale, the clock is a unique timepiece that’s anything but boring.

We really appreciate [Leo]’s unique and creative take on projects, and his range. Check out his everlasting continuity tester and his phage-like sentry gun for some neat build details.

Continue reading “Linear Clock Ratchets Up The Action”

Mechanisms: Cable Ties

Zip ties, Ty-Raps, cable ties; call them what you will, but it’s hard to imagine doing without these ubiquitous and useful devices. Along with duct tape and hot glue, they’re part of the triumvirate of fasteners used to solve nasty problems quickly and cheaply. They’re next up on the list of mechanisms we find fascinating, and as it turns out, there’s more to these devices than meets the eye.

Continue reading “Mechanisms: Cable Ties”

Roll Your Own Rotary Encoders

[miroslavus] hasn’t had much luck with rotary encoders. The parts he has tested from the usual sources have all been problematic either mechanically or electrically, resulting in poor performance in his projects. Even attempts to deal with the deficiencies in software didn’t help, so he did what any red-blooded hacker would do — he built his own rotary encoder from microswitches and 3D-printed parts.

[miroslavus]’s “encoder” isn’t a quadrature encoder in the classic sense. It has two switches and only one of them fires when it turns a given direction, one for clockwise and one for counterclockwise. The knob has a ratchet wheel on the underside that engages with a small trip lever, and carefully located microswitches are actuated repeatedly as the ratchet wheel moves the trip lever. The action is smooth but satisfyingly clicky. Personally, we’d forsake the 3D-printed baseplate in favor of a custom PCB with debouncing circuitry, and perhaps relocate the switches so they’re under the knob for a more compact form factor. That and the addition of another switch on the shaft’s axis to register knob pushes, and you’ve got a perfectly respectable input device for navigating menus.

We think this is great, but perhaps your project really needs a legitimate rotary encoder. In that case, you’ll want to catch up on basics like Gray codes.

Continue reading “Roll Your Own Rotary Encoders”