Using A Potato As Photographic Recording Surface

Following in the tracks of unconventional science projects, [The Thought Emporium] seeks to answer the question of whether you can use a potato as a photograph recording medium. This is less crazy than it sounds, as ultimately analog photographs (and photograms) is about inducing a light-based change in some kind of medium, which raises the question of whether there is anything about potatoes that is light-sensitive enough to be used for capturing an image, or what we can add to make it suitable.

Unfortunately, a potato by itself cannot record light as it is just starch and salty water, so it needs a bit of help. Here [The Thought Emporium] takes us through the history of black and white photography, starting with a UV-sensitive mixture consisting out of turmeric and rubbing alcohol. After filtration and staining a sheet of paper with it, exposing only part of the paper to strong UV light creates a clear image, which can be intensified using a borax solution. Unfortunately this method fails to work on a potato slice.

The next attempt was to create a cyanotype, which involves covering a surface in a solution of 25 g ferric ammonium oxalate, 10 g of potassium ferricyanide and 100 mL water and exposing it to UV light. This creates the brilliant blue that gave us the term ‘blueprint’. As it turns out, this method works really well on potato slices too, with lots of detail, but the exposure process is very slow.

Speeding up cyanotype production is done by spraying the surface with an ammonium oxalate and oxalic acid solution to modify the pH, exposing the surface to UV, and then spraying it with a 10 g / 100 mL potassium ferricyanide solution, leading to fast exposure and good details.

This is still not as good on paper as an all-time favorite using silver-nitrate, however. These silver prints are the staple of black and white photography, with the silver halide reacting very quickly to light exposure, after which a fixer, like sodium thiosulfate, can make the changes permanent. When using cyanotype or silver-nitrate film like this in a 35 mm camera, it does work quite well too, but of course creates a negative image, that requires inverting, done digitally in the video, to tease out the recorded image.

Here the disappointment for potatoes hit, as using the developer with potatoes was a soggy no-go. Ideally a solution like that used with direct positive paper that uses a silver solution suspended in a gel, but creates a positive image unlike plain silver-nitrate. As for the idea of using the potato itself as the camera, this was also briefly attempted to by using a pinhole in a potato and a light-sensitive recording surface on the other side, but the result did indeed look like a potato was used to create the photograph.

Continue reading “Using A Potato As Photographic Recording Surface”

Converting A Polaroid SX70 Camera To Use 600 Film

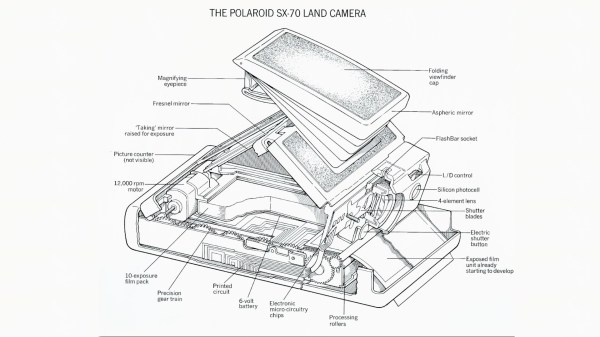
These days, it’s possible to buy a number of different Polaroid instant cameras new off the shelf. That’s largely thanks to the retro resurgence that has buoyed interest in everything from vinyl records to analog synthesizers. However, if you’re truly old-school, you might still be rocking a vintage Polaroid SX-70 camera. Thankfully, there’s a way to convert these old rigs to work properly with the more popular modern 600 film.

The interesting thing about the SX-70 camera design is that its shutter speed and aperture setting are essentially linked together as the aperture and shutter assembly are combined into one unit with a variable tear-drop shaped opening. Thus, the timing of the shutter opening and closing and the extent to which it opens are what determines exposure and aperture.

Thankfully, [Jake Bright] has learned a lot about these unique cameras and exactly how this complex system operates. He shares his tips on firstly restoring the camera to factory-grade operation, and then the methods in which they may be converted to work with modern film. Fundamentally, it’s about changing capacitors or resistors to change the shutter/aperture timing. However, do it blindly and you’ll have little success. You first need to understand the camera’s mechanics, pneumatics, and its “Electric Eye” control system before you can get things dialed in just so.

We’ve seldom seen such a great deep dive into a camera outside of full-fat engineering documentation. [Jake] should be commended on his deep understanding and command of these fine instant cameras from yesteryear. May the Polaroid picture never die. Video after the break. Continue reading “Converting A Polaroid SX70 Camera To Use 600 Film”

Converting A B&W Enlarger For Colour Analog Photo Printing

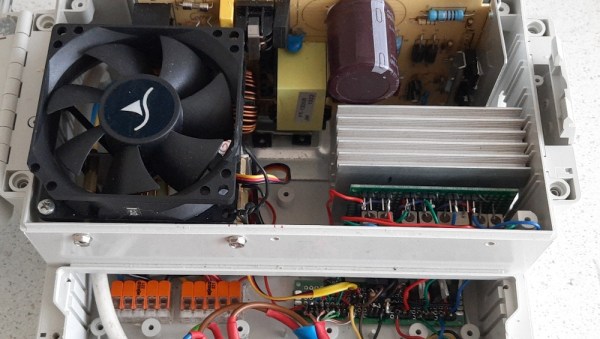
[Koraks tinkers] was gifted a gargantuan photographic enlarger, a Durst Laborator 138 s, which is a unit designed specifically for black and white usage only. This was not good enough for [Koraks] so down the rabbit hole of conversion to colour we go! The moral of the story is this: if you can’t find it, build it. The hacker mentality. After wasting time and effort trying to source a period colour head for the thing, [Koraks] did the decent thing and converted what was already in front of them.

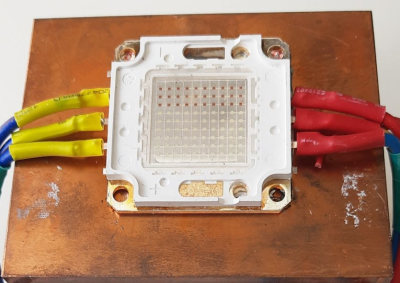
A hacked Chinese-sourced COB array. This is no use.

Now, if you’re thinking this process is simply a matter of ripping out the tungsten bulb and sticking a high-power RGB array in there, then you’re going to be disappointed! You see, colour photography of the era — specifically the RA4 process in this case — requires careful colour calibration and is heavily biased towards the red end of the visible spectrum, due to the colour curve of those tungsten bulbs we touched upon earlier.

Attempt 2: With a heavy bias towards the red end of the spectrum

The first attempt at using an off-the-shelf COB array was a bust — it simply wasn’t bright enough once the light had passed through the diffuser plate, and the light path losses were too high to expose the RA4 paper sufficiently, especially at the red end of the spectrum. Quite simply this is due to the reduced energy of red photons (compared to blue) making the desired chemical reaction rate too low. The solution is more power.

Another issue that quickly raised itself was that 8-bits of PWM control of the RGB components was inadequate since the ratio of blue to red required was so skewed, that only a few effective bits of blue channel control were usable, and that was far too granular to get the necessary accuracy.

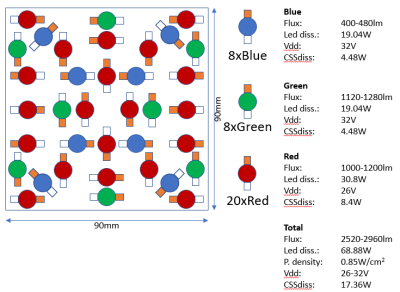
[Koraks’] approach was to custom build an LED array with twenty red 3W LEDs and eight each of the green and blue devices. 12-bits of PWM resolution was delivered via a PCA9685 PWM controller, that also handily controlled the cooling fans. The whole thing was hooked up to an Arduino Nano, with an MCP23016 expander board performing the duty of interfacing the rotary encoders and trigger footswitch. In fact, several iterations of the LED array have been constructed and this four-part blog series (Part1, Part2, Part3, Part4) lays out the whole story in all its gory detail for your entertainment. Enjoy!

COB LED arrays are pretty nifty, checkout turning them into 7-segment displays, just because. If all you want is raw power, we reckon that 100W “should be enough for anyone…”

Thanks [macsimski] for the tip!

Update: Corrected the article header from ‘exposer head’ to ‘enlarger’ for clarity at the request of the project author.