Using A Watch To Control Ms. Pacman

Recently, [Alan] broke out the ‘ol Atari 2600 to relive his childhood with a bit of Yar’s Revenge and Adventure, but after looking at his new TI EZ430 Chronos watch, he figured he could add a bit of motion control from this classic game system. He used the accelerometer in this watch to play Ms. Pacman by tilting his wrist, an awesome build that really shows off the power of his new wrist worn device.

The watch is running stock firmware and communicates to a PC via an RF module attached to his computer’s USB port. The accelerometer data is fed into a VB.net app to convert the movements of the wrist into up, down, left, and right commands. These commands are then sent out over a serial port to an Arduino to translate those commands into something the Atari joystick port can understand.

Sure, it may be a roundabout way of playing Ms. Pacman, but considering the TI Chronos has been used for very serious work such as stopping SIDS and helping out soccer referees, we’re happy to see a more frivolous application for this neat watch.

You can check out [Alan]’s video after the break, or get the VB and Arduino source here and here.

Continue reading “Using A Watch To Control Ms. Pacman”

Building Your Own Atari Cartridges

Have you ever wanted to create your own atari games from scratch? Thanks to the Grand Idea Studio, you can download the files to make your own cartridge PCBs. There isn’t a ton of information here, as this is an old project that isn’t being supported anymore. However, you can download the instructions, schematics, and gerber files for carts that work in the 3 main models of the atari 2600. As [Tyler] over at Adafruit points out, you could easily 3d print your own shell as well.

Putting An Atari POKEY In Your Pocket

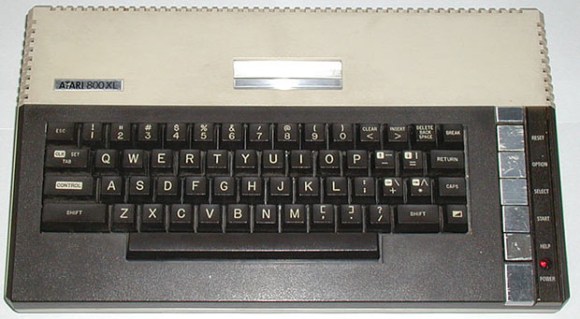
The Atari POKEY served as the main I/O chip on the venerable Atari 400/800 and XL/XE 8-bit computers. While a chip designed to get voltages from game paddles and scanning a matrix of keyboard switches wouldn’t normally be remembered 30 years later, the POKEY had another function: generating very, very distinctive music and sound effects for those old Atari games. [Markus Gritsch] wanted a portable version of the POKEY, so he emulated one on a modern microcontroller. Now he’s able to take those old Atari chiptunes where ever he goes.

The build uses the Another Slight Atari Player by emulating a 6502 and POKEY chip inside [Markus]’ PIC32MX-based microcontroller. There’s not much physical hardware [Markus] had to deal with – the board is built on a QFP proto board [Markus] picked up with a few buttons and a jack added for some simple I/O.

This isn’t [Markus]’s first attempt at portabalizing chiptunes – last year, we saw a truly awesome portable SID player that used the same PIC32 microcontroller and an emulated 6502. Between the Atari SAP Music Archive and the High Voltage SID Collection, [Markus] has more than enough chiptunes for days of listening pleasure.

Using An NES Controller With An Atari 2600

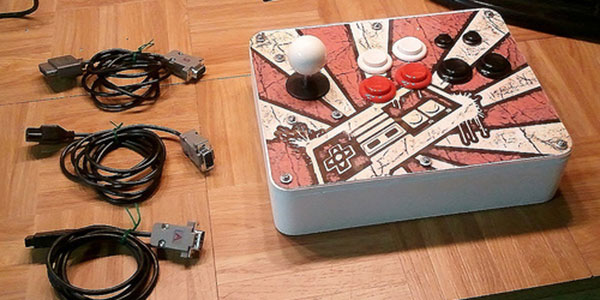
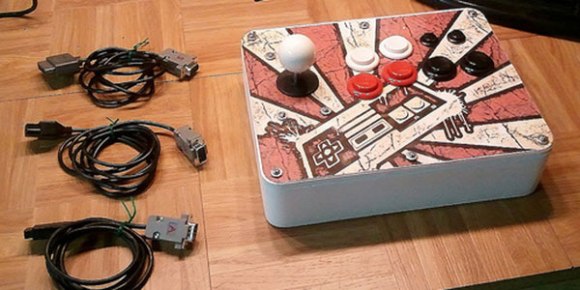
Instructibles user [Danjovic] managed to get his hands on an Atari 2600, but all the joysticks were damaged beyond repair. Instead of building an atari joystick from scratch, he looked to a slightly newer generation of gaming and decided to us an NES controller instead. This was done fairly easily with the aide of an Arduino.

This seems like a nice easy mod that could breathe a little new life into some old games, but we just can’t imagine playing without that original joystick!

Playing Chiptunes With A YM2149 And Optimizing An Arduino

[Oryx] grew up with the bleeps and bloops of an Atari ST, so it comes as no surprise he would want to relish in his nostalgia by playing with the YM2149 sound generator he recently picked up on eBay. Like most of us, [Oryx] went to his old standby, the Arduino, when it came to connect this bare chip to his computer. The first circuit didn’t work, so after a lot of poking around the firmware, [Oryx] discovered the benefits of hand-optimizing software.

There are a lot of sound files available for the YM2149 floating around on the Internet. These files are just dumps of the 16 registers at 50Hz, so it’s very easy to send these from a computer to an Arduino over a serial connection. Unfortunately, when [Oryx] got his breadboard set up nothing happened. After breaking out the ‘scope, he discovered the Arduino was switching pins 100 times slower than the YM2149 data sheet called for.

[Oryx] remembered seeing a great blog post going over the speed at which the digitalWrite() function changes pin states. We’ve seen this before, and the fastest way to change pin states on the Arduino is with the ugly bitwise manipulation. After changing a few lines of code, [Oryx] was switching two pins nearly simultaneously.

Now that the YM2149 chip is working correctly, [Oryx] is planning to make a MIDI synth out of his project. You can get an idea of how that will sound with the demo video he put up after the break.

Continue reading “Playing Chiptunes With A YM2149 And Optimizing An Arduino”

The Teensiest Atari 2600 Ever

[Dablio] sent in an awesome console mod he made. It may just be the smallest Atari 2600 ever (Portuguese, here’s the Google translation).

The build began with a Dynacom MegaBoy, from the same company that put out many less-than-legal 2600 clones. The MegaBoy PCB is an exercise in parsimony consisting of only a single IC, a crystal, and some resistors and caps. [Dablio] made a new PCB board based on the schematic he reverse engineered and this thing is tiny. It’s much smaller than even the smallest [Ben Heck] 2600 console build.

[Dablio] now needed a case for his new console. He had originally planned to mount the whole thing in an Atari controller like this commercial product. Serendipity intervened and he realized the entire system (sans cartridge port) fit inside a plastic tube of m&m minis.

Currently, [Dablio] has two ports on his ‘Atari tube of m&ms’ – the largest is the cartridge slot, and a small VGA port sits in the lid of the tube. This VGA port carries the power supply, controller, sound and video signals to and from the console.

[Dablio] sent in a bunch of pictures of his build which are in a gallery after the break. Now for the million-dollar question: anybody know where to buy one of these Dynacom MegaBoys?

Continue reading “The Teensiest Atari 2600 Ever”

Giving An Old Atari Computer A Much Needed Upgrade

As a kid, [Boisy] cut his teeth on the TRS-80 Color Computer. It was a wonderful machine for its day, featuring a relatively powerful Motorola 6809 CPU. Although his CoCo was theoretically more powerful than its Commodore and Apple contemporaries, the graphics and sound capabilities of [Boisy]’s first love paled in comparison to his friends 6502-based machines. A little jealously and thirty years go a long way, because now [Boisy] is adding a 6809 microprocessor to the 6502-based machines Atari put out.

[Boisy]’s goal for his Liber809 project was simple: Put a 6809 CPU in an Atari XEGS and get NitrOS-9, the Unix-like OS for the TRS-80 CoCo running on his Frankenputer. After a few months of work, [Boisy] completed his goal and more so: the Liber809 also works on the Atari 1200XL.

To put [Boisy]’s work in perspective, it’s like he took a Macintosh from 1993 and made it run on an Intel 486. While that’s not a terribly accurate analogy, we hope our readers will understand the fortitude needed to make a computer run on a completely different processor.

After the break, you can check out a neat demo app written by [SLOR] from the AtariAge forums showcasing a 6809 running in a machine designed for a 6502. Awesome work for all involved

Continue reading “Giving An Old Atari Computer A Much Needed Upgrade”