Famicom-Inspired NES TV Looks Rad In Red

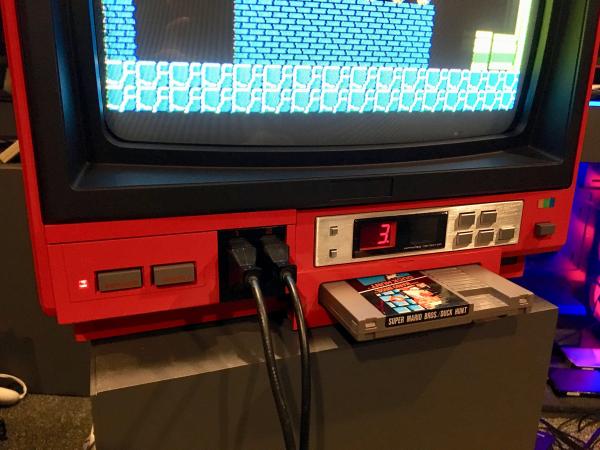
Take it from us, insomnia is no joke. But the wee hours can have a great effect on creativity, and if you’ve got a project in mind, doing that is way better than just sitting around, zoning out to infomercials and wishing for sleep. Over recent nights, [insomniacfactory] has been working on a Sharp C1 Famicon-inspired NES TV, and the result is simply fabulous.

The Sharp C1 Famicom was CRT television with a Famicom (precursor to the NES) built in. It allegedly had better picture quality than either a Famicom or NES with a separate television, and this was because it had direct internal display connection. The picture quality was so good that video game magazines at the time used it for screenshots.

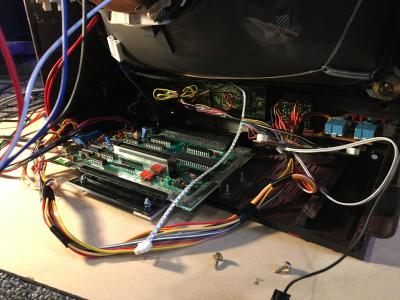
Starting with a couple of TVs and a plan, [insomniacfactory] got to work, using the guts from a newer donor TV and a 1985 NES main board with the region-free mod and the RF module removed.

[insomniacfactory] also added also added a wiring harness and a side loader connector from a broken Game Genie to the NES main board. After some careful Dremeling out of the 1981 AKAI TV, they had room for the clone console’s cartridge slot and controller plugs.

This project took a lot of careful and fiddly work, especially since the boards are all bracketed in place and easy to remove. But it totally looks like it was worth it, and now [insomniacfactory] can retro game all night for a while before starting the next insomnia-driven project.

Are you in the mood for more iconic NES? Take a guided tour.

Automation For The NES

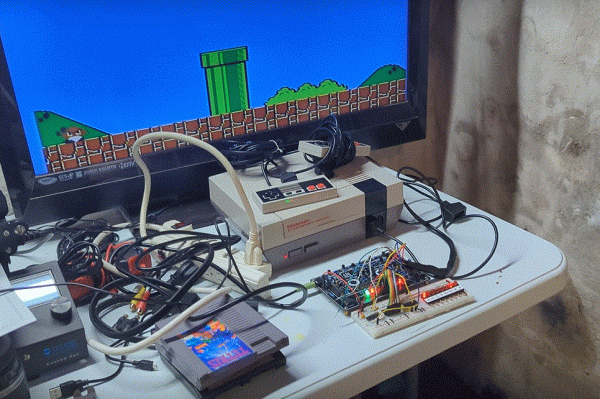
Old hardware might not be anywhere close to as powerful as modern technology, but it does have a few perks. Aesthetics can of course drive the popularity of things like retro gaming systems, but the ease of understanding the underpinnings of their inner workings is also critical. The Nintendo Entertainment System, now nearly four decades old, is a relatively simple machine by modern standards and this lends the system to plenty of modifications, like this controller that allows the system to be somewhat automated.

The original NES controller used a fairly simple shift register to send button presses to the system. The system outputted a latch signal to the controller, the shift register would take as input the current state of the buttons, and then would send them one-by-one to the system at a rate of around 1000 times per second. These signals can be sent without a controller easily enough, too. This build uses a CD4021 shift register, which is the same as the original controller, but instead of reading button states it accepts its inputs from a separate computer via a latching circuit. In this case, the separate computer is a custom design that came about through adapting cassette storage for a 6502-based computer, but it could come from anything else just as easily.

With this system in place, it’s possible to automate gameplay to some extent. Since the system can’t get feedback about the game in its current state, it requires some precise timing to get it to play the game well, and a lot of tuning needs to go into it. This isn’t just a one-off, either. Similar methods are how we get tool-assisted speedruns of games and although these are often done in emulators instead of on real hardware, they can result in some interesting exploits.

Continue reading “Automation For The NES”

TinyTendo Is A Miniscule Yet Real NES

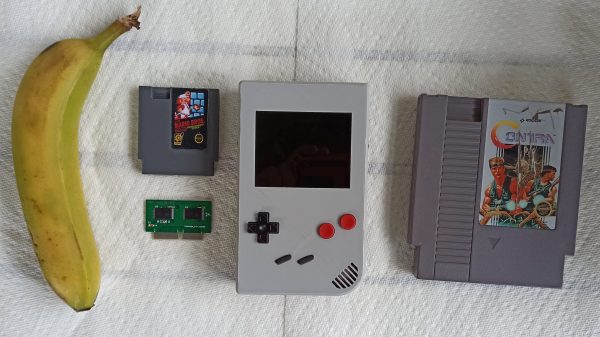
These days, it’s possible to get a single-board computer the size of a stick of gum. This will give you the power to emulate thousands of games and you can run one off batteries inside a handheld of your own devising. [Redherring32] took an altogether more creative and old-school approach with the TinyTendo, however. This is one pocket-sized NES that actually runs on genuine hardware. (Nitter)

The feat was achieved by drastically reducing the size of the original NES hardware to make it fit into a Game Boy style form factor. Key to this work was creating a custom cut-sized motherboard which uses original Nintendo DIP chips that have been machined down to become more like QFN-style surface mount packages. With that done, the chips can be assembled onto the TinyTendo PCB which is even smaller than a contemporary Raspberry Pi 3. It’s all assembled in a custom case, with USB C for charging and a bright and colorful LCD screen.

The TinyTendo is designed to use mini-cartridges created by [Bucket Mouse], a hacker who’s no stranger to impressive custom Game Boy hardware. By virtue of running genuine NES hardware, there’s also the possibility that the TinyTendo could play full-sized NES carts with a simple adapter.

This project has been a long time in the making; we first looked at [Redherring32]’s efforts back in 2021. It begs the question why the original NES was so big when Nintendo clearly had plenty of space to spare in those hefty DIP packages! It’s amazing what can be done with some creativity and perseverance. Continue reading “TinyTendo Is A Miniscule Yet Real NES”

Commodore 64 Upgrade In Modern Package

While the Commodore 64 was an immensely popular computer for its time, and still remains a strong favorite within the retrocomputing community, there’s a reason we’re not using modern Commodore-branded computers today. Intense competition, company mismanagement, and advancing beyond 8-bit computers too late in the game all led to the company’s eventual downfall. But if you’re still a Commodore enthusiast and always wished you were able to get an upgraded C64, you might want to take a look at the Commander X16, a modern take on this classic computer.

We’ve actually seen the Commander X16 before, but this was back in its early days of prototyping and design. This video from [Adrian’s Digital Basement], also linked below the break, takes a look at how it’s come in the four years since [David Murray] started this project. At its core, it’s an 8-bit 6502-based computer like you’d find in the 1980s but built with new components. There are some more modern updates as well such as the ability to use an SD card as well as built-in SNES controller ports, but the real magic here is the VERA module. Built around an FPGA, this module handles graphics, some of the audio, and the storage capabilities and does all of these things much better than the original Commodore, while still being faithful to what made these computer great.

While the inclusion of the FPGA might offend some of the most staunch 8-bit purists, it turns out to be necessary due to the lack of off-the-shelf video chips and really makes this build shine in the end. It’s also capable of running 6502-based software from other machines too, including the original NES. The VERA module makes it possible to run other software too, including a sample of Sonic the Hedgehog from the Sega Genesis which [Adrian] demonstrates in his video. 6502-based computers are quite versatile as the Commander X16 demonstrates, and it’s even possible to build a rudimentary 6502 on a breadboard with just a few parts.

Continue reading “Commodore 64 Upgrade In Modern Package”

A Guided Tour Of The NES

No matter your age or background, there’s an excellent chance you’ll recognize the Nintendo Entertainment System (NES) at first glance. The iconic 8-bit system not only revitalized the gaming industry, but helped to establish the “blueprint” of console gaming for decades to come. It’s a machine so legendary and transformative that even today, it enjoys a considerable following. Some appreciate the more austere approach to gaming from a bygone era, while others are fascinated with the functional aspects of console.

The NesHacker YouTube channel is an excellent example of that latter group. Host [Ryan] explores the ins and outs of the NES as a platform, with a leaning towards the software techniques used to push the system’s 6502 processor to the limits. Even if you aren’t terribly interested in gaming, the videos on assembly programming and optimization are well worth a watch for anyone writing code for vintage hardware.

Continue reading “A Guided Tour Of The NES”

Ultimate Game And Watch Has Support For NES

We’ve talked about feature creep plenty of times around here, and it’s generally regarded as something to be avoided when designing a prototype. It might sound good to have a lot of features in a build, but this often results in more complexity and more difficulty when actually bringing a project to fruition. [Brendan] has had the opposite experience with this custom handheld originally designed for Game and Watch games, though, and he eventually added NES and Game Boy functionality as well.

As this build was originally intended just for Game and Watch games, the screen is about the size of these old games, and while it can easily mimic the monochrome LCD-style video that would have been present on these 80s handhelds, it also has support for color which means that it’s the perfect candidate for emulating other consoles as well. It’s based around a Raspberry Pi Zero 2W and the enclosure is custom printed and painted. Some workarounds for audio had to be figured out, though, since native analog output isn’t supported, but it still has almost every feature for all of these systems.

While we’ve seen plenty of custom portable builds from everything from retro consoles to more modern ones, the Game and Watch catalog is often overlooked. There are a few out there, but in this case we appreciate the feature creep that allowed this build to support Game Boy and NES games as well.

How Those NES DIP Chips Were Reduced To QFNs

The world of console modding leads us to some extremely impressive projects, and a recent one we featured of note was a portable NES produced by [Redherring32]. It was special because the original NES custom DIP chips had been sanded down to something like a surface-mount QFN package. Back when our colleague [Arya] wrote up the project there wasn’t much information, but since then the full details have been put up in a GitHub repository. Perhaps of most interest, it includes a full tutorial for the chip-sanding process.

To take irreplaceable classic chips and sand them down must take some guts, but the premise is a sound enough one. Inside a DIP package is a chip carrier and a web of contact strips that go to the pins, this process simply sands away the epoxy to expose those strips for new contacts. The result can then be reflowed as would happen with any QFN, and used in a new, smaller NES.

Along the way this provides a fascinating insight into DIP construction that most of us never see. If any of you have ever managed to fatigue a pin off a DIP, you’ll also no doubt be thinking how the technique could be used to reattach a conductor.

You can read our original coverage of the project here.