Restoring A Rusty Rebar Cutter

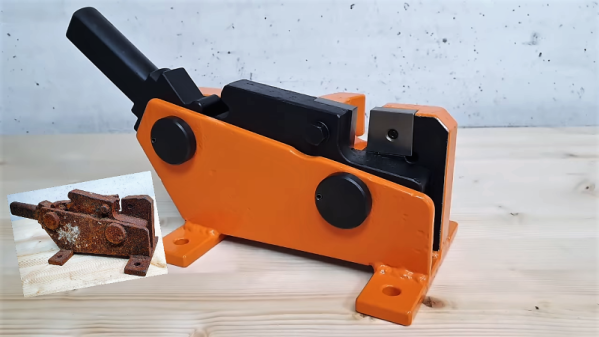
We’ve all probably come across hunks of junk that used to be tools, long-neglected and chemically welded into a useless mass of solid rust. Such items are available for a pittance at the local flea market, or more likely found in an old barn or rotting on a junk pile. They appear to be far beyond salvage, but with the proper application of elbow grease and penetrating lubricants, even a nasty old seized-up rebar cutter can live again.

We honestly almost passed up on the video below when it came across our feed. After all, a rebar cutter is a dead-simple device, and half the fun of restoration videos like those made by [my mechanics] is seeing all the parts removed, restored, and replaced. But it ended up being far more interesting than we expected, and far more challenging too.
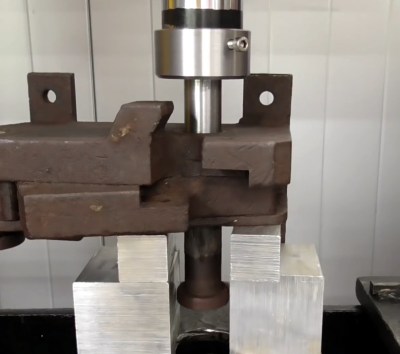
The cutter was missing its original handle and looked for all the world like it had been cast from a solid piece of iron oxide. [my mechanics] was able to get the main pivot bolts free with a combination of leverage, liberal application of penetrating oil, drilling, and the gentle persuasion of a hydraulic press.

These efforts proved destructive to both bolts, so new ones were made on the lathe, as were a number of other parts beyond saving. New cutters were fabricated from tool steel and a new handle was built; before anyone comments on anyone’s welding skills, please read [Jenny]’s recent article on the subject.

The finished product is strikingly dissimilar to the starting lump of oxidized junk, so there’s going to to be some debate in calling this a “restoration” in the classical sense. The end result of a [my mechanics] video is invariably a tool or piece of gear that looks far better than it did the day it was made, and any one of them would get a place of honor on our shelf. That said, he’d probably be swiftly shown the door if he worked at the Smithsonian.

Whatever you want to call these sort of videos, there are tons of them out there. We’ve featured a few examples of the genre, from the loving rehabilitation of classic Matchbox cars to rebuilding an antique saw set. They’re enough to make us start trolling garage sales. Or scrap yards.

Continue reading “Restoring A Rusty Rebar Cutter”

Scrapyard Milling Machine Gets Work Done On A Budget

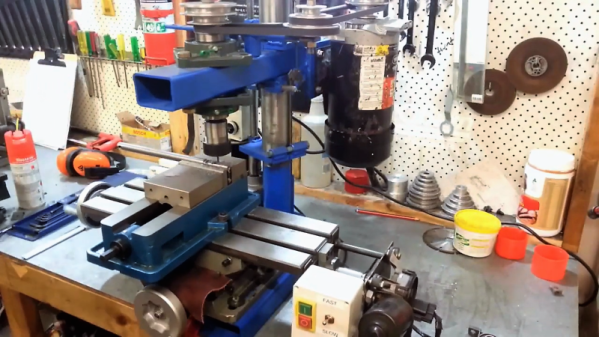
Which to buy first, a lathe or a mill? It’s a tough question for the aspiring home machinist with limited funds to spend on machine tools, but of course the correct answer is a lathe. With a lathe, we are told, all other machine tools can be built, including a milling machine. Granted that might be a slight  exaggeration, but [Maximum DIY] was still able to use his budget-blowing lathe to make a decent milling machine mostly from scrap.

Details are a bit sparse in the forum post, but there’s enough there and in the video after the break to be mightily impressed with the build. Unlike many DIY mills that are basically modified drill presses, [Maximum DIY] started with things like a scrapped bench grinder pedestal and surplus steel tubing. The spindle motor is from a paint sprayer and the Z-axis power feed is a treadmill incline motor. The compound table was a little too hard to make, so the purchased table was fitted with windshield wiper motor power feeds.

Therein lies perhaps the most clever hack in this build: the use of a plain old deep 19mm socket as a clutch for the power feeds. The 12-point socket slides on the square shaft of the wiper motor to engage the drive screw for the compound table – simple and bulletproof.

To be sure, the finished mill is far from perfect. It looks like it needs more mass to quell vibration, and those open drive pulleys are a little nerve wracking. But it seems to work well, and really, any mill is better than no mill. Of course, if you’re flush with cash and want to buy a mill instead of making one, this buyer’s guide should help.

Continue reading “Scrapyard Milling Machine Gets Work Done On A Budget”

Make 3D-Modeling Child’s Play With A Can Of Play-Doh

You need to replicate a small part on a 3-D printer, so you start getting your tools together. Calipers, rulers, and a sketch pad at a minimum, and if you’re extra fancy, maybe you pull out a 3D-scanner to make the job really easy. But would you raid your kid’s stash of Play-Doh too?

You might, if you want to follow [Vladimir Mariano]’s lead and use Play-Doh for accurately modeling surface features in the part to be replicated. Play-Doh is a modeling compound that kids and obsolete kids alike love to play with, especially a nice fresh can before it gets all dried out or mixed in with other colors or gets dog hair stuck in it.

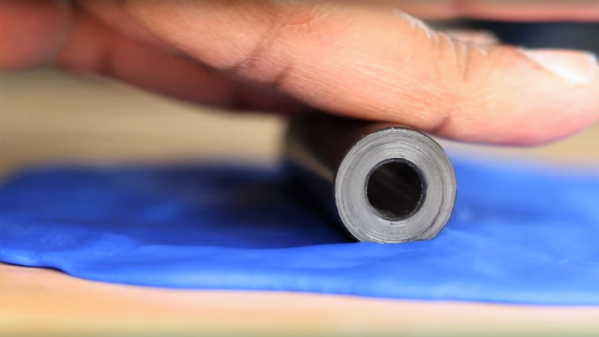
For [Vladimir], the soft, smooth stuff was the perfect solution to the problem of measuring the spacing of small divots in the surface of a cylinder that he was asked to replicate. Rather than measuring the features directly on the curved surface, he simply rolled it across a flattened wad of Play-Doh. The goop picked up the impressions on the divots, which were then easy to measure and transfer to Fusion 360. The video below shows the Play-Doh trick up front, but stay tuned through the whole thing to get some great tips on using the sheet metal tool to wrap and unwrap cylinders, as well as learning how to import images and recalibrate them in Fusion 360.

Run into a modeling problem that Play-Doh can’t solve? Relax, we’ve got a rundown on the basics for you.

Continue reading “Make 3D-Modeling Child’s Play With A Can Of Play-Doh”