High Voltage Turns Welder Into Plasma Cutter

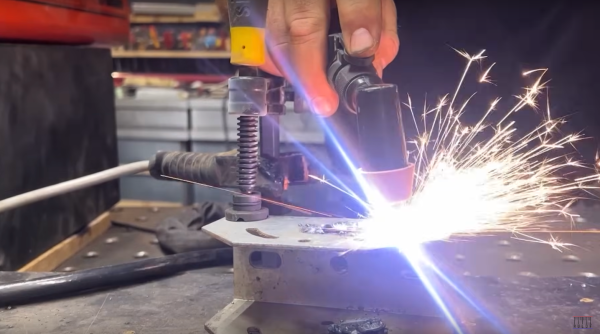
For doing basic steel welding, most of us will reach for a MIG welder. It might not be the best tool for every welding job, but it’s definitely the most accessible since they tend to use only basic parts, easy-to-find gas, and can run from a standard electrical outlet. A plasma cutter isn’t as common, and while they’re certainly useful, [Rulof] wanted to forgo the expense of buying one off the shelf. Instead, he used parts of an old welder and a few other odds and ends to build his own plasma cutter.

The welder he’s working from in this project uses low-voltage alternating current to drive the welding process, but since a plasma cutter ionizes gas it needs high-voltage direct current. A 200 A bridge rectifier with some heat sinks from a Mac and an old stereo get this job done, but that’s not the only step in the process. A driver board and flyback transformer is used to generate the high voltage needed for the cutting head. There are some DIY circuit protection and safety features built in as well, including a spark gap using two nails, galvanic isolation from a transformer built from copper pipe, and some filtering coils made from old copper wire and iron bars.

With everything connected to the old welding machine and some pressurized air inside to push out the plasma, [Rulof] has a functional plasma cutter that can make short work out of a variety of metals at a fraction of the cost of a commercial tool. With the cutting tool finished, we’d recommend mounting it to a home-built CNC machine next.

Continue reading “High Voltage Turns Welder Into Plasma Cutter”

DIY Fiber Laser Adds Metal Cutting To The Mix

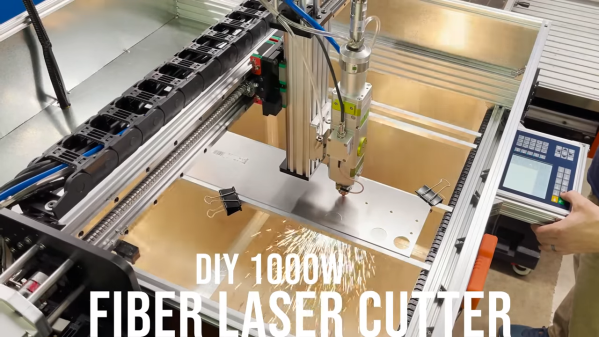
Sadly, the usual CO2-powered suspects in the DIY laser cutter market are woefully incapable of cutting metal. Sure, they’ll cut the heck out of plywood and acrylic, and most will do a decent job at engraving metal. But cutting through a sheet of steel or aluminum requires a step up to much more powerful fiber laser cutters. True, the costs of such machines can be daunting, but not daunting enough for [Travis Mitchell], who has undertaken a DIY fiber laser cutter build that really caught our eye.

Right off the bat, a couple of things are worth noting here. First — and this should be obvious from the fountains of white-hot sparks in the video below — laser cutters are dangerous, and you should really know what you’re doing before tackling such a build. Second, just because [Travis] was able to cut costs considerably compared to a commercial fiber laser cutter doesn’t mean this build was cheap in absolute terms — he reports dropping about $15,000 so far, with considerable ongoing costs to operate the thing.

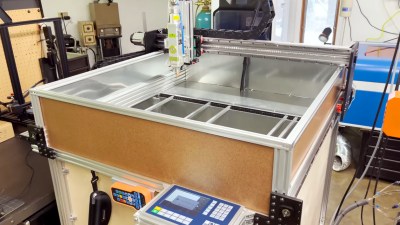
That said, there doesn’t appear to be anything about this build that anyone with some experience building CNC machines wouldn’t be able to tackle. The CNC side of this is pretty straightforward, although we note that the gantry, servos, and controller seem especially robust.

The laser itself is an off-the-shelf machine, a Raycus RFL-C1000 fiber laser and head that packs a 1,000-Watt punch. There’s also the required cooling system for the laser, and of course there’s an exhaust system to get rid of the nasty fumes.

All that stuff requires a considerable investment, but we were surprised to learn how much the consumables cost. [Travis] opted for bottled gas for the cutter’s gas assist system — low-pressure oxygen for carbon steel and high-pressure nitrogen for everything else. Refills are really pricey, in part because of the purity required, but since the proper compressor for the job is out of the budget for now, the tanks will have to do. And really, the thing cuts like a dream. Check out the cutting speed and precision in the video below.

This is but the first in a series of videos that will detail the build, and if [Travis] thought this would whet our appetites for more, he was right. We really haven’t seen many DIY fiber laser builds, but we have seen a teardown of a 200-kW fiber laser that might tickle your fancy.

Continue reading “DIY Fiber Laser Adds Metal Cutting To The Mix”

Interesting Optics Make This Laser Engraver Fit In A Pocket

We’re going to start this post with a stern warning: building a laser engraver that can fit in your pocket is probably not a wise idea. Without any safety interlocks and made from lightweight components as it is, this thing could easily tip over and sear a retina before you’d even have time to react. You definitely should not build this, or even be in the same room with it. Got it?

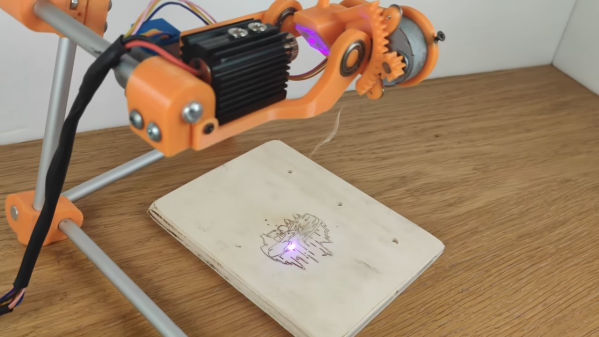
Safety concerns aside, [DAZ] has taken a pretty neat approach to making this engraver, eschewing the traditional X-Y gantry design in favor of something more like the galvanometers used for laser projectors, albeit completely homebrew and much, much slower than commercial galvos. Built mostly of 3D-printed parts, the scanning head of this engraver uses a single mirror riding on an angled block attached to gimbals with two degrees of freedom. The laser module and mirror gimbals are mounted on a stand made of light aluminum so that the whole thing is suspended directly over a workpiece; the steppers slew the mirror to raster the beam across the workpiece and burn a design.

The video below shows it at work, and again, we have to stress that this is about as close to this build as you should get. It shouldn’t be too hard to add some safety features, though — at a minimum, we’d like to see a tilt-switch that kills power if it’s knocked over, and maybe some kind of enclosure. Sure, that would probably spoil the pocketability of the engraver, but is that really a feature valuable enough to risk your eyesight for?

If there’s a laser build in your future, please read our handy guide to homebrew laser cutter safety — before you can’t.

Continue reading “Interesting Optics Make This Laser Engraver Fit In A Pocket”

Automate Parts Kitting With This Innovative SMD Tape Slicer

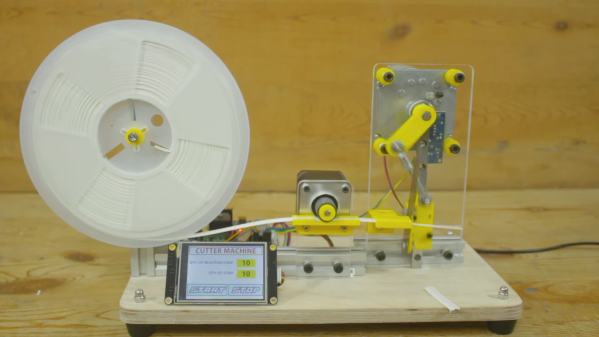
Nobody likes a tedious manual job prone to repetitive stress injury, and such tasks rightly inspire an automated solution. This automatic SMD tape cutter is a good example of automating such a chore, while leaving plenty of room for further development.

We’re used to seeing such tactical automation projects from [Mr Innovative], each of which centers on an oddly specific task. In this case, the task involves cutting a strip containing a specific number of SMD resistors from a reel, perhaps for assembling kits of parts. The mechanism is simple: a stepper motor with a rubber friction wheel to drive the tape, and a nasty-looking guillotine to cut the tape. The cutter is particularly interesting, using as it does a short length of linear bearing to carry a holder for a razor blade that’s mounted perpendicular to the SMD tape. The holder is mounted to a small motor via a crank, and when the proper number of parts have been fed out, the motor rotates one revolution, driving the angled blade quickly down and then back up. This results in a shearing cut rather than the clipping action seen in this automated wire cutter, also by [Mr Innovative].

Curiously, there seems to be no feedback mechanism to actually measure how many resistors have been dispensed. We assume [Mr Innovative] is just counting steps, but it seems easy enough to integrate a photosensor to count the number of drive sprocket holes in the tape. It also seems like a few simple changes would allow this machine to accommodate SMD tapes of different sizes, making it generally useful for SMD kitting. It’s still pretty cool as a tactical project, though, and does a great job inspiring future improvements.

Continue reading “Automate Parts Kitting With This Innovative SMD Tape Slicer”

Scratch-Built CO2 Laser Tube Kicks Off A Laser Cutter Build

When we see a CO2 laser cutter build around these parts, chances are pretty good that the focus will be on the mechatronics end, and that the actual laser will be purchased. So when we see a laser cutter project that starts with scratch-building the laser tube, we take notice.

[Cranktown City]’s build style is refreshingly informal, but there’s a lot going on with this build that’s worth looking at — although it’s perhaps best to ignore the sourcing of glass tubing by cutting the ends off of an old fluorescent tube; there’s no mention of what became of the mercury vapor or liquid therein, but we’ll just assume it was disposed of safely. We’ll further assume that stealing nitrogen for the lasing gas mix from car tires was just prank, but we did like the rough-and-ready volumetric method for estimating the gas mix.

The video below shows the whole process of building and testing the tube. Initial tests were disappointing, but with a lot of tweaking and the addition of a much bigger neon sign transformer to power the tube, the familiar bluish-purple plasma made an appearance. Further fiddling with the mirrors revealed the least little bit of laser output — nowhere near enough to start cutting, but certainly on the path to the ultimate goal of building a laser cutter.

We appreciate [Cranktown City]’s unique approach to his builds; you may recall his abuse-powered drill bit index that we recently covered. We’re interested to see where this laser build goes, and we’ll be sure to keep you posted.

Continue reading “Scratch-Built CO2 Laser Tube Kicks Off A Laser Cutter Build”

How Much Is Too Much?

I definitely tend towards minimalism in my personal projects. That often translates into getting stuff done with the smallest number of parts, or the cheapest parts, or the lowest tech. Oddly enough that doesn’t extend to getting the project done in the minimum amount of time, which is a resource no less valuable than money or silicon. The overkill road is often the smoothest road, but I’ll make the case for taking the rocky, muddy path. (At least sometimes.)

There are a bunch of great designs for CNC hot-wire foam cutters out there, and they range from the hacky to the ridiculously over-engineered, with probably most of them falling into the latter pile. Many of the machines you’ll see borrow heavily from their nearest cousins, the CNC mill or the 3D printer, and sport hardened steel rails or ballscrews and are constructed out of thick MDF or even aluminum plates.

All a CNC foam cutter needs to do is hold a little bit of tension on a wire that gets hot, and pass it slowly and accurately through a block of foam, which obligingly melts out of the way. The wire moves slowly, so the frame doesn’t need to handle the acceleration of a 3D printer head, and it faces almost no load so it doesn’t need any of the beefy drives and ways of the CNC mill. But the mechanics of the mill and printer are so well worked out that most makers don’t feel the need to minimize, simply build what they already know, and thereby save time. They build a machine strong enough to carry a small child instead of a 60 cm length of 0.4 mm wire that weighs less than a bird’s feather.

I took the opposite approach, building as light and as minimal as possible from the ground up. (Which is why my machine still isn’t finished yet!) By building too little, too wobbly, or simply too janky, I’ve gotten to see what the advantages of the more robust designs are. Had I started out with an infinite supply of v-slot rail and ballscrews, I wouldn’t have found out that they’re overkill, but if I had started out with a frame that resisted pulling inwards a little bit more, I would be done by now.

Overbuilding is expedient, but it’s also a one-way street. Once you have the gilded version of the machine up and running, there’s little incentive to reduce the cost or complexity of the thing; it’s working and the money is already spent. But when your machine doesn’t quite work well enough yet, it’s easy enough to tell what needs improving, as well as what doesn’t. Overkill is the path of getting it done fast, while iterated failure and improvement is the path of learning along the way. And when it’s done, I’ll have a good story to tell. Or at least that’s what I’m saying to myself as I wait for my third rail-holder block to finish printing.

Arduino Takes Control Of Dead Business Card Cutter

It’s a common enough situation, that when an older piece of equipment dies, and nobody wants to spend the money to repair it. Why fix the old one, when the newer version with all the latest bells and whistles isn’t much more expensive? We all understand the decision from a business standpoint, but as hackers, it always feels a bit wrong.

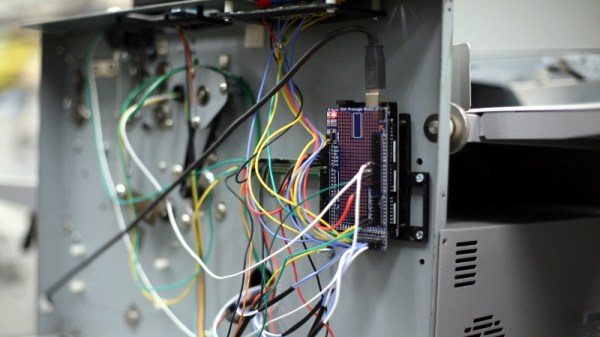
Which is exactly why [tommycoolman] decided to rebuild the office’s recently deceased Duplo CC-330 heavy duty business card cutter. It sounds like nobody really knows what happened to the machine in the first place, but since the majority of the internals were cooked, some kind of power surge seems likely. Whatever the reason, almost none of the original electronics were reused. From the buttons on the front panel to the motor drivers, everything has been implemented from scratch.

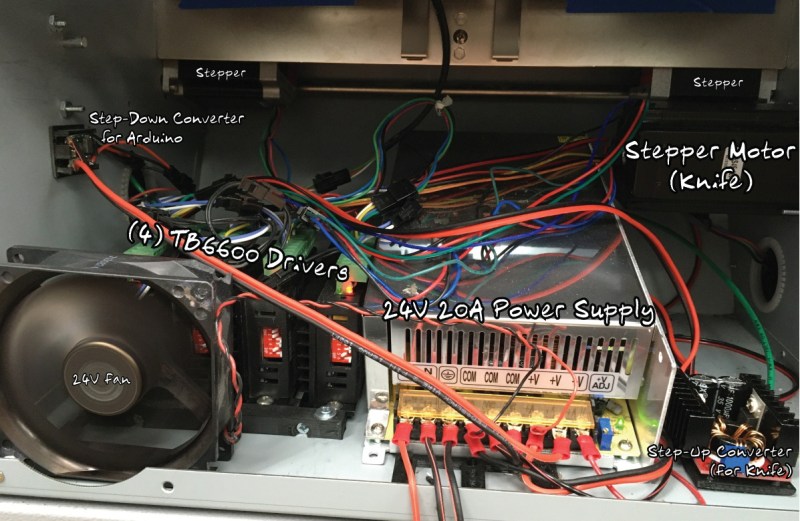
An Arduino Mega 2560 clone is used to control four TB6600 stepper motor drivers, with a common OLED display module installed where the original display went. The keypad next to the screen has been replaced with 10 arcade-style buttons soldered to a scrap of perfboard, though in the end [tommycoolman] covers them with a very professional looking printed vinyl sheet. There’s also a 24 V power supply onboard, with the expected assortment of step up and step down converters necessary to feed the various electronics their intended voltages.

In the end, [tommycoolman] estimates it took about $200 and 30 hours of work to get the card cutter up and running again. The argument could be made that the value of his time needs to be factored into the repair bill as well, but even still, it sounds like a bargain to us; these machines have a four-figure price tag on them when new.

Stories like this one are important reminders of the all wondrous things you can find hiding in the trash. Any time a machine like this can be rescued from the junkyard, it’s an accomplishment worthy of praise in our book.