Fail Of The Week: Magnetic Levitation

We are big fans of the little desktop magnetic levitation setups that float a small object on a magnet. As [3D Printed Life] points out, they look like magic. He was surprised that the commercial units use analog electronics. He decided to build a digital version but didn’t know what he was getting into. He details his journey in the video you can see below.

Along with a custom control board, he decided to wind his own electromagnets. After finding that tedious he built a simple coil winder to automate some of the work.

Continue reading “Fail Of The Week: Magnetic Levitation”

2D-Platform Seeks Balance With A Touch Screen

It’s the [Bruce Land]-iest season of all, when the Cornell professor submits the projects his microcontroller class students have been working on all semester. Imagination does not seem to be in short supply with these students, and we always look forward to these tips this time of year.

[Greg] and [Sam]’s touch-screen two-dimensional ball balancer is a good example of what [Land]’s students turn out. The resistive touch screen is supported by a 3D-printed gimballed platform and tilted in two axes by hobby servos. [Greg] and [Sam] chose to read the voltage outputs from the touch screen directly using the ADC on a PIC32, toggling between the two axes at 2 kHz. Two PID control loops were implemented to keep the ball as centered as possible on the platform, and the video below shows that there’s still some loop tuning to do. But given the positional inaccuracies of hobby servos and the compliance in the gimbal, we’re impressed that they were able to keep the system under control at all.

Of course we’ve seen ball-balancers before, but most of them have closed the loop using either cameras or microphones. Seeing direct sensing on the platform like this is a nice change of pace. Continue reading “2D-Platform Seeks Balance With A Touch Screen”

Ping-Pong Ball Makes Great PID Example

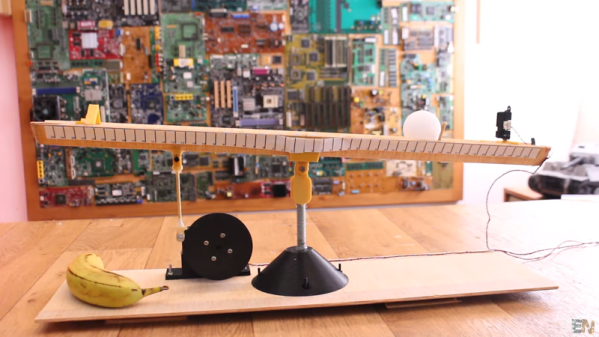
It is a common situation in electronics to have a control loop, that is some sort of feedback that drives the input to a system such as a motor or a heater based upon a sensor to measure something like position or temperature. You’ll have a set point — whatever you want the sensor to read — and your job is to adjust the driving thing to make the sensor read the set point value. This seems easy, right? It does seem that way, but in realitythere’s a lot of nuance to doing it well and that usually involves at least some part of a PID (proportional, integral, derivative) controller. You can bog down in math trying to understand the PID but [Electronoobs] recent video shows a very simple test setup that clearly demonstrates what’s going on with an Arduino, a motor, a distance sensor, and a ping-pong ball. You can see the video below.

Imagine for a moment heating a tank of water as an example. The simple approach would be to turn on the heater and when the water reaches the setpoint, turn the heater off. The problem there is though that you will probably overshoot the target. The proportional part of a PID controller will only turn the heater fully on when the water is way under the target temperature. As the water gets closer to the right temperature, the controller will turn down the input — in this case using PWM. The closer the sensor reads to the setpoint, the lower the system will turn the heater.

Continue reading “Ping-Pong Ball Makes Great PID Example”