Slipping Sheets Map Multiple Bends In This Ingenious Flex Sensor

When thoughts turn to measuring the degree to which something bends, it’s pretty likely that strain gauges or some kind of encoders on a linkage come to mind. Things could be much simpler in the world of flex measurement, though, if [Fereshteh Shahmiri] and [Paul H. Dietz]’s capacitive multi-bend flex sensor catches on.

This is one of those ideas that seems so obvious that you don’t know why it hasn’t been tried before. The basic idea is to leverage the geometry of layered materials that slip past each other when bent. Think of the way the pages of a hardbound book feather out when you open it, and you’ll get the idea. In the case of the ShArc (“Shift Arc”) sensor, the front and back covers of the book are flexible PCBs with a series of overlapping pads. Between these PCBs are a number of plain polyimide spacer strips. All the strips of the sensor are anchored at one end, and everything is held together with an elastic sleeve. As the ShArc is bent, the positions of the electrodes on the top and bottom layers shift relative to each other, changing the capacitance across them. From the capacitance measurements and the known position of each pad, a microcontroller can easily calculate the bend radius at each point and infer the curvature of the whole strip.

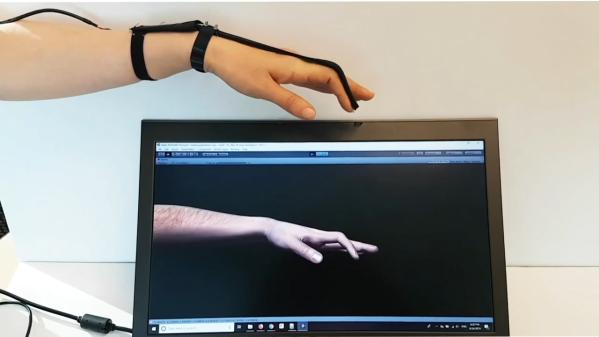
The video below shows how the ShArc works, as well as several applications for the technology. The obvious use as a flex sensor for the human hand is most impressive — it could vastly simplify [Will Cogley]’s biomimetic hand controller — but such sensors could be put to work in any system that bends. And as a bonus, it looks pretty simple to build one at home.

Continue reading “Slipping Sheets Map Multiple Bends In This Ingenious Flex Sensor”

Thermochromic Display Tells You The Temperature Despite Your Current Mood

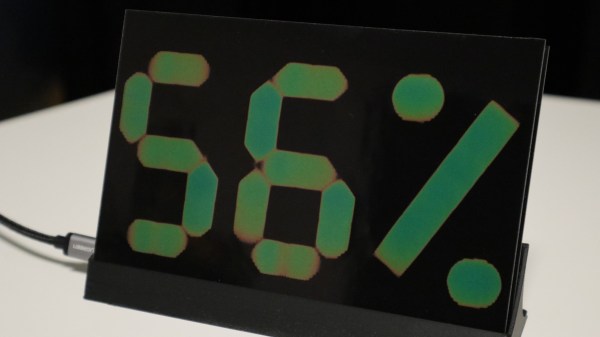
Readers who survived the 1970s will no doubt remember the “mood ring” fad, where a liquid crystal mounted to a ring would magically reveal your current emotional state to all and sundry by changing color. This nifty thermochromic display is based on the same principle, and while it might not start a new craze, it’s still pretty mesmerizing to watch.

This isn’t [Moritz v. Sivers]’ first attempt at a thermochromic display. His earlier version was far more complicated, using separate copper plates clad with thermochromic film for each segment, with Peltier devices to cool and heat them individually. Version two is much simpler, using a printed circuit board with heating elements in the shape of seven-segment displays etched into it. The thermochromic film sits directly on the heater PCB; a control PCB below has the MCU and sensors on it. The display alternates between temperature and humidity, with the segments fading in an uneven and ghostly way that really makes this fun to watch. [Moritz] has made the build files available, and there’s a detailed Instructable as well.

We’re always on the lookout for alternate display modalities, especially when they look this cool. We’ve seen other thermochromic displays before, of course, and persistence of phosphorescence looks great, too.

Continue reading “Thermochromic Display Tells You The Temperature Despite Your Current Mood”

2D-Platform Seeks Balance With A Touch Screen

It’s the [Bruce Land]-iest season of all, when the Cornell professor submits the projects his microcontroller class students have been working on all semester. Imagination does not seem to be in short supply with these students, and we always look forward to these tips this time of year.

[Greg] and [Sam]’s touch-screen two-dimensional ball balancer is a good example of what [Land]’s students turn out. The resistive touch screen is supported by a 3D-printed gimballed platform and tilted in two axes by hobby servos. [Greg] and [Sam] chose to read the voltage outputs from the touch screen directly using the ADC on a PIC32, toggling between the two axes at 2 kHz. Two PID control loops were implemented to keep the ball as centered as possible on the platform, and the video below shows that there’s still some loop tuning to do. But given the positional inaccuracies of hobby servos and the compliance in the gimbal, we’re impressed that they were able to keep the system under control at all.

Of course we’ve seen ball-balancers before, but most of them have closed the loop using either cameras or microphones. Seeing direct sensing on the platform like this is a nice change of pace. Continue reading “2D-Platform Seeks Balance With A Touch Screen”

The $50 Ham: Dummy Loads

This is an exciting day for me — we finally get to build some ham radio gear! To me, building gear is the big attraction of amateur radio as a hobby. Sure, it’s cool to buy a radio, even a cheap one, and be able to hit a repeater that you think is unreachable. Or on the other end of the money spectrum, using a Yaesu or Kenwood HF rig with a linear amp and big beam antenna to work someone in Antartica must be pretty cool, too. But neither of those feats require much in the way of electronics knowledge or skill, and at the end of the day, that’s why I got into amateur radio in the first place — to learn more about electronics.

To get my homebrewer’s feet wet, I chose perhaps the simplest of ham radio projects: dummy loads. Every ham eventually needs a dummy load, which is basically a circuit that looks like an antenna to a transmitter but dissipates the energy as heat instead of radiating it an appreciable distance. They allow operators to test gear and make adjustments while staying legal on emission. Al Williams covered the basics of dummy loads a few years back in case you need a little more background.

We’ll be building two dummy loads: a lower-power one specifically for my handy talkies (HTs) will be the subject of this article, while a bigger, oil-filled “cantenna” load for use with higher power transmitters will follow. Neither of my designs is original, of course; borrowing circuits from other hams is expected, after all. But I did put my own twist on each, and you should do the same thing. These builds are covered in depth on my Hackaday.io page, but join me below for the gist on a good one: the L’il Dummy.

Continue reading “The $50 Ham: Dummy Loads”

Print Physical Buttons For Your Touch Screen

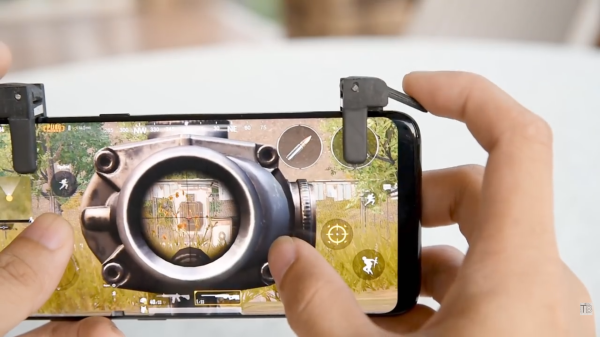
Modern handheld gaming hardware is great. The units are ergonomic powerhouses, yet many of us do all our portable gaming on a painfully rectangular smartphone. Their primary method of interaction is the index finger or thumbs, not a D-pad and buttons. Shoulder triggers have only existed on a few phones. Bluetooth gaming pads are affordable but they are either bulky or you have to find another way to hold your phone. Detachable shoulder buttons are a perfect compromise since they can fit in a coin purse and they’re cheap because you can make your own.

[ASCAS] explains how his levers work to translate a physical lever press into a capacitive touch response. The basic premise is that the contact point is always touching the screen, but until you pull the lever, which is covered in aluminum tape, the screen won’t sense anything there. It’s pretty clever, and the whole kit can be built with consumables usually stocked in hardware stores and hacker basements and it should work on any capacitive touch screen.

Physical buttons and phones don’t have to be estranged and full-fledged keyswitches aren’t exempt. Or maybe many capacitive touch switches are your forte.

Continue reading “Print Physical Buttons For Your Touch Screen”

FabricKeyboard

FabricKeyboard Is Piano, Theremin And More

Two researchers of Responsive Environments, MIT Media Lab, have put to together a device that is an amazing array of musical instruments squeezed into one flexible package. Made using seven layers of fabrics with different electrical properties, the result can be played using touch, proximity, pressure, stretch, or with combinations of them. Using a fabric-based keyboard, ribbon-controller, and trackpad, it can be played as a one-octave keyboard, a theremin, and in ways that have no words, such as stretching while pressing keys. It can also be folded up and stuffed into a case along with your laptop, and care has even been taken to make it washable.

The FabricKeyboard layers

Layer one, the top layer, is a conductive fabric for detecting proximity and touch. The twelve keys can work independently with a MPR121 proximity touch controller or the controller can treat them all as one, extending the distance the hand can be and have it still work. Layer two is just a knit fabric but layers three to six detect pressure, consisting to two conductive layers with a mesh fabric and a piezo-resistive fabric in between. The piezo-resistive fabric is LTT-SPLA from eeonyx, a knit fabric coated with the conductive polymer, polypyrrole (PPy). Layer seven consists of two strips of knitted spandex fabric, also coated with PPy, and detects stretching. Two strips of this are sewn on the bottom, one horizontal and one vertical. You can see and hear the amazing sound this all produces in the video below.

Continue reading “FabricKeyboard Is Piano, Theremin And More”

Light Dimmer Shows How To Steal Power From AC Line

We see a lot of traffic on the tips line with projects that cover old ground but do so in an instructive way, giving us insight into the basics of electronics. Sure, commercial versions of this IR-controlled light dimmer have been available for decades. But seeing how one works might just help you design your Next Big Thing.

Like many electronic controls, the previous version of this hack required a connection to a neutral in addition to the hot. This version of the circuit relies on passing a small current through the light bulb the dimmer controls to avoid that extra connection. This design limits application to resistive loads like incandescent bulbs. But it’s still a cool circuit, and [Muris] goes into great detail explaining how it works.

We think the neatest bit is the power supply that actually shorts itself out to turn on the load. A PIC controls a triac connected across the supply by monitoring power line zero-crossing. The PIC controls dimming by delaying the time the triac fires, which trims the peaks off of the AC waveform. The PIC is powered by a large capacitor while the triac is conducting, preventing it from resetting until the circuit can start stealing power again. Pretty clever stuff, and a nice PCB design to boot.

Given the pace of technological and cultural change, it might be that [Muris]’ dimmer is already largely obsolete since it won’t work with CFLs or LEDs. But we can see other applications for non-switched mode transformerless power supplies. And then again, we reported on [Muris]’s original dimmer back in 2009, so the basic design has staying power.