A Simple Yet Feature-Packed Programmable DC Load

If you’ve got the hankering to own a lab full of high-end gear but your budget is groaning in protest, rolling your own test equipment can be a great option. Not everything the complete shop needs is appropriate for a DIY version, of course, but a programmable DC load like this one is certainly within reach of most hackers.

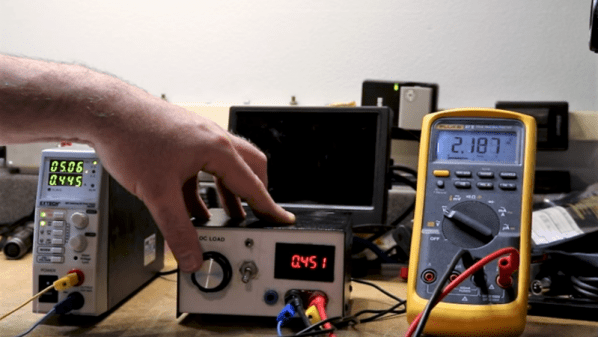
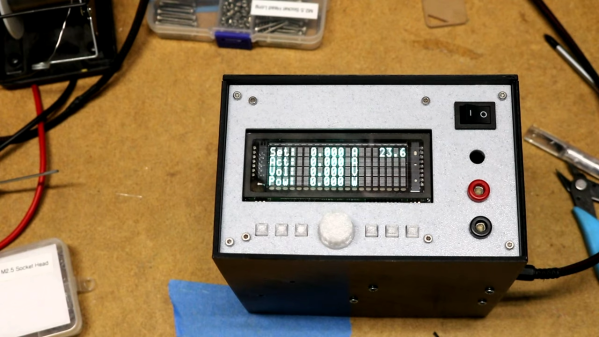
This build comes to us courtesy of [Scott M. Baker], who does his usual top-notch job of documenting everything. There’s a longish video below that covers everything from design to testing, while the link above is a more succinct version of events. Either way, you’ll get treated to a good description of the design basics, which is essentially an op-amp controlling the gate of a MOSFET in proportion to the voltage across a current sense resistor. The final circuit adds bells and whistles, primarily in the form of triple MOSFETS and a small DAC to control the set-point. The DAC is driven by a Raspberry Pi, which also supports either an LCD or VFD display, an ADC for reading the voltage across the sense resistor, and a web interface for controlling the load remotely. [Scott]’s testing revealed a few problems, like a small discrepancy in the actual amperage reading caused by the offset voltage of the op-amp. The MOSFETs also got a bit toasty under a full load of 100 W; a larger heatsink allows him to push the load to 200 W without releasing the smoke.

We always enjoy [Dr. Baker]’s projects, particularly for the insight they provide on design decisions. Whether you want to upgrade the controller for a 40-year-old game console or giving a voice to an RC2014, you should check out his stuff.

Continue reading “A Simple Yet Feature-Packed Programmable DC Load”

Careful Testing Reveals USB Cable Duds

What’s worse than powering up your latest build for the first time only to have absolutely nothing happen? OK, maybe it’s not as bad as releasing the Magic Smoke, but it’s still pretty bewildering to have none of your blinky lights blink like they’re supposed to.

What you do at that point is largely a matter of your troubleshooting style, and when [Scott M. Baker]’s Raspberry Pi jukebox build failed to chooch, he returned to first principles and checked the power cable. That turned out to be the culprit, but instead of giving up there, he did a thorough series of load tests on multiple USB cables to see which ones were suspect, with interesting results.

[Scott] originally used a cable with a USB-A on one end and a 3.5-mm barrel plug on the other with a switch in between, under the assumption that the plug on the Pi end would be more robust, as well as to have a power switch for the jukebox. Testing that cable using an adjustable DC load would prove that the cable was unfit for Pi duty, dropping the voltage to under 2 volts at a measly 500-mA load. Other cables proved much better under load, even those with USB mini jacks and even one with a 5.5-mm barrel. But the larger barrel-plug cable also proved to be a stinker when it was paired with an inline switch. In the video below, [Scott] walks through not only the testing process, but also gives a quick tour of his homebrew DC load.

The lesson is clear: not all USB cables are created equal, so caveat hacker. And if you’ve got a yen to check the cables in your junk bin like [Scott] did, this full-featured smart DC load might be just the thing.

Continue reading “Careful Testing Reveals USB Cable Duds”