As far as giving mechanical instruments electronic control goes, drums are probably the best candidate for conversion; learning to play them is challenging and loud for a human, but they’re a straightforward matter for a microcontroller. [Jeremy Cook]’s latest project takes this approach by using an Arduino Opta to play a tongue drum.
[Jeremy]’s design far the drum controller was inspired by the ring-shaped arrangement of the Cray 2 supercomputer. A laser-cut MDF frame forms a C-shape around the tongue drum, and holds eight camera mount friction arms. Each friction arm holds a solenoid above a different point on the drum head, making it easy to position them. A few supports were 3D-printed, and some sections of PVC tubing form pivots to close the ring frame. [Jeremy] found that the the bare metal tips of the solenoids made a harsh sound against the drum, so he covered the tips of six solenoids with plastic caps, while the other two uncoated tips provide an auditory contrast.
The Arduino Opta is an open-source programmable logic controller normally intended for industrial automation. Here, its silent solid-state relays drive the solenoids, as [Jeremy]’s done before in an earlier experiment. The Opta is programmed to accept MIDI input, which [Jeremy] provided from two of the MIDI controllers which we’ve seen him build previously. He was able to get it working in time for the 2024 Orlando Maker Faire, which was the major time constraint.
Of course, for a project like this you need a MIDI controller, and we’ve previously seen [Jeremy] convert a kalimba into such a controller. We’ve seen this kind of drum machine at least once before, but it’s more common to see a purely electronic implementation.
drum controller2 Articles
Forgotten Rock Band Drum Controller As A MIDI Instrument
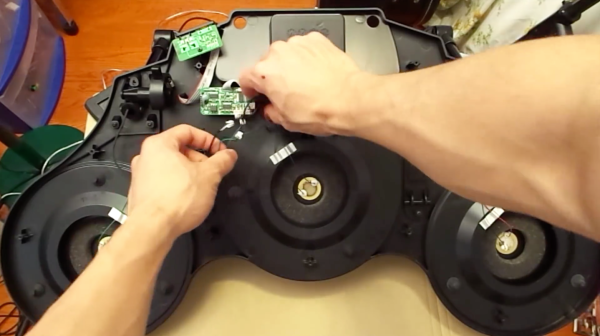
Happen to have an old Rock Band drum controller collecting dust in your living room? If you also have a spare Arduino and don’t mind parting with that plastic college memento then you’ve got the bulk of what could potentially be your new percussive MIDI instrument. In his project video [Evan Kale] outlines the steps necessary to turn that unloved plastic into a capable instrument for recording.
The whole process as outlined by [Evan] in under seven minutes. This looks like a great weekend endeavor for those of us just starting out with MIDI. After cracking the back of the Guitar Hero drum kit controller open, the main board within is easily replaced with a standard sized Ardunio (which matches the present mounting holes exactly). About 4:50 into the video [Evan] explains how to add a basic perf-board shield over the Arduino which connects the piezo sensors in each of the drum pads to the analog pins of the micro-controller. The MIDI jack that comes built into the back of the kit can also be reused as MIDI out when wired to the Arduino’s serial out pin. By adjusting [Evan’s] example code you can dial in the instrument’s feedback to match the intensity of each hit.
The video with all of the details is after the jump. Or you can check out a MIDI hack that goes the other way and uses a drum kit as a Guitar Hero or Rock Band controller instead…
Continue reading “Forgotten Rock Band Drum Controller As A MIDI Instrument”


