Because Art: Can Machines Be Creative?

You’re walking through a gallery and stop to take in two seemingly unrelated pieces hanging side-by-side. One of them is a drawing of a bird, rendered with such precision its feathers could easily pop off the paper. The other is a sketch of what seems to be the same bird, however it’s nearly unrecognizable due to inconsistent line quality and parts that are entirely missing.

This article was written for the Omnibus vol #02 Order yours now
This article was written for the Omnibus vol #02
Order yours now

In staring at the photo-real drawing of the perfect bird, you marvel over the technical ability required to produce it. You also study the sloppy sketch just as long, picking out each one of its flaws, yet decide you like the image of the strange bird because the errors are interesting to you.

When you lean forward to read the title card posted on the wall between them, you’re shocked to learn that the two drastically different images were made by the same artist; not the person them self, but a machine they built to create both drawings in two different styles.

As an illustrator, I’m fascinated by drawing machines because their purpose is to emulate an act which has always been a highly personal form of self expression for me. Drawing machines and their creators are in a sense my peers.

Continue reading “Because Art: Can Machines Be Creative?”

Forgotten Rock Band Drum Controller As A MIDI Instrument

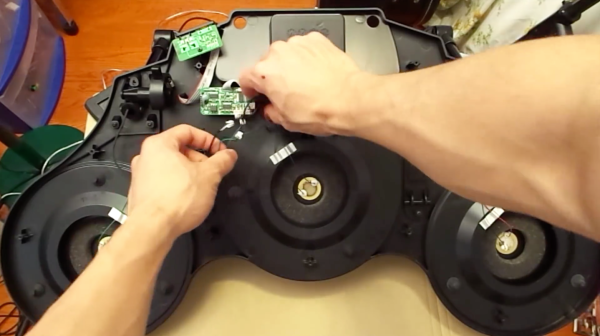
Happen to have an old Rock Band drum controller collecting dust in your living room? If you also have a spare Arduino and don’t mind parting with that plastic college memento then you’ve got the bulk of what could potentially be your new percussive MIDI instrument. In his project video [Evan Kale] outlines the steps necessary to turn that unloved plastic into a capable instrument for recording.

The whole process as outlined by [Evan] in under seven minutes. This looks like a great weekend endeavor for those of us just starting out with MIDI. After cracking the back of the Guitar Hero drum kit controller open, the main board within is easily replaced with a standard sized Ardunio (which matches the present mounting holes exactly). About 4:50 into the video [Evan] explains how to add a basic perf-board shield over the Arduino which connects the piezo sensors in each of the drum pads to the analog pins of the micro-controller. The MIDI jack that comes built into the back of the kit can also be reused as MIDI out when wired to the Arduino’s serial out pin. By adjusting [Evan’s] example code you can dial in the instrument’s feedback to match the intensity of each hit.

The video with all of the details is after the jump. Or you can check out a MIDI hack that goes the other way and uses a drum kit as a Guitar Hero or Rock Band controller instead

Continue reading “Forgotten Rock Band Drum Controller As A MIDI Instrument”

LED Strip Notifies You Of The Light Show You’re Missing Outside

Unless you live way up in Canada, it’s not very likely that those gorgeous coronal mass ejections will collide with the atmosphere above your home. If they do, it’s a rare occurrence you wouldn’t want to miss. This is why [James] devised of a special alarm that would notify him when the Northern Lights may be visible in his neck of the woods. And what’s a better aurora alarm than a simulated aurora light show for your room?

[James] uses a Raspberry Pi to check data from Aurora Watch UK at Lancaster University for local activity. If the forecast reads that there may be some light above his home town in northern England, it triggers a NeoPixel LED strip to scroll through the color values of an actual aurora PNG image. This produces the same sporadic shifting of colors for a proximal ambient indoor lighting effect… though slightly less dramatic than the real thing. You can take a look at his Python script on github if you feel inspired.

Continue reading “LED Strip Notifies You Of The Light Show You’re Missing Outside”

My Robot Army @ Maker Faire

For a few years now I’ve been developing an interactive army of delta robots. This ongoing project is fueled by my desire to control many mechanical extremities like an extension of my body (I’m assuming I’m not the only one who fantasizes about robots here).
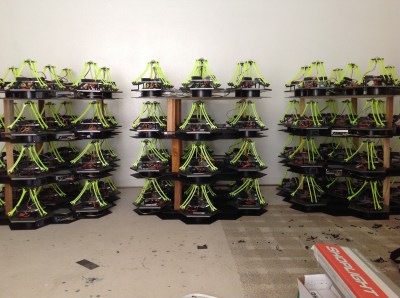
IMG_1846Since my army doesn’t have a practical application… other than producing pretty light patterns and making the user feel extremely cool for a minute, I guess you’d call it art. In the past I’ve held a Kickstarter to fund the production of my art which I can now happily show at cool events with interesting people; Maker Faire being one of them.

Interactivity and Sprawling Crowds

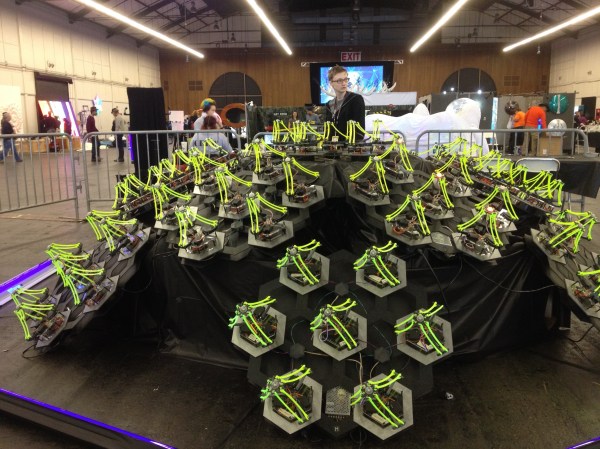
Last year, for our debut at the big Bay Area Maker Faire, my collaborator, [Mark], and I displayed a smaller sampling of 30 robots for our installation. We also decided to create an interactive aspect for others to experience. After the end of our crowdfunding period last March, we had a little over a month to do any development before the big event, so our options were slim. The easy solution was to jam our delta code into the hand tracking demo which comes with the Xbox Kinect’s Open NI within Processing. This was cool enough to exhibit, but we hadn’t really anticipated how it would go over in an environment as densely packed as the dark room at Maker Faire.

We should have known better. Both of us were aware that there would be many, many children… all with micro hands to confuse and bewilder the Kinect, but we did it anyway. Our only resolve was to implement the feature that would force the Kinect to track one hand at a time, only after being waved at in a very particular fashion. After needing to explain this stipulation to every person who stopped by our booth over the course of the weekend, we decided never to use the Kinect for crowds ever again; lesson learned.

Delta Robots and DMX

Over the past year since that experience, we’ve tripled the size of the installation and brainstormed some better demo ideas. As of now, the robots are all individually addressable over an RS485 bus, and we use the DMX protocol over a CAT5 cable to send commands. If you aren’t familiar with it, DMX is used in show production to control stage lighting… to which there is a super neat and free application called QLC+ that allows you to effectively orchestrate the motion and color of many individual light units; perfect for our cause.
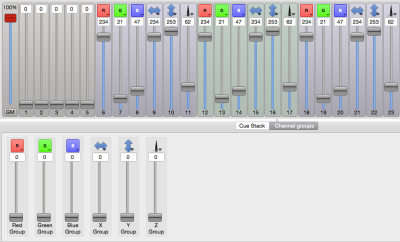
qlcDeltasFunctionally, each of the 84 delta robots in the installation believes that it is a stage light (robots with identity issues). We mapped the X and Y axis of the end effector to the existing pan and tilt values, and the z axis to the beam focus value. The RGB of the LED mounted in the end effector of each delta maps directly to the RGB value of the stage light.

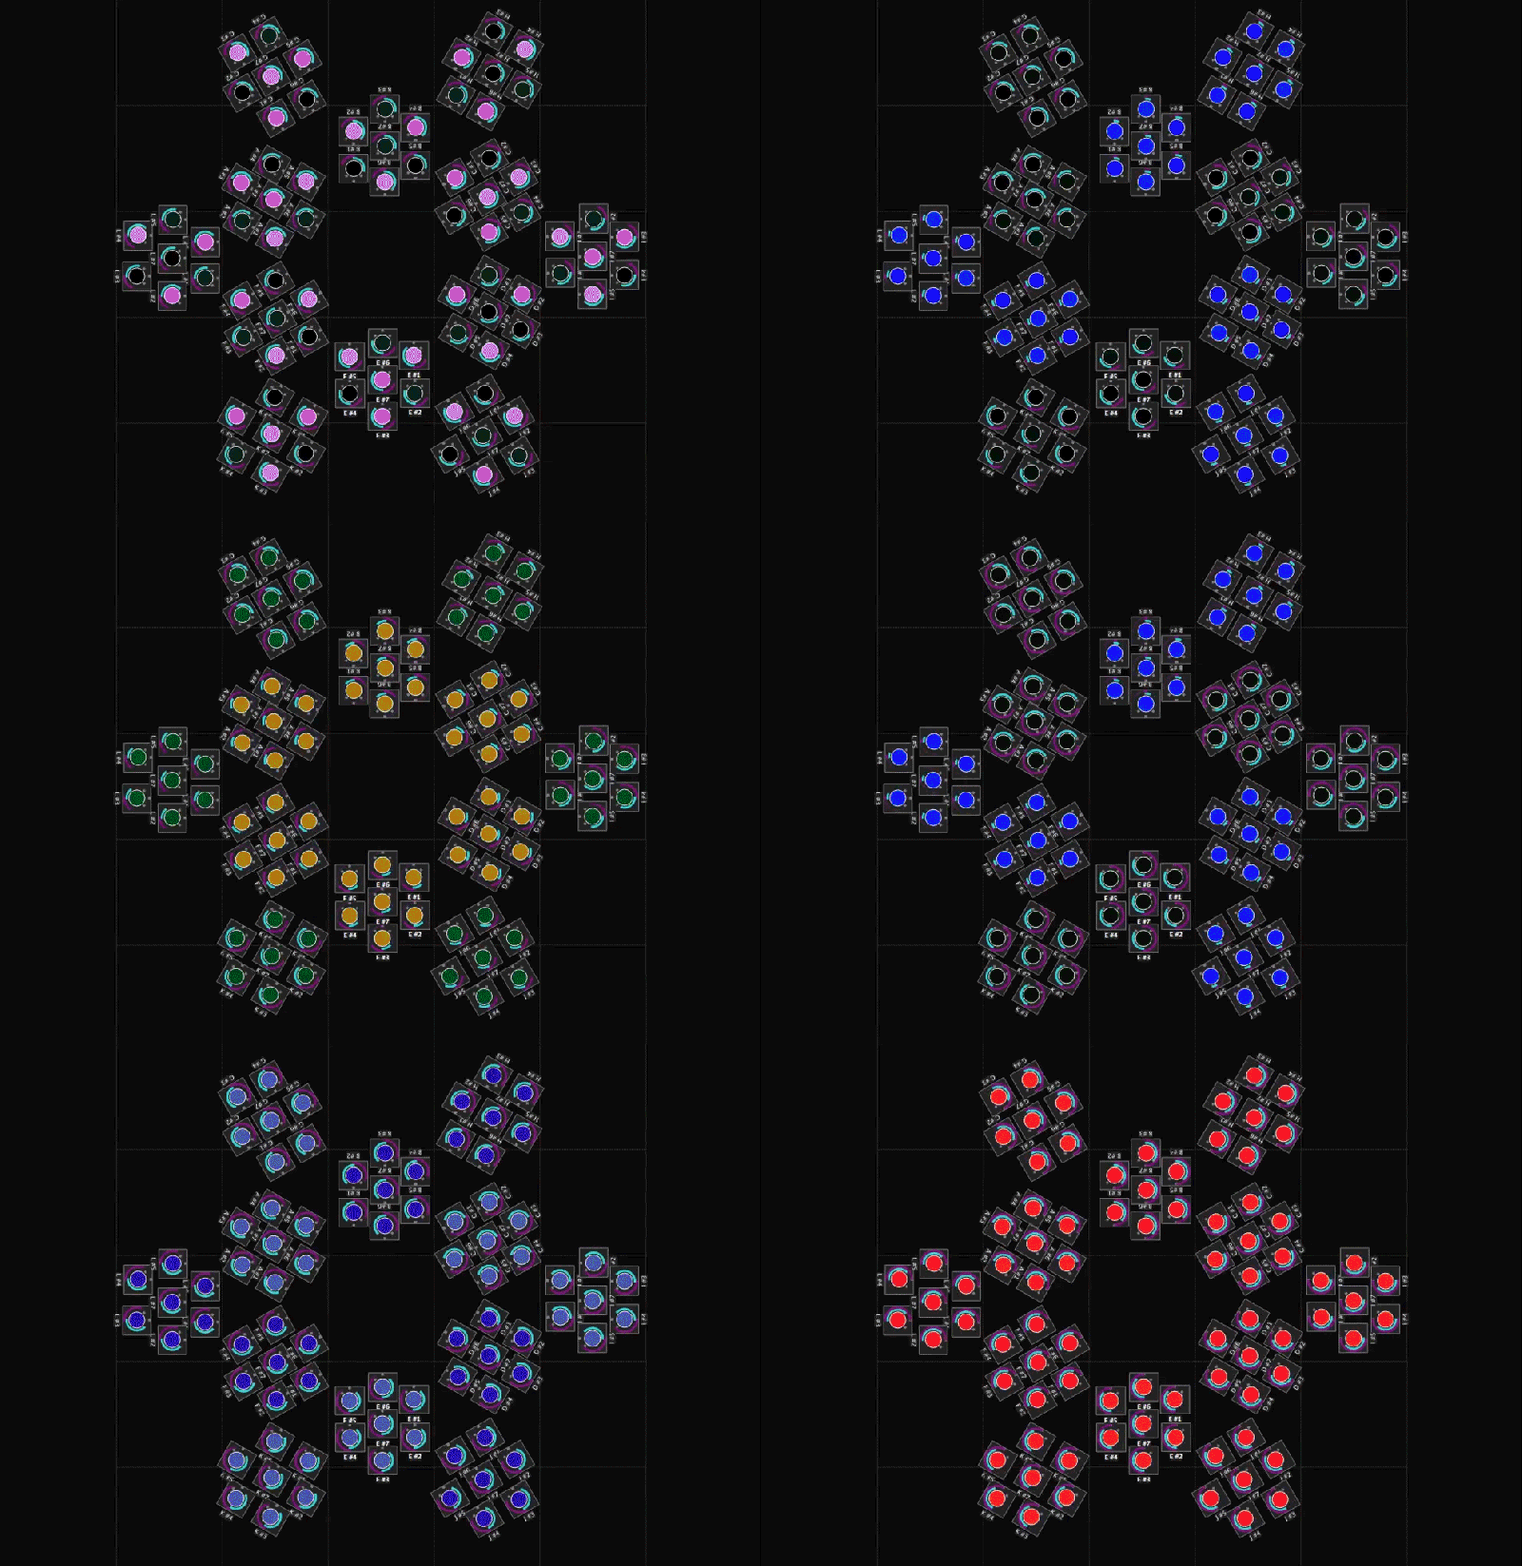
By using the sliders in the QLC+ GUI, I could select groups of robots and create presets for position and color. This was great, someone like me who doesn’t really write a lot of code could whip up impressive choreography with little sweat. Additionally, the program comes with a nice visualizer, where you can layout virtual nodes and view your effects as you develop them.

This is the layout of our installation mapped in QLC+. The teal and purple sliders around each light represent pan and tilt (or in our case X and Y):
QLCdelta

Lighting control was an interesting solution. Having autonomous robots this year changed how people responded to them, as they were less like an army you’d command and more of a hypnotic field of glowing grass.

[Mark] and I are considering picking up some flex sensors and maybe playing with the Leap or an EEG headset as a means to reintroduce the interactive aspect. Bottom line, I have this cool new toy that I can’t wait to play with over the summer!

Continue reading “My Robot Army @ Maker Faire”

Playing Space Invaders With Real Fire And Lasers

Making a Space Invaders game is up there on the list of most unconventional things you could do with a laser cutter. In watching the tiny little ships burst into flames, [Martin Raynsford’s] modification has got to be one of the more dangerous looking ones we’ve seen as well.

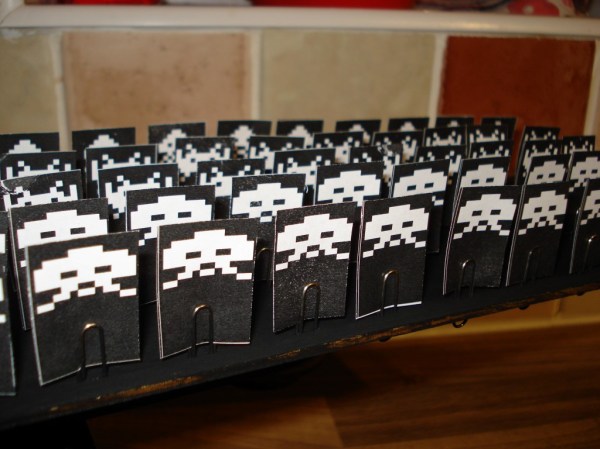
[Martin] always had the desire to make a tangible version of the classic game. Since his Whitetooth A1 laser cutter already contained the bulk of the moving hardware needed, not to mention an actual high powered laser to “pew pew” with, he decided it was the perfect starting point for such a project. The game is played looking down into the cutter since the laser of course fires in that direction, however a basic webcam is mounted to the laser assembly so that you can view the game on a computer screen at the proper perspective. An Arduino Mini is responsible for stepper control, allowing the player to jog back and forth and fire with a keyboard. [Martin] added an extra gear to the z-axis bed-leveler so that it could drive rows of paper invaders left and right across the bottom. Paperclips wedged into slots along a modified backboard hold each of the paper slips in place. This works ideally since they can be reloaded easily and won’t be maimed during use.

Due to the heat of the laser, landing a well positioned shot will likely nuke all of the nearby invaders as well, making for a theatrical inferno and easy win. Now to step up the difficulty level and figure out how to make them fire back…

Continue reading “Playing Space Invaders With Real Fire And Lasers”

Digital Light Processing, So Many Tiny Mirrors

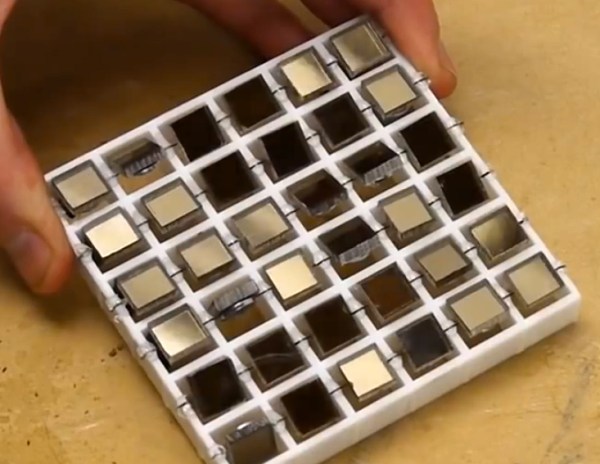
Did you know there are a million little mirrors flickering back and forth, reflecting light within some modern projectors; like a flip-dot display but at the micro level? In his video, [Ben Krasnow] explains the tiny magic at work in DLP, or digital light processing technology with a scaled up model he constructed of the moving parts.

LCD projectors work much like old slide projectors. Light is shined through a transparent screen containing the image, which is then focused and enlarged through a lens. DLP projectors however achieve the moving image in a slightly different way. A beam of focused light is shined onto a chip equipped with an array of astonishingly small mirrors. When the mirror is flipped in one direction, it reflects the light out through the lens and creates a visible pixel. When the mirror is tilted the opposite direction, no light is reflected and the pixel is dark. All of these tiny moving parts are actuated by means of static electricity, and since a pixel can effectively only either be in an on or off state without any range of value in-between, the pixel must flutter at a rate fast enough to achieve the illusion of intensity, much like pulsing an LED to create a dimming effect.

In addition to slicing open the protective casing of one of these tiny micro-mirrored chips to give us a look at their physical surface under a microscope, [Ben] also built his own functioning matrix from tiles of mirrors and metal washers sandwiched around pieces of string. A wound electromagnet positioned behind each tile tilts the pixel into position when a current is run through the wire — although he didn’t sink the time needed to build out the full array in this manner (and we don’t blame him). If you do have the time and add in a high powered flash-light, this makes for an awesome way to shine messages on your roommate’s wall.

Continue reading “Digital Light Processing, So Many Tiny Mirrors”

ROBOCHOP! It Slices, Dices, But Wait! There’s More…

You’re gunna love my cuts. 

KUKA robots are cool. They’re both elegant and terrifying to watch in action as they move unyieldingly to preform tasks. Not many of us get to use industrial tools like this because they aren’t exactly trivial to wield (or cheap!). Artists [Clemens Weisshaar] and [Reed Kram] however created an installation that allows anyone to potentially control one of these orange beauties to do their bidding… all from the safety and comfort of a computer chair.

For their piece, “ROBOCHOP”, the artists developed a web app that allows you to easily manipulate the surface of a virtual cube. You can rotate for positioning and then use a straight or curved line tool to draw vectors through its surface and subtract material. Once you’re finished sculpting your desired masterpiece, one of the four KUKA robots in the installation will retrieve a 40 x 40 x 40 cm block of foam and shape it into a real-life version of whatever you created in the app.

Screen Shot 2015-03-06 at 1.03.39 PMStarting today you can visit the project’s website and upload your own mutilated cube designs. If your design is selected by the artists, it will be among the 2000 pieces carved by the robots throughout their installation during CeBit in Hanover. After the show, your cube spawn will then be mailed to you free of charge! The only way I could see this being cooler, is if they filmed the process so you could watch your shape being born.

Anyhow, I personally couldn’t resist the invitation to sculpt Styrofoam remotely with an industrial grade robot arm and came up with this gem.

You can go to their page if you want to give the app a go, and really… why wouldn’t you?

Continue reading “ROBOCHOP! It Slices, Dices, But Wait! There’s More…”