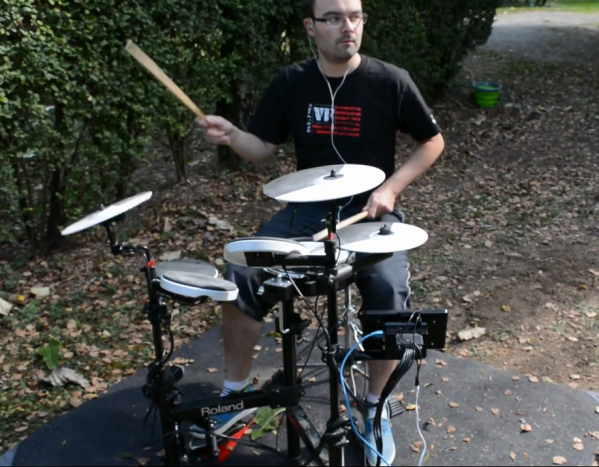
As far as giving mechanical instruments electronic control goes, drums are probably the best candidate for conversion; learning to play them is challenging and loud for a human, but they’re a straightforward matter for a microcontroller. [Jeremy Cook]’s latest project takes this approach by using an Arduino Opta to play a tongue drum.
[Jeremy]’s design far the drum controller was inspired by the ring-shaped arrangement of the Cray 2 supercomputer. A laser-cut MDF frame forms a C-shape around the tongue drum, and holds eight camera mount friction arms. Each friction arm holds a solenoid above a different point on the drum head, making it easy to position them. A few supports were 3D-printed, and some sections of PVC tubing form pivots to close the ring frame. [Jeremy] found that the the bare metal tips of the solenoids made a harsh sound against the drum, so he covered the tips of six solenoids with plastic caps, while the other two uncoated tips provide an auditory contrast.
The Arduino Opta is an open-source programmable logic controller normally intended for industrial automation. Here, its silent solid-state relays drive the solenoids, as [Jeremy]’s done before in an earlier experiment. The Opta is programmed to accept MIDI input, which [Jeremy] provided from two of the MIDI controllers which we’ve seen him build previously. He was able to get it working in time for the 2024 Orlando Maker Faire, which was the major time constraint.
Of course, for a project like this you need a MIDI controller, and we’ve previously seen [Jeremy] convert a kalimba into such a controller. We’ve seen this kind of drum machine at least once before, but it’s more common to see a purely electronic implementation.
drum31 Articles
Designing An FM Drum Synth From Scratch
How it started: a simple repair job on a Roland drum machine. How it ended: a scratch-built FM drum synth module that’s completely analog, and completely cool.
[Moritz Klein]’s journey down the analog drum machine rabbit hole started with a Roland TR-909, a hybrid drum machine from the mid-80s that combined sampled sounds with analog synthesis. The unit [Moritz] picked up was having trouble with the decay on the kick drum, so he spread out the gloriously detailed schematic and got to work. He breadboarded a few sections of the kick drum circuit to aid troubleshooting, but one thing led to another and he was soon in new territory.
The video below is on the longish side, with the first third or so dedicated to recreating the circuits used to create the 909’s iconic sound, slightly modifying some of them to simplify construction. Like the schematic that started the whole thing, this section of the video is jam-packed with goodness, too much to detail here. But a few of the gems that caught our eye were the voltage-controlled amplifier (VCA) circuit that seems to make appearances in multiple places in the circuit, and the dead-simple wave-shaper circuit, which takes some of the harmonics out of the triangle wave oscillator’s output with just a couple of diodes and some resistors.
Once the 909’s kick and toms section had been breadboarded, [Moritz] turned his attention to adding something Roland hadn’t included: frequency modulation. He did this by adding a second, lower-frequency voltage-controlled oscillator (VCO) and using that to modulate the drum section. That resulted in a weird, metallic sound that can be tuned to imitate anything from a steel drum to a bell. He also added a hi-hat and cymbal section by mixing the square wave outputs on the VCOs through a funky XOR gate made from discrete components and a high-pass filter.
There’s a lot of information packed into this video, and by breaking everything down into small, simple blocks, [Moritz] makes it easy to understand analog synths and the circuits behind them.
Piezo Buzzer Makes A Drum
The humble piezo disc buzzer is much more than something that makes tinny beeps in retro electronic equipment, it can also be used as a sensor. Tapping a piezo buzzer gives an interesting waveform, with a voltage spike followed by an envelope, and then a negative rebound voltage. It’s something [Igor Brichkov] is using, to make a simple but effective electronic drum.
First of all, the output of the buzzer must be tamed, which he does by giving it a little impedance to dissipate any voltage spikes. There follows some simple signal conditioning with passive components, to arrive at an envelope for the final drum sound. How to turn a voltage into a sound? Using a voltage controlled amplifier working on a noise source. The result is recognizably the drum sound, entirely in electronics.
In a world of digital music it’s easy to forget the simpler end of sound synthesis, using circuits rather than software. If you hanker for the Good Old Days, we have an entire series on logic noise, doing the job with 4000 series CMOS logic.
Arduino Drum Platform Is Fast
Drums are an exciting instrument to learn to play, but often prohibitive if there are housemates or close neighbors involved. For that problem there are still electronic drums which can be played much more quietly, but then the problem becomes one of price. To solve at least part of that one, [Jeremy] turned to using an Arduino to build a drum module on his own, but he still had to solve yet a third problem: how to make the Arduino fast enough for the drums to sound natural.
Playing music in real life requires precise timing, so the choice of C++ as a language poses some problems as it’s not typically as fast as lower-level languages. It is much easier to work with though, and [Jeremy] explains this in great detail over a series of blog posts detailing his drum kit’s design. Some of the solutions to the software timing are made up for with the hardware on the specific Arduino he chose to use, including an even system, a speedy EEPROM, hardware timers, and an ADC that can sample at 150k samples per second.
With that being said, the hardware isn’t the only thing standing out on this build. [Jeremy] has released the source code on his GitHub page for those curious about the build, and is planning on releasing several more blog posts about the drum kit build in the near future as well. This isn’t the only path to electronic drums, though, as we’ve seen with this build which converts an analog drumset into a digital one.
Field Guide To Shipping Containers
In the 1950s, trucking magnate Malcom McLean changed the world when he got frustrated enough with the speed of trucking and traffic to start a commercial shipping company in order to move goods up and down the eastern seaboard a little faster. Within ten years, containers were standardized, and the first international container ship set sail in 1966. The cargo? Whisky for the U.S. and guns for Europe. What was once a slow and unreliable method of moving all kinds of whatever in barrels, bags, and boxes became a streamlined operation — one that now moves millions of identical containers full of unfathomable miscellany each year.
When I started writing this, there was a container ship stuck in the Suez canal that had been blocking it for days. Just like that, a vital passage became completely clogged, halting the shipping schedule of everything from oil and weapons to ESP8266 boards and high-waist jeans. The incident really highlights the fragility of the whole intermodal system and makes us wonder if anything will change.
Setting the Standard
We are all used to seeing the standard shipping container that’s either a 10′, 20′, or 40′ long box made of steel or aluminum with doors on one end. These are by far the most common type, and are probably what come to mind whenever shipping containers are mentioned.
These are called dry storage containers, and per ISO container standards, they are all 8′ wide and 8′ 6″ tall. There are also ‘high cube’ containers that are a foot taller, but otherwise share the same dimensions. Many of these containers end up as some type of housing, either as stylish studios, post-disaster survivalist shelters, or construction site offices. As the pandemic wears on, they have become so much in demand that prices have surged in the last few months.
Although Malcom McLean did not invent container shipping, the strict containerization standards that followed in his wake prevent issues during stacking, shipping, and storing, and allow any container to be handled safely at any port in the world, or load onto any rail car with ease. Every bit of the container is standardized, from the dimensions to the way the container’s information is displayed on the end. At most, the difference between any two otherwise identical containers is the number, the paint job, and maybe a few millimeters in one dimension.
Standard as they may be, these containers don’t work for every type of cargo. There are quite a few more types of shipping containers out there that serve different needs. Let’s take a look at some of them, shall we?
Your Own Electronic Drum Kit
[Jake_Of_All_Trades] wanted to take up a new drumming hobby, but he didn’t want to punish his neighbors in the process. He started considering an electric drum kit which would allow him to practice silently but still get some semblance of the real drumming experience.
Unfortunately, electric drum kits are pretty expensive compared to their acoustic counterparts, so buying an electric kit was a bit out of the question. So, like any good hacker, he decided to make his own.
He found a pretty cheap acoustic drum kit on Craigslist and decided to convert it to electric. He thought this would be a perfect opportunity to learn more about electric drum kits in general and would allow him to do as much tweaking as he wanted to in order to personalize his experience. He also figured this would be a great way to get the best of both worlds. He could get an electric kit to practice whenever he wanted without disturbing neighbors and he could easily convert back to acoustic when needed.
First, he had to do a bit of restorative work with the cheap acoustic kit he found on eBay since it was pretty worn. Then, he decided to convert the drum heads to electric using two-ply mesh drum heads made from heavy-duty fiberglass screen mesh. The fiberglass screen mesh was cheap and easy to replace in the event he needed to make repairs. He added drum and cymbal triggers with his own DIY mechanism using a piezoelectric element, similar to another hack we’ve seen. These little sensors are great for converting mechanical to electrical energy and can feed directly into a GPIO to detect when the drum or cymbal was struck. The electrical signal is then interpreted by an on-board signal processing module.
All he needed were some headphones or a small amplifier and he was good to go! Cool hack [Jake_Of_All_Trades]!
While you’re here, check out some of our best DIY musical projects over the years.
Fabric(ated) Drum Machine
Some folks bring out an heirloom table runner when they have company, but what if you sewed your own and made it musical? We’d never put it away! [kAi CHENG] has an Instructable about how to recreate his melodic material, and there is a link to his website, which describes his design process, not just the finished product. We have a video below showing a jam session where he exercises a basic function set.
GarageBand is his DAW of choice, which receives translated MIDI from a Lilypad. If you don’t have a Lilypad, any Arduino based on the ATmega328P chip should work seamlessly. Testing shows that conductive threads in the soft circuit results in an occasional short circuit, but copper tape makes a good conductor at the intersections. Wide metallic strips make for tolerant landing pads beneath modular potentiometers fitted with inviting foam knobs. Each twist controls a loop in GarageBand, and there is a pressure-sensitive pad to change the soundset. Of course, since this is all over MIDI, you can customize to your heart’s content.
MIDI drums come in all shapes and sizes, from a familiar game controller to hand rakes.