Tiny Hardware-based DSLR Intervalometer

diy_dslr_intervalometer

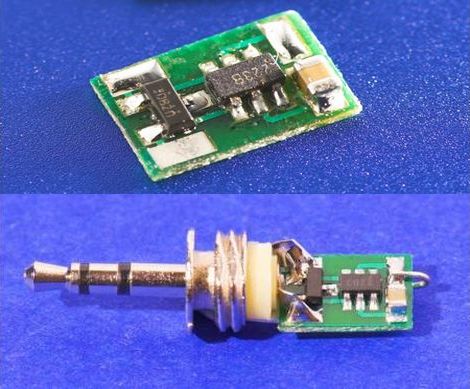
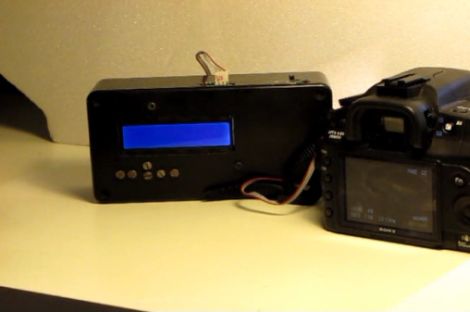
Most DSLR cameras have the ability to take pictures at set intervals, but sometimes the menu system can be clunky, and the options are often less than ideal. [Achim] is a big fan of time lapse photography and has been hard at work creating a hardware-based intervalometer to suit his needs. He has just finished the second revision of the controller which is just about small enough to fit inside the housing of a 2.5mm stereo plug. The timer is not 100% universal, but so far he has confirmed it works on Nikon, Canon, and Pentax cameras.

Based on a PIC10F222, the circuit’s operation is quite simple. Once the dongle is connected to your camera, you simply need to take two pictures anywhere from 0.4 seconds to 18 minutes apart. The intervalometer “watches” to see how long you waited between pictures, and proceeds to take shots at that interval until the battery dies or your memory card fills up.

As you can see in the video on his site, the timer works a treat. If you want to make one of your own, swing by his site to grab schematics and code – it’s all available for free.

*Whoops, it looks like we’ve actually covered this before. Our apologies.

DSLR Infrared Camera Conversion

ir_conversion

[Jerry] recently got a shiny new DSLR camera and was looking to do something with the old Pentax DSLR it replaced. Having performed a few point and shoot IR conversions in the past, he was pretty confident he could tackle this conversion without too much trouble.

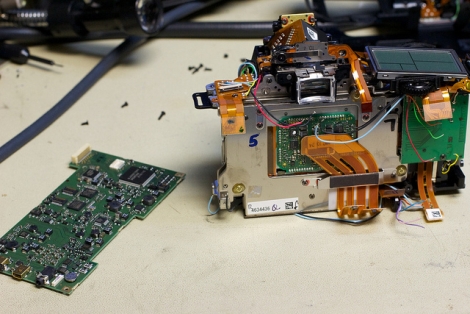
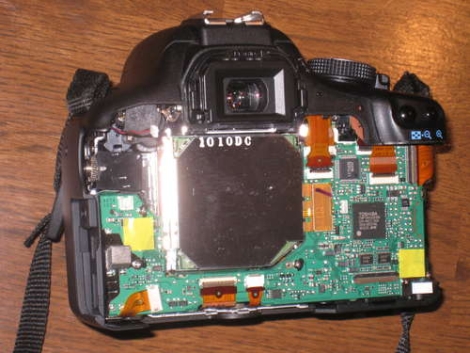
He located the service manual for the camera and got busy taking it apart. He had to desolder the main board to get to the CCD block, where the sensor, IR cut filter, and the shake reduction motors are all located. The IR cut filter was pried off without too much trouble as it is only secured with a clip and an adhesive foam gasket.

Once things were disassembled, the real work began. He had a little trouble cutting the IR filter he purchased, so it took a little bit of elbow grease to get things exactly the way he wanted. Once he got the filter in place, he carefully re-mounted the sensor block to ensure that it was set at the proper height.

Once things were fully reassembled, he tried taking a few test shots, but found that there were some focus issues due to the IR filter being thicker than the original IR cut filter. A few manual tweaks in the camera’s debug menu and he was in business.

Be sure to check out his photo stream to take a look at some of the pictures he snapped with his new IR camera.

DSLR Bellows-mounted Lens Retrofit

dslr_lens_retrofit

While digging through a pile of old camera equipment, [Jake] stumbled upon a camera that belonged to his grandfather and was curious to see what sorts of images the old lens would produce. He wasn’t interested in messing around with a film-based camera for his experiments, so he needed to find a way to mount the vintage lens on his newer Canon DSLR.

After considering several options including custom machined adapters and mounting rings built from old Canon lenses, he found a much cheaper solution. He purchased a lens adapter made to mount a particular type of lens to a modern DSLR, and then modified it to fit his lens. It worked perfectly, though he admits the resulting images are not that different than those taken with his regular lens.

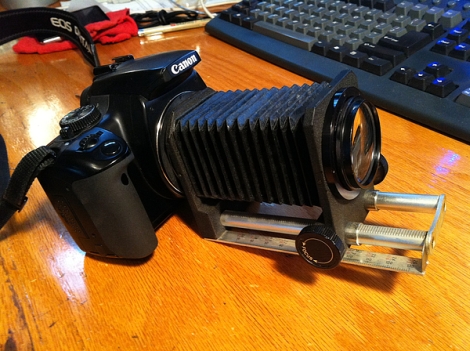
Underwhelmed with the images, he decided to mount the lens on a set of bellows he picked up at the local dump. It looks pretty neat, but he has yet to get a chance to take any pictures with his new setup. Hopefully we’ll see some test shots soon.

If anyone has experience with using bellows lenses on a modern DSLR, we’re always up for seeing some sample pictures. In the meantime, check out this other DSLR/bellows hybrid project we featured a short while back.

[via BoingBoing]

DIY Ring Light Takes Its Cues From Fiber Optic Toys

the_ram_ring_light

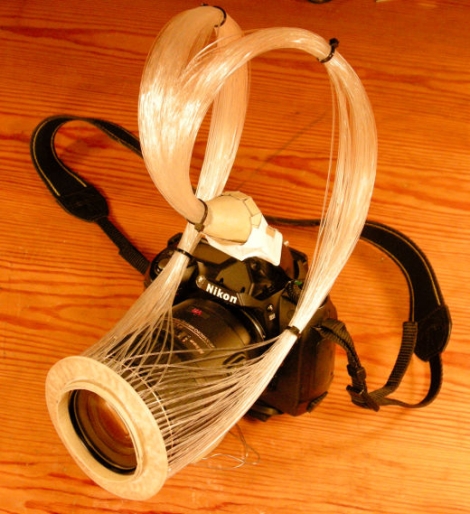
DIY ring light setups for DSLR cameras are nothing new around here. While most of them rely on an array of LEDs or a mirror-based light tube, [Wolf] had a different idea. He figured that since optical fibers are made specifically for transmitting light from one place to another, they would make a perfect medium for constructing a ring light.

Since he was using the camera’s built-in flash to power the ring light, he was able to provide a function that few other DIY ring lights do: proper flash compensation. Typically, a self-made ring light flashes at one set brightness, regardless of how much light is actually required to compose the image.

The construction was relatively simple, albeit time consuming. He procured a set of fiber optic cables that had been melted together into 150 small bundles, which he then glued to an acrylic ring that he fabricated. The end result isn’t the most aesthetically pleasing ring light we’ve ever seen, but it’s the pictures that matter at the end of the day. As you can see on his site, they speak for themselves.

Looking to build your own ring light? Check out a couple of other projects we have featured in the past.

Bellows Camera To DSLR

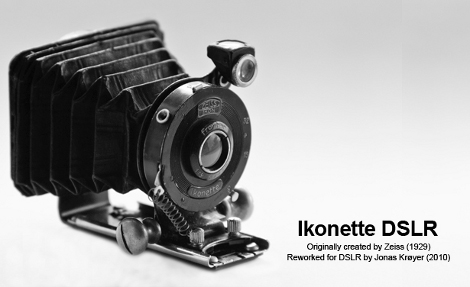
[Jonas Kroyer] is a digital  photographer, with a fascination with old cameras and pairing the two together sounded like a fun idea. Searching around on the net he fell in love with the design of the Zeiss Ikon Ikonette (1929-31), and found one with a chipped lens.

After dismantling the camera completely, it was found out that he needed the lens/shutter mechanism, the bellows, and the rails that allow the lens to slide back and forth. The bellows were glued to the body of the camera, but some careful prying and they were quickly removed unharmed. Next was to make an adapter so he could attach the lens to a digital DSLR camera, a steel plate and a Nikon Bayonet swiped off of a no name lens holds everything together. Rails were reattached using rivets, and the bellows were glued onto the plate. Other mods include adding small brass knobs to aid in adjustments, and a spring from a ballpoint pen to hold the original shutter open.

The new old lens is said to be easy to operate, and produces some beautiful images. Though since the lens does not have any modern day coatings it does have its drawbacks, like a diamond shaped flare in the middle of the image, which can be good when you want it, or partially removed in photoshop if you don’t.

Canon T1i/500d External Microphone Hack

canon_t1i_external_mic

Like most other DSLR cameras that feature video recording, the Canon T1i has a small built-in microphone with limited sound reproduction capabilities. [Robb] wanted better audio performance while taking video, but found the camera’s inability to use an external microphone to be a frustrating limitation. He decided to take matters into his own hands, and disassembled his camera in order to add an external microphone jack. The process is not overly complicated, as it requires little more than the installation of a switching microphone jack. You will however need to get your hands a bit dirty since it involves opening the camera, a bit of drilling, and some epoxy. Doing such things to your camera clearly voids the warranty, and with a $600 camera at stake, this hack is definitely not for the faint of heart. That said, if you desperately want to get better quality audio from your Canon T1i or 500d DSLR, be sure to check out his tutorial.

Hackaday Links: October 10, 2010

Old timey pics with a new timey camera

Update: We’ve already looked at this one… see the full article for all the details.

One way to get old-looking photographs is to use a vintage camera. Then again you can just connect a 1908 lens to a modern dslr with great results. [Thanks MS3FGX]

Cheap iPad mounting bracket

Need a way to hang your iPad but don’t want to spend some bucks? [Tumbleweed] used a $3 plate hanger to do the trick.

Hand engraving

You can get free laser engraving when you buy an iPhone but it won’t look as good as this does. [Viljo Marrandi] spent eight hours on this, but most of the time was spent resharpening tools dulled by the tough metal.

Let time prevent your computer from going idle

Want to keep your screen saver from running? No need to change settings, software, or use special hardware. Just set your mouse on an analog watch and let the moving hands jiggle it around. [Thanks Lovro]