Hacking Strippers To Do Your Bidding

wire_strippers

[Alex] knows his strippers.

By his estimation, he has stripped millions of wires over the years, and he has seen his fair share of wire strippers come and go. That cheap set of wire strippers you have with the graduated holes, or that adjustable stripper you squeeze as you pull the wire through? They just stress the insulation as well as the wires you are trying to strip – he says you might as well just use them in your tackle box.

His favorite style of wire stripper is the automatic kind that grip the wire, then cut and remove the insulation just by squeezing the handles. His issue with this particular tool is that it’s difficult to get a uniform length of stripped wire when working in volume.

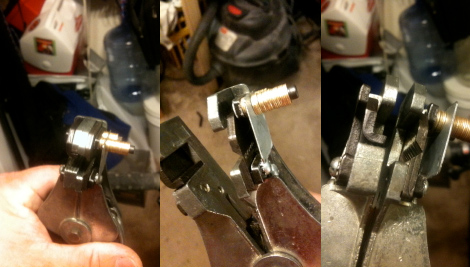
Since [Alex] needs uniformity in his line of work, he modified a set of automatic wire strippers to include an adjustable wire stop. He determines the length of wire he needs, adds or removes some washers from his wire stop, and off he goes. It’s a very simple yet very useful hack, depending on your application. We bet it is probably one of the most accurate ways to get uniform length, this side of a fully automatic wire stripper.


How Escher’s Impossible Waterfall Was Faked

Study the image above closely. You’ll notice that physically it is an impossible object, yet this is a screenshot of full-motion video. The clip after the break shows a gentleman pouring water into the waterfall where the wheel is located. The liquid flows in a direction that appears to be uphill, then falls onto the waterwheel where it was originally poured. Ladies and Gentleman, we have the solution to the world’s energy crisis. Nope, we have a hoax and the real question is how was it done?

[David Goldman] has come up with quite the explanation. He watched the video very closely and the put together a three-dimensional diagram showing how he would build the apparatus. If you saw the movie Inception (we highly recommend you do) you will remember the infinite stair puzzle that is exposed as an optical illusion. [David’s] proposed method for debunking this hoax uses a similar build that comes in four different, precisely placed elements.

We’ve got to hand it to him. That’s a brilliant theory! Of course the first commenter on the post linked above calls this out as CGI and we’re inclined to go with that answer but that’s much less fun.

Continue reading “How Escher’s Impossible Waterfall Was Faked”

Simple PCB Etchant Made From Chemicals You Can Put In Your Mouth

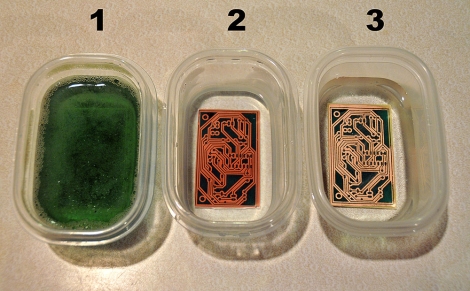
etching_test

[Stephen] often finds the need to make his own PCBs at home, and when he got the urge to do some etching recently, he realized that he was fresh out of “Ferret Chloride and Bureaucratic Acid*.” Undeterred by his empty chemical cabinet, he poked around in his kitchen mixing together anything and everything that might have the ability to strip copper from a PCB.

Now, we don’t necessarily recommend this course of action, but it seems that he finally hit upon a winner. He discovered a formula that can be made at home from simple and safe household ingredients which does the job quite nicely. A fair warning however, standard ferric chloride disposal procedures need to be followed when using this solution.

If you want to know what he concocted in his kitchen as well as the chemistry behind it, you will have to visit his site, we won’t ruin it for you. You can however, see the solution at work in the video we have posted below.

*His joke, not ours

Continue reading “Simple PCB Etchant Made From Chemicals You Can Put In Your Mouth”

Jittering Hexapod Dances To The Strokes Of Your Bluetooth Keyboard

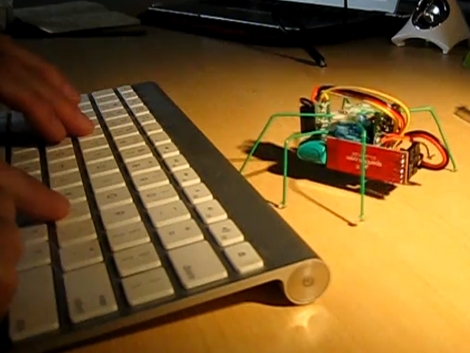
Here’s a small but functional hexapod that is controlled via Bluetooth. [Sigfpe] started with the hexapod kit sold by Polulu and added a BlueSMiRF modem to get the little guy’s communications up and running. But since the bot is merely three servos, a microcontroller board, sensors, and miscellaneous parts it’s an easy build for most electronic hobbyists.

Check out the video after the break to see the delightful dance it can perform at your bidding. When we first looked at the project we thought that the keyboard was directly paired with the bot for control, but a look at the code makes us think the computer is controlling it after processing keystrokes. Either way the BlueSMiRF should have no problem pairing with other Bluetooth devices so it’s just a matter of coding to get it taking commands from your device of choice. We’d love to see Android control but for the really hard-core code monkeys we think this should be voice controlled with a Bluetooth headset.

Continue reading “Jittering Hexapod Dances To The Strokes Of Your Bluetooth Keyboard”

Arduino Based Ambient Lighting Improvements

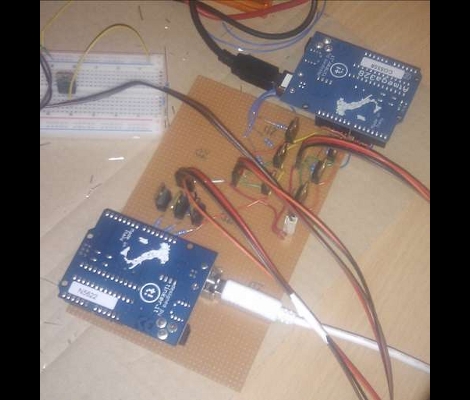
[Simon] improved upon an existing hack by making this Arduino ambient lighting system that has four different color regions. He was inspired by [Roy’s] processing-based setup which we saw a few weeks ago. That system used processing to determine the average color of the currently displayed image, then it displayed the color on a single RGB LED strip. [Simon] was thinking a little bit bigger.

He purchased a lighting strip that could be cut into different sections and then set out to develop his own software for multiple color regions. He had little or no experience with Processing so he went one abstraction layer lower and used Java to code his interface. It’s got a lot of nice settings where you can tweak how, when, and why colors are displayed. In the end he has four independently addressable color strip on the left, right, top-left, and top-right of the screen. The best part is that the Java suite he developed can be used on different platforms, having been already tested on Windows and Linux.

Keypad Input Scanning By A 555 Timer

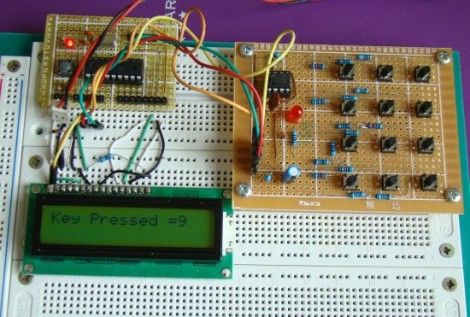
[R-B] designed a 555 timer circuit to scan a keypad. Keypads are common interfaces for small projects and require row and column scanning by a microcontroller. [R-B’s] setup allows you to reduce the number of pins used on the microcontroller to just two. One is an interrupt that is triggered when any of the buttons are pushed, the other reads the frequency from the 555 chip. Each button has its own resistance which alters the frequency of the 555. The microcontroller reads the frequency for 100ms using a timer. The number of timer overflows that occur during that period directly correspond to the button press (five overflows for the numeral 5, zero overflows for the numeral zero).

We usually debounce our button presses for 40 ms, this is more than twice that amount of time but still not a staggering difference. It does make us wonder if you will miss quick button presses? The only really way to know is to try this out yourself. Check out the video after the break and don’t forget to leave a comment with your own experiences in working with the circuit.

Continue reading “Keypad Input Scanning By A 555 Timer”

Cutting Out Your Own Breakout Boards

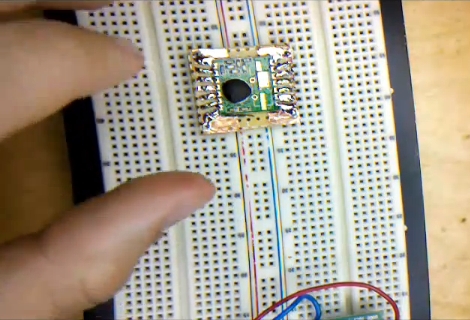
[Caleb] needed to use some surface mount components when prototyping. Instead of buy a breakout board he made one himself without doing any etching. The process he shows off in the video after the break uses copper tape to layout the traces for the board. It’s quite an interesting method which requires a sharp knife and a steady hand.

He used regular protoboard as a substrate and applied a layer of copper tape on the side without copper pads. From there he poked holes for the DIP pin headers. Now it’s time to do some cutting. [Caleb] removed the band of copper that would fall in between the pins of the surface mount device. He then tacked it in place with one dot of solder and drew the traces from the part to the pin headers. After removing the part he cut out the waste in between each line he drew with marker. What he’s left with is a set of thin traces that connect each pin of the surface mount component to the corresponding through-hole pin header.

This is very time-consuming, but then again so is soldering jumper wires to small-pitch components.

Continue reading “Cutting Out Your Own Breakout Boards”