More POV Fan Message Hacking

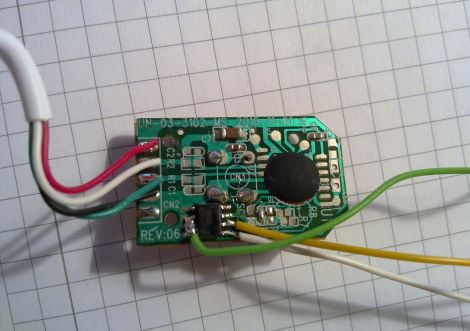
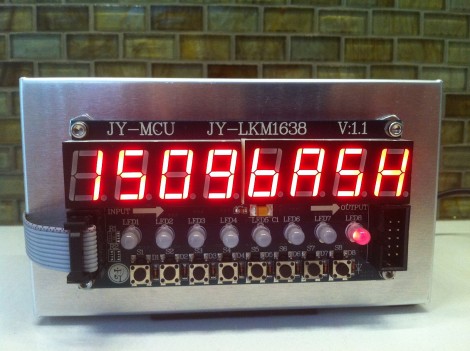
[Zach’s] company is all about the safety and to reinforce those ideals they handed out POV display fans to each employee. “Being Safe is Cool”, get it? Gimmicky… yes, but now [Zach’s] got a tiny little POV fan to hack. Although he may not have known it, this isn’t the first time we’ve seen this hardware. These fans were handed out as a promotion at Black Hat a couple of years ago and prompted some reverse engineering action. The message is stored on an EEPROM and there’s even a female programming header that makes it easy to write reflash it with your own messages if you know how to craft the data.

This is where the two products diverge. The older project uses a serial connection and PonyProg to dump and data. [Zach] first tried using his Bus Pirate to dump the data but after having no success he grabbed his Arduino and managed to get the job done. Once the message encoding protocol was worked out, he wrote a sketch to flash the EEPROM. So if you can get your hands on one of these the work has already been done. See [Zach’s] custom messages in the video after the break.

But we’d like to see this taken to the next level. How about a wall-mounted device that waits for something, like an incoming email or tweet, then spins up the fan to display it?

Continue reading “More POV Fan Message Hacking”

Is That A Rom In Your Locket?

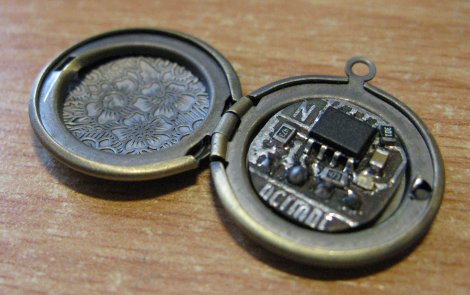
[Andrew] recently ordered some lockets to bejewel them with some LEDs but got a bonus small locket for free with the order. Not really having a plan for the small locket it kind of sat around until finally some inspiration hit. Meet the ee-locket which contains a tiny circular pcb with a 64k eeprom, a few passive support components and a male pin header on the back so you can quickly plug it into the micro of your choice.

While the uses of such a thing may not be obvious at first, just sitting down writing this I thought of a few applications, such as some form of key and lock system, mission impossible dreams, or just going full out geek at your next job interview. Its a pretty spiffy idea no matter what its used for, and we just love it when people shove electronics where no one expect them.

Destroying An Arduino’s EEPROM

We’ve seen projects test the lifespan of an EEPROM before, but these projects have only tested discrete EEPROM chips. [John] at tronixstuff had a different idea and set out to test the internal EEPROM of an ATmega328.

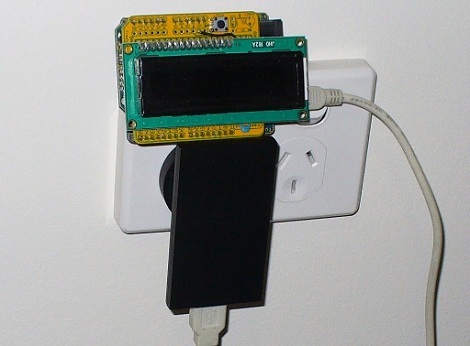
[John]’s build is just an Arduino and LCD shield that writes the number 170 to memory on one pass, and the number 85 on the next pass. Because these numbers are 10101010 and 01010101 in binary, each bit is flipped flipped once each run. We think this might be better than writing 0xFF for every run – hackaday readers are welcomed to comment on this implementation. The Arduino was plugged into a wall wart and sat, “behind a couch for a couple of months.” The EEPROM saw it’s first write error after 47 days and 1,230,163 cycles. This is an order of magnitude better than the spec on the atmel datasheet, but similar to the results of similar experiments.

We covered a similar project, the Flash Destroyer, last year, but that tested an external EEPROM, and not the internal memory of a microcontroller.

Check out the hugely abridged video of the EEPROM Killer after the break.

Continue reading “Destroying An Arduino’s EEPROM”

PIC-based Temperature Logger With Onboard Storage

pic_temp_logger

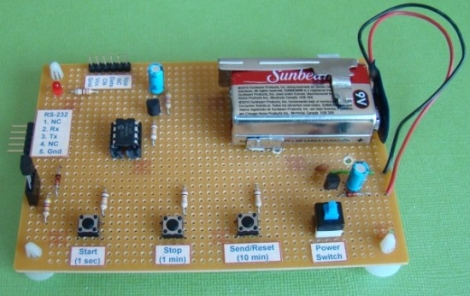
Last summer, [Rajendra Bhatt] built himself a simple PIC-based temperature monitor with data logging abilities and recently got around to sharing it on his site. The sensor is based on a PIC12F683 micro controller and measures the ambient temperature on a set interval, storing the values on the MCU’s internal EEPROM.

He used a Maxim DS18B20 temperature sensor, which communicates with the PIC over a 1-wire bus. The sensor is read based upon the interval chosen by the user, and can be configured to measure the temperature every second, every minute, or every 10 minutes. The data is stored on the aforementioned EEPROM and can be uploaded to a computer via a serial connection. The PIC has the ability to store 254 readings before the data must be cleared from the device.

It’s a great beginner project, and has plenty of room for improvement. As [Rajendra] points out, an external EEPROM could be added to expand the recording capacity, and it would be nice to have a real-time clock on hand for accurate time stamping. If we were to build one ourselves, a means of wireless data transfer would be first on our list of potential enhancements.

Propeller Platform Prototyping Board Gets An Upgrade

[Nick] over at Gadget Gangster has a new version of his prototyping hardware for Propeller microcontrollers, called the Propeller Platform USB. A little more than a year ago we looked at the last version which was larger, used a DIP processor, and came unassembled. The new version does come assembled because of the migration to surface mount components (which may take some of the fun out of it if you just love soldering kits). This not only reduces the board footprint, but makes room for more goodies. As the name implies, there’s now a mini-USB socket with a USB to UART bridge, a microSD card slot as been added, and the onboard EEPROM has been doubled. This is a nice hardware upgrade but the price has been upgraded by $25 as well. No worries, it’s open source so you can roll your own if you have the parts on hand.

Porting Code To MSP430

I took a little time to look into porting code written for AVR in order to run it on the MSP430 architecture. It’s easier than you think, being mostly small differences like an extra step to enable pull-up resistors. But there is a lot to be learned in order to transition away from using EEPROM.

Since the TI chips don’t have EEPROM you need to use the Info Flash, a topic which I detail in the article linked at the top. This flash memory must be erased before writing because a write operation can only change high bits to low, not the other way around. And an erase operation clears an entire 64 kB segment, not just the bytes you want to write to. It’s different but manageable.

Oh, and if you were wondering, I ported the code I wrote for the garage door coded entry project.

Unbricking With The Help Of Arduino

A

This bricked Eee PC came to [Janzo] for about $50. Everything was fine with it, except for the failed bios update that rendered it useless to the last owner. [Janzo] set to work with an Arduino on a quest to repair the bios. He looked up the datasheet for the EEPROM that stores the bios and did some delicate soldering to gain access to the power and data pins on the device. A bit of trial and error and he was able to read the registers. Some comparisons between the output file and the official Eee PC bios file in a HEX editor confirmed that the first 80 bytes were fine but after that something went wrong. After coding a quick Python script [Janzo] reflashed the chip and had the computer up and running again.

We’ve seen Eee PC bios recovery before. This is a very simple method because it makes use of the simplicity we find in the Arduino. Nice job.