One of the great things about sharing hacks is that sometimes one person’s work inspires someone else to take it even further. A case in point is [Ivor]’s colorimeter hacking (parts two and three), which started with some relatively simple request spoofing to install non-stock firmware, and expanded from there until he had complete control over the hardware.
After reading [Adam Zeloof]’s work on replacing the firmware on a cosmetics spectrophotometer with general-purpose firmware, [Ivor] bought two of these colorimeters, one as a backup. He started with [Adam]’s method for updating the firmware by altering the request sent to an update server, but was only able to find the serial number from a quality-control unit. This installed the quality-control firmware, which encountered an error on the device. More searching led [Ivor] to another serial number, which gave him the base firmware, and let him dump and compare the cosmetic, quality-control, and base firmwares.
Bus Pirate is nearly a household name in the hardware hacking world. The first version came out way back in 2008, and there have been several revisions since then. You can buy pre-built Bus Pirate devices, but there’s also the option now to build our own. The ESP32 Bus Pirate project has everything you need to turn an ESP32 device into a protocol sniffing/decoding powerhouse—all on a board you may have sitting around from another project.
There are a ton of solutions when it comes to talking to different buses —I2C, UART, JTAG, you name it, there’s a purpose-built device for it. Over a decade ago, Dangerous Prototypes released the Bus Pirate, offering a Swiss Army knife of a tool to interface with this ever-expanding list of communications standards. The ESP32 Bus Pirate project is open-source firmware for ESP32s that gives them the ability to be the multi-tool that lets us communicate with a long list of protocols.
It supports a wide variety of devices, from the straightforward ESP32 S3 Dev Kit available from a long list of suppliers to the more specialized M5 Cardputer equipped with its own keyboard. The original Bus Pirate required plugging the board into a PC to use it; with this being ESP32-based, that’s no longer a limitation. So long as you can supply power to the ESP32, you can connect and control it via WiFi and a web browser. In addition to the Bus Pirate protocols, the project allows us to directly control the pins on the ESP32 board, should you want to do more with it besides interfacing with one of the supported protocols. Be sure to check out some of our other articles about Bus Pirate, as it’s been a fantastic tool for the hacker community over the years.
Own a Bus Pirate 5? Now, it can do power glitching, thanks to [Matt Brugman’s] demo and contributions to the stock code. This is also a great demo of Bus Pirate’s capabilities and programmability! All you need is the Bus Pirate and a generic Arduino – load a glitch-vulnerable code example into the Arduino, get yourself a generic FET-based glitching setup, and you too can play.
The Arduino board outputs data over UART, and that’s used as a trigger for the Bus Pirate’s new glitch feature – now mainline, thanks to [Matt]’s pull request. It’s pretty feature-complete, too — all parameters are configurable, it can vary the glitching interval, as one would want, and the code checks for success conditions so that it can retry glitching automatically.
In this demo, it only took six consecutive attempts to successfully glitch the ATMega328P – wouldn’t you know it, the code that got glitched was pulled almost wholesale from an IoT device. Glitching remains an underappreciated vector for reverse-engineering, and there’s really no shortage of hacks it allows you to do – get yourself a FET, a Bus Pirate, or maybe just an ESP8266, and join the glitching-aware hackers club!
The Bus Pirate multi-tool has held a place of honor in many a hardware hacker’s toolbox for years, and the latest generation of the gadget powered by the Raspberry Pi RP2040/RP2350 offers significantly enhanced capabilities over the original PIC versions. We took a look at the new Bus Pirate when it started shipping back in February, and while the firmware was still in the early stages back then, it was already clear that creator [Ian Lesnet] and his team had put together a compelling product.
Over the last several months, the Bus Pirate software has improved dramatically. New features have started showing off the hardware’s capabilities, and the user experience is far improved over where it was at release. Following the firmware development is a roller coaster ride, with [Ian] sometimes pushing out several updates a day. Luckily, like the Pi Pico itself, updating the new Bus Pirate only takes a second.
But as impressive and important as those software updates have been, that’s not what we’re talking about today. In this post, we’ll take a look at one of the most exciting aspects of the new Bus Pirate — the ability to easily develop add-on modules for it.
If you’ve been involved with electronics and hardware hacking for awhile, there’s an excellent chance you’ve heard of the Bus Pirate. First introduced on the pages of Hackaday back in 2008 by creator Ian Lesnet, the open hardware multi-tool was designed not only as away to easily tap into a wide array of communication protocols, but to provide various functions that would be useful during hardware development or reverse engineering. The Bus Pirate could talk to your I2C and SPI devices, while also being able to measure frequencies, check voltages, program chips, and even function as a logic analyzer or oscilloscope.
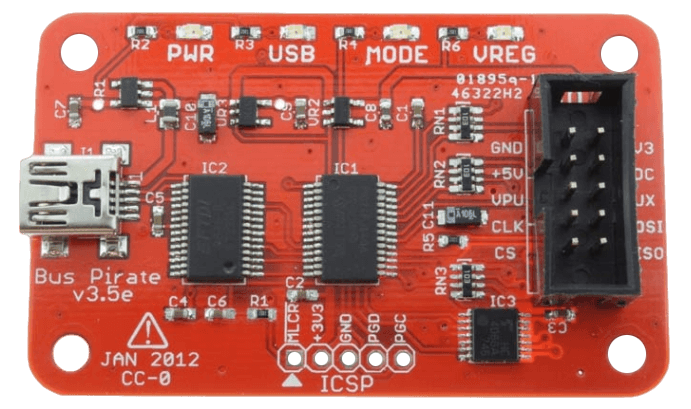
Bus Pirate 3, circa 2012
The Bus Pirate provided an incredible number of tools at a hobbyist-friendly price, and it wasn’t long before the device became so popular that it achieved a milestone which only a few hardware hacking gadgets can boast: its sales started to get undercut by cheap overseas clones. Of course, as an open hardware device, this wasn’t really a problem. If other companies wanted to crank out cheap Bus Pirates, that’s fine. It freed Ian up to research a next-generation version of the device.
But it turns out that was easier said than done. It’s around this point that the Bus Pirate enters what might be considered its Duke Nukem Forever phase. It took 15 years to release the sequel to 1996’s Duke Nukem 3D because the state-of-the-art in video games kept changing, and the developers didn’t want to be behind the curve. Similarly, Ian and his team spent years developing and redeveloping versions of the Bus Pirate that utilized different hardware platforms, such as the STM32 and ICE40 FPGA. But each time, there would be problems sourcing components, or something newer and more interesting would be released.
But then in 2021 the Raspberry Pi Pico hit the scene, and soon after, the bare RP2040 chip. Not only were the vast I/O capabilities of the new microcontroller a perfect fit for the Bus Pirate, but the chip was cheap and widely available. Finally, after years of false starts, the Bus Pirate 5 was born.
I was able to grab one of the first all-new Bus Pirates off the production line in January, and have been spending the last week or so playing around with it. While there’s definitely room for improvement on the software side of things, the hardware is extremely promising, and I’m very excited to be see how this new chapter in the Bus Pirate story plays out.
It’s happened to all of us at one time or another. There’s some component sitting on the bench, say an I2C sensor, a new display, or maybe a flash chip, and you want to poke around with it. So you get out the breadboard, wire it to a microcontroller, write some code, flash it…you get the idea. Frankly, it’s all kind of a hassle. Which is why [Ian Lesnet] created the Bus Pirate: a USB multi-tool designed to get you up and running with a new piece of hardware as quickly as possible.
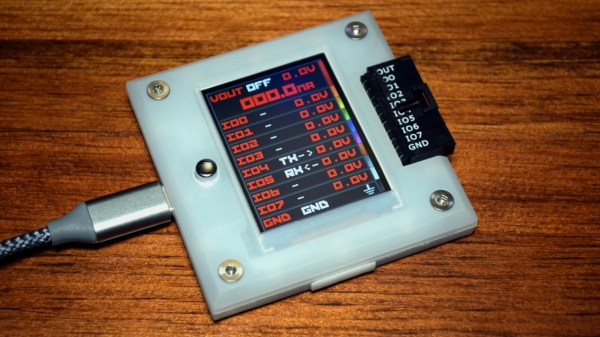
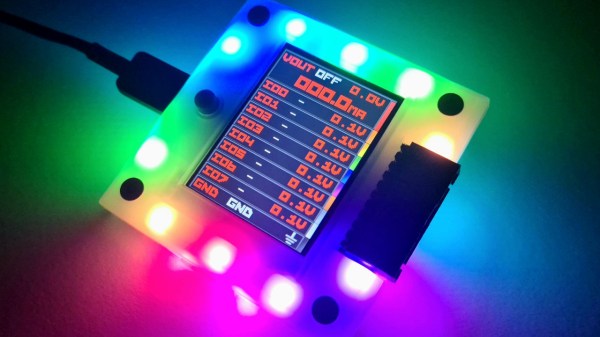
Now, after years of development, the Bus Pirate 5 is available for purchase. Completely redesigned to take advantage of the impressive I/O capabilities of the RP2040, the new Bus Pirate also features a 240 x 320 IPS LCD that can show real-time voltage data and pin assignments. But despite the new display, and the bevy of RGB LEDs lurking under the injection molded enclosure, the primary interface for the device remains the VT100 terminal interface — now with the addition of a color status bar running along the bottom.
You’ve probably seen a few of these miniature arcade games online or in big box retailers: for $20 USD or so you get scaled-down version of a classic arcade cabinet, perfect for a desk toy or to throw up on a shelf as part of your gaming collection. Like any good Hackaday reader, you were probably curious about what makes them tick. Thanks to [wrongbaud], we don’t have to wonder anymore.
Over the course of several blog posts, [wrongbaud] walks readers through the hardware and software used in a few of these miniature games. For example, the Rampage cabinet is using a so-called “NES on a Chip” along with a SPI flash chip to hold the ROM, while Mortal Kombat is using a Genesis emulation solution and parallel flash. It wouldn’t be interesting if they didn’t throw you a few curves now and again, right?
But these are more than simple teardowns. Once [wrongbaud] gives an overview of the hardware, the next step is reading the respective flash storage and trying to make sense of the dumped data. These sort of games generally reuse the hardware among a number of titles, so by isolating where the game ROM is and replacing it, they can be made to play other games without hardware modification. Here, this capability is demonstrated by replacing the ROM data for Rampage with Yoshi’s Cookie. Naturally it’s one of those things that’s easier said than done, but it’s an interesting proof of concept.
The Mortal Kombat cabinet is a newer addition to the collection, so [wrongbaud] hasn’t progressed quite as far with that one. The parallel flash chip has been dumped with the help of an ESP32 and a MCP23017 I/O expander, and some Genesis ROM headers are identifiable in the data, but there’s still some sifting to be done before the firmware structure can be fully understood.
Even if you’re not in the market for a diminutive arcade experience, the information that [wrongbaud] has collected here is really phenomenal. From understanding protocols such as I2C and SPI to navigating firmware dumps with a hex editor, these posts are an invaluable resource for anyone looking to get started with reverse engineering.