The Internet Of Things Chip Gets A New Spectrum

Last year we learned about Weightless, an Internet of Things chip that solves all the problems of current wireless solutions. It’s low power and has a 10-year battery life (one AA cell), the hardware should cost around $2 per module, and the range of the Weightless devices range from 5+km in urban environments to 20-30km in rural environments. There haven’t been many public announcements from the Weightless SIG since the specification was announced, but today they’re announcing Weightless will include an additional spectrum, the 868/915 MHz ISM spectrum.

weightless

The original plan for Weightless was to use the spectrum left behind by UHF TV – between 470 and 790MHz. Regulatory agencies haven’t been moving as fast as members of the Weightless SIG would have hoped, so now they’re working on a slightly different design that uses the already-allocated ISM bands. They’re not giving up on the TV whitespace spectrum; that’s still part of the plan to put radio modules in everything. The new Weightless-N will be available sooner, though, with the first publicly available base station, module, and SDK arriving sometime next spring.

Weightless has put up a video describing their new Weightless-N hardware; you can check that out below. If you want the TL;DR of how Weightless can claim such a long battery life and huge range from an Internet of Things radio module, here’s an overly simplified explanation: power, range, and bandwidth. Pick any two.

Continue reading “The Internet Of Things Chip Gets A New Spectrum”

GCC For The ESP8266 WiFi Module

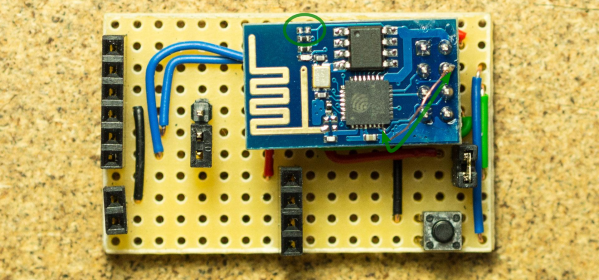
When we first heard about it a few weeks ago, we knew the ESP8266 UART to WiFi module was a special beast. It was cheap, gave every microcontroller the ability to connect to a WiFi network, and could – possibly – be programmed itself, turning this little module into a complete Internet of Things solution. The only thing preventing the last feature from being realized was the lack of compiler support. This has now changed. The officially unofficial ESP8266 community forums now has a working GCC for the ESP8266.

The ESP8266 most people are getting from China features a Tensilica Xtensa LX3 32-bit SOC clocked at 80 MHz. There’s an SPI flash on the board, containing a few dozen kilobytes of data. Most of this, of course, is the code to run the TCP/IP stack and manage the radio. There are a few k left over – and a few pins – for anyone to add some code and some extended functionality to this module. With the work on GCC for this module, it’ll be just a few days until someone manages to get the most basic project running on this module. By next week, someone will have a video of this module connected to a battery, with a web-enabled blinking LED.

Of course that’s not the only thing this module can do; at less than $5, it will only be a matter of time until sensors are wired in, code written, and a truly affordable IoT sensor platform is created.

If you have a few of these modules sitting around and you’d like to give the new compiler a go, the git is right here.

fridge alarm

Internet Of Things Refrigerator Alarm

For anyone who gets a late-night craving for anything out of the refrigerator and needs some help in the willpower department, [Claudio] may have the project for you. He has just finished work on a project that sends out an alarm when the refrigerator door opens, alerting others that you’re on the prowl for munchies.

The device uses a light sensor connected to an OpenPicus IoT kit that contains a FlyportPRO Wi-Fi module. When the refrigerator door is opened, the device sends out an email message via a web server, which can be sent to whomever you choose. All of the project’s code and instructions are available on the project site as well.

The project is pretty clever in that no actual interfacing with the refrigerator is required, beyond running a power cable through the seal of the door (although [Claudio] notes that the device will run on a lithium battery as an option). The web server itself can be set up to send out alarms during any timeframe as well, allowing a user to customize his or her nighttime snacking window. If you’re looking for a less subtle approach, we’d recommend the fridge speakers with a volume setting of 11.

Very Dumb Security For A WiFi Thermostat

We have finally figured out what the Internet of Things actually is. It turns out, it’s just connecting a relay to the Internet. Not a bad idea if you’re building a smart, Internet-connected thermostat, but you have no idea how bad the security can be for some of these devices. The Heatmiser WiFi thermostat is probably the worst of the current round of smart home devices, allowing anyone with even a tiny amount of skill to control one of these thermostats over the Internet.

The Heatmiser is a fairly standard thermostat, able to connect to an 802.11b network and controllable through iOS, Android, and browser apps. Setting this up on your home network requires you to forward port 80 (for browser access) and port 8068 (for iOS/Android access). A username, password, and PIN is required to change the settings on the device, but the default credentials of user: admin, password: admin, and PIN: 1234 are allowed. If you’re on the same network as one of these devices, these credentials can be seen by looking at the source of the webpage hosted on the thermostat.

if you connect to this thermostat with a browser, you’re vulnerable to cross-site request forgery. If you use the Android or iOS apps to access the device with the custom protocol on port 8068, things are even worse: there is no rate limiting for the PIN, and with only four digits and no username required, it’s possible to unlock this thermostat by trying all 10,000 possible PINs in about an hour.

There are about a half-dozen more ways to bypass the security on the Heatmiser thermostat, but the most damning is the fact there is no way to update the firmware without renting a programmer from Heatmiser and taking the device apart. Combine this fact with the huge amount security holes, and you have tens of thousands of installed devices that will remain unpatched. Absolutely astonishing, but a great example of how not to build an Internet connected device.

THP Hacker Bio: Felix Rusu

As far as entries for The Hackaday Prize go, Moteino is exceptionally interesting. It’s the only project to be used in other projects for The Hackaday Prize. The two other projects making use of the Moteino, 433MHz transceiver and Plant Friends didn’t make the cut, but [Felix]’s Moteino did.

Like many of the Internet of Things project, Moteino is a radio module and a microcontroller in an extremely convenient package. The radio is a HopeRF RFM69 operating in the  315, 433, 868 and 915MHz ISM bands. The microcontroller is everyone’s favorite – the ATMega328, but [Felix] also has a Mega version with the ATMega1284 on board. Already there are a few great examples of what the Moteino can do, including a mailbox notifier, a sump pump monitor, and a way to Internetify a water meter.

[Felix]’s bio below.

Continue reading “THP Hacker Bio: Felix Rusu”

THP Semifinalist: The Moteino

One of the apparent unofficial themes of The Hackaday Prize is the Internet of Things and home automation. While there were plenty of projects that looked at new and interesting ways to turn on a light switch from the Internet, very few took a good, hard look at the hardware required to do that. [Felix]’s Moteino is one of those projects.

The Moteino is based on the Arduino, and adds a low-cost radio module to talk to the rest of the world. The module is the HopeRF RFM12B or RFM69. Both of these radios operate in the ISM band at 434, 868, or 915 MHz. Being pretty much the same as an Arduino with a radio module strapped to the back, programming is easy and it should be able to do anything that has been done with an ATMega328.

[Felix] has been offering the Moteino for a while now, and already there are a few great projects using this platform. In fact, a few other Hackaday Prize entries incorporated a Moteino into their design; Plant Friends used it in a sensor node, and this project is using it for texting and remote control with a cell phone.


SpaceWrencherThe project featured in this post is a semifinalist in The Hackaday Prize.

Foosball Now Part Of The Internet Of Things

internet of things foosball

At a local LAN event, [Thomas] wanted a way to easily show off the capabilities from some of the Internet-of-Things devices everyone keeps talking about. His idea was to build an internet-connected foosball/table soccer/table football table to show off some hardware and software.

[Thomas]’s table automates almost everything that is part of the great sport of foosball. Once a user logs in using the barcode scanner, the game begins by deploying the tiny ball with parts salvaged from a Roomba. The table uses infrared sensors to detect the ball. Once a goal is scored, it is posted online where anyone can see the current score and a history of all of the games played on the table.

There are a few other unique touches on the foosball table, such as the LED lighting, touch screen displays, and an STM32-E407 ARM processor to tie the whole machine together.

For more information including the source code and demonstrations, check out [Thomas]’s project blog. And, if you get lonely, perhaps you can try the robot foosball player!